Managing and Restoring Application Backups
Learn how to create on-demand backups and restore your KloudBean application from previous backups. This guide covers backup creation, restoration options, and best practices for protecting your application data.
Overview
KloudBean ensures regular backups of your application; however, you also have the option to take on-demand backups as well. All backups are incremental and are stored offsite by default, providing secure and efficient backup storage. However, you also have the option to enable onsite backups, which are helpful to download and store on your local machine by the user.
Backup Types
- Incremental Backups: All backups are incremental, meaning only changes since the last backup are stored, making backups faster and more storage-efficient
- Offsite Backups: Default backup storage location, providing secure cloud storage for your backups
- Onsite Backups: Optional feature that allows you to download backups and store them on your local machine
What Gets Backed Up
When a backup is done, KloudBean by default takes a backup of:
- All Your Files: Complete application files, including code, uploads, media files, and configuration files
- Your Database: Full database backup including all tables, data, and database structure
This ensures comprehensive protection of both your application code and data.
Prerequisites
Before managing application backups, ensure you have:
- An Active KloudBean Application: Your application must be created and running
- Appropriate Permissions: You need appropriate permissions to manage backups in your KloudBean account
- Basic Knowledge: Basic knowledge of backups and DNS mapping is helpful
- Domains Added: Domains should be added to your application. Check domain adding in the Managing Application Domains and Aliases section
Viewing Application Backups
Step 1: Navigate to Backups Section
To view and manage your application backups:
- Navigate to Application Administration: Log in to your KloudBean dashboard and open the application administration page for your desired application.
- Access Backups Section: Go to the "Backups" section in the application settings menu.
- View Backup Options: Here you will see two main options:
- Backup Application: For creating on-demand backups
- Restore Application: For restoring from previous backups
Creating On-Demand Backups
Step 1: Initiate Backup
To create an on-demand backup of your application:
- Click "Backup Application": In the Backups section, click on "Backup Application". This is where you can initiate your on-demand backups of the app.
- Backup Creation: If you click it, it will create a recent backup of your app.
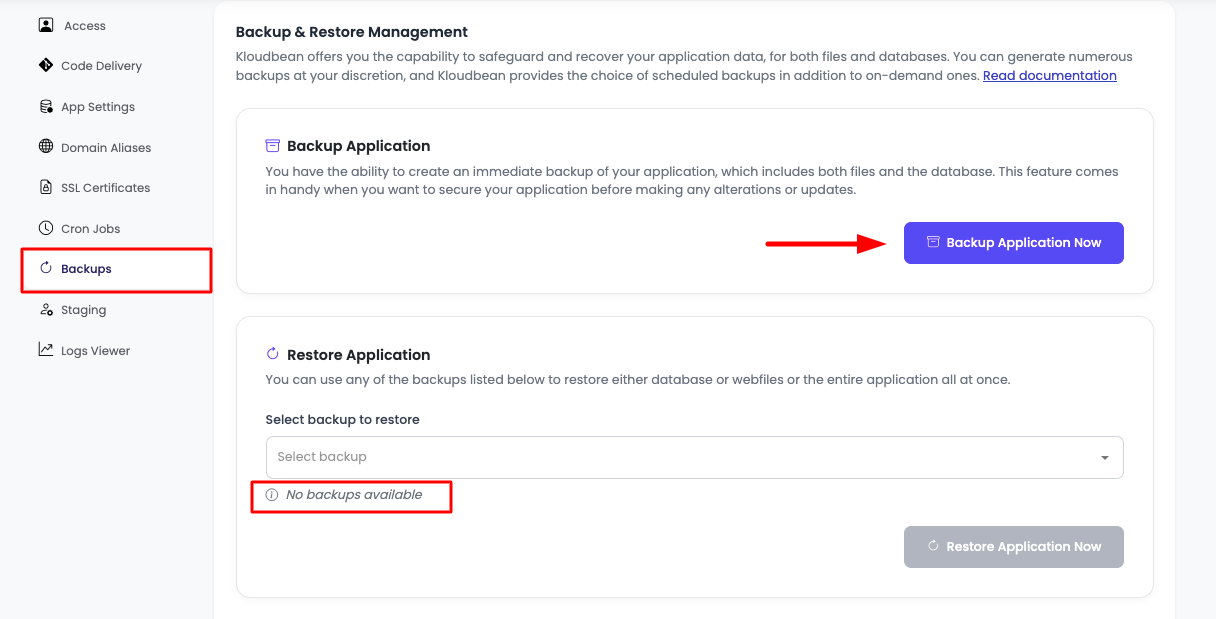
If you have just created your app and backup time isn't due yet, then you will see "Currently there is no backup available". However, you can initiate one by clicking "Backup application now".
Step 2: Confirm Backup
- Backup Confirmation Pop-up: You will see a pop-up with backup details to "Confirm Application Backup".
- Backup Information Displayed: The pop-up will also show:
- Current Available Backups: Number of existing backups
- Last Backup DateTime: When the last backup was created
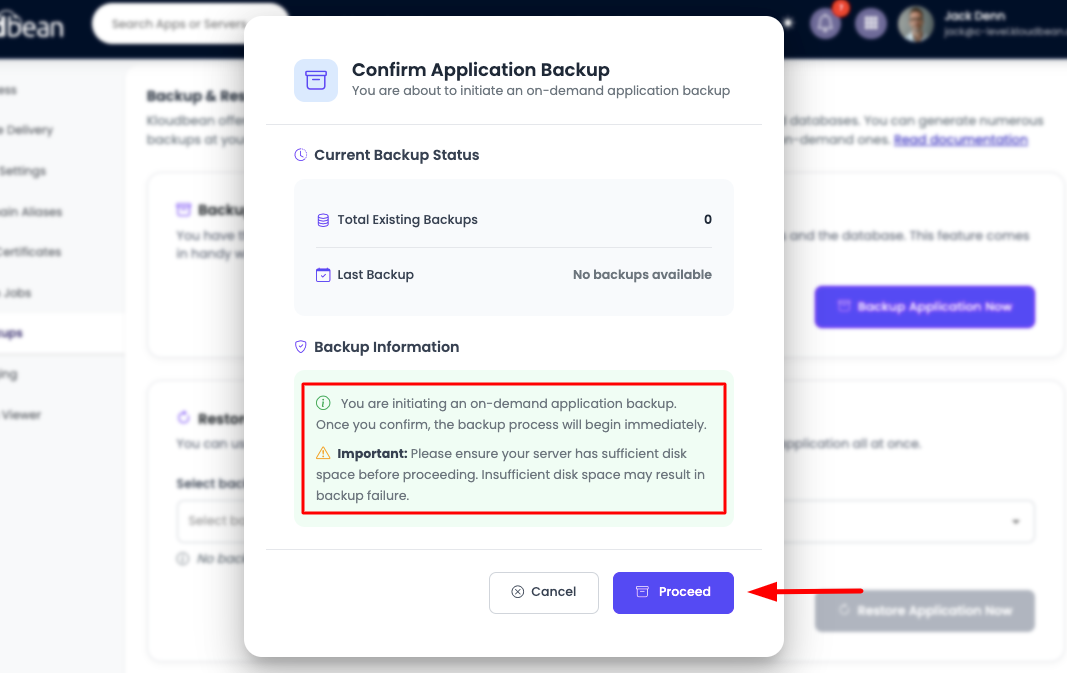
- Important Considerations: Before you click to proceed, make sure:
- You are initiating an on-demand application backup: Once you confirm, the backup process will begin immediately
- Server Disk Space: Please ensure your server has sufficient disk space before proceeding. Insufficient disk space may result in backup failure
Step 3: Monitor Backup Process
- Redirect to Server List: After confirming, you will be redirected to the server list page.
- Server Status: Your server will go into a "busy" state until the backup is completed.
- Wait for Completion: Wait until the backup process gets completed. The duration depends on:
- Size of your application files
- Database size
- Server performance
- Network speed
Step 4: Verify Backup Completion
- Check Backup Dropdown: Once complete, you can see a new and recent backup is added in the backup dropdown.
- Backup Details: The backup will show:
- Creation date and time
- Backup size
- Backup type (incremental)
- Status (completed)
Restoring Application Backups
Step 1: Select Backup to Restore
If you want to restore your application from an older backup:
- Navigate to Restore Section: Go to the Backups section and click on "Restore Application".
- Select Backup: Click on the dropdown to select the desired backup from the available backups, organized by datetime.
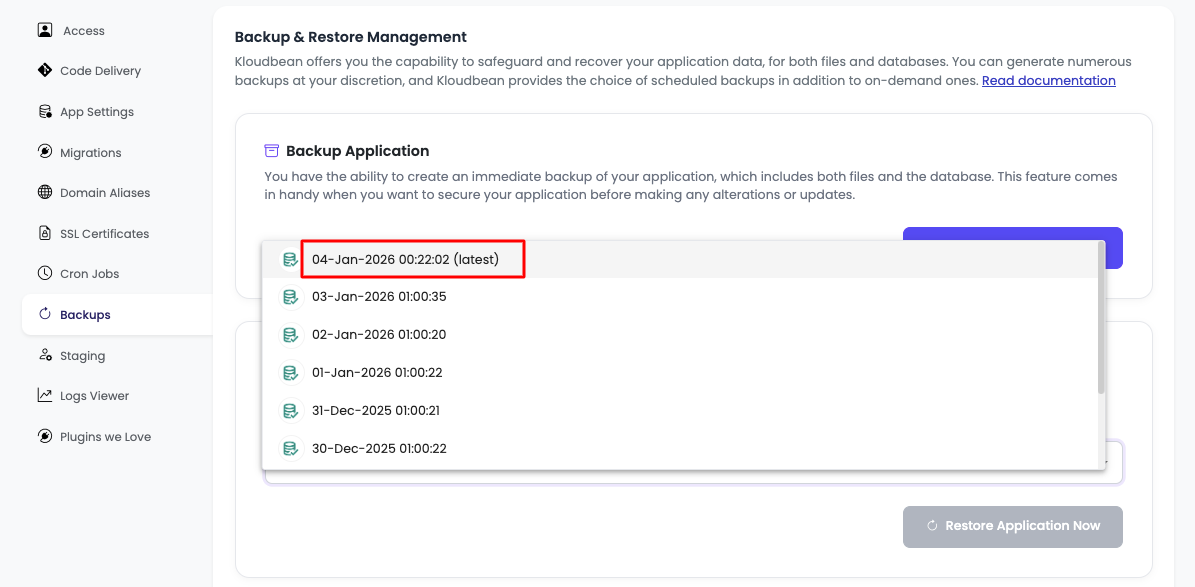
- Choose Backup Point: Select the backup from the datetime that represents the state you want to restore your application to.
Step 2: Initiate Restore
- Click "Restore Application": Once the date is selected, click on "Restore Application" to proceed.
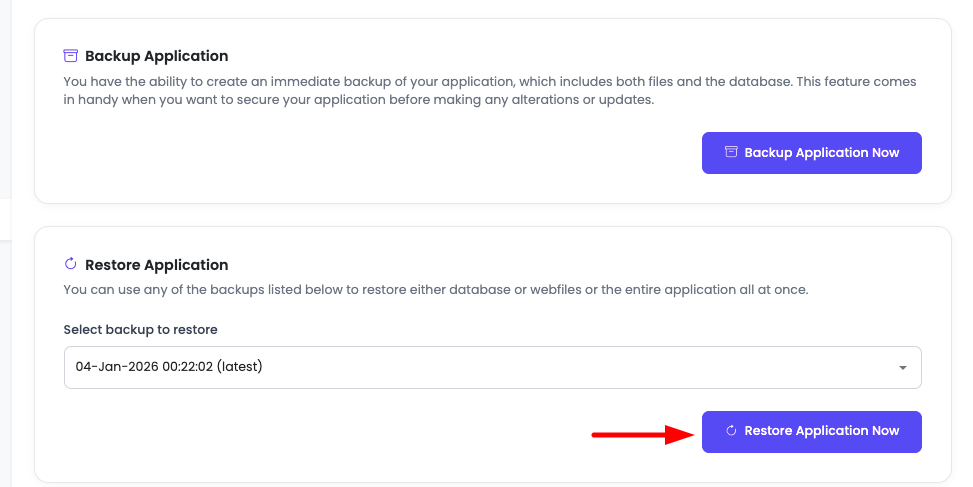
- Restore Confirmation: It will ask for confirmation with the following details and options.
Step 3: Choose Restore Type
You need to select what you want to restore:
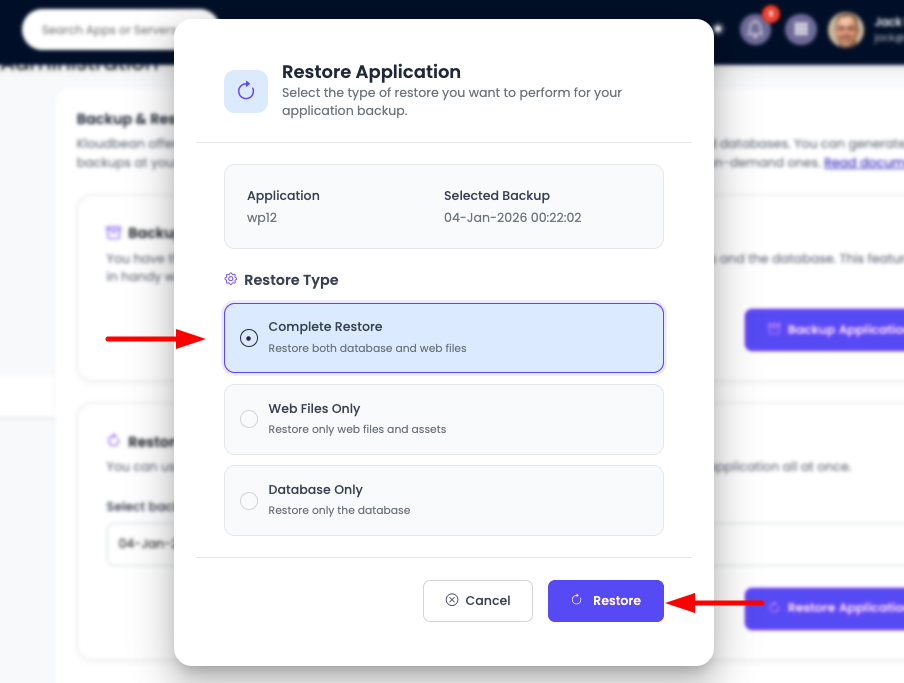
Restore Options:
-
Complete (Database + Webfiles):
- Restores both your database and all web files
- Use this option when you want to restore your entire application to a previous state
- Use Case: Complete application rollback, disaster recovery, or reverting major changes
-
Webfiles Only:
- Restores only your application files (code, uploads, media, configuration)
- Database remains unchanged
- Use Case: Reverting code changes, fixing file corruption, or restoring specific files without affecting data
-
Database Only:
- Restores only your database (all tables and data)
- Application files remain unchanged
- Use Case: Reverting database changes, fixing data corruption, or restoring specific data without affecting code
Step 4: Confirm and Monitor Restore
-
Select Restore Type: Choose the restore option that matches your needs.
-
Click "Restore": Once you click restore, it will initiate the restoring process.
-
Restore Duration: The process will take a couple of minutes depending upon backup size:
- Small Backups (< 1GB): Typically 2-5 minutes
- Medium Backups (1-10GB): Typically 5-15 minutes
- Large Backups (> 10GB): May take 15-30 minutes or more
-
Monitor Progress: You can monitor the restore progress in the application dashboard.
-
Verification: After restoration is complete, verify that your application is working correctly.
Important Notes:
- Application Downtime: Your application may experience brief downtime during the restore process
- Data Loss Warning: Restoring will overwrite current data with backup data. Ensure you have a recent backup before restoring
- Test After Restore: Always test your application after restoration to ensure everything works correctly
Managing Backup Schedule
If you want to change application backup schedule, frequency, or time:
- Server-Level Configuration: Backup schedules are configured at the server level
- Navigate to Server Management: Go to the Server Management section
- Managing Server Backups: Review the Managing Server Backups guide for detailed instructions on:
- Setting backup frequency
- Configuring backup times
- Managing backup retention
- Enabling/disabling automatic backups
Understanding Backup Types
Incremental Backups
- Efficiency: Only stores changes since the last backup, making backups faster
- Storage Optimization: Reduces storage requirements compared to full backups
- Quick Restoration: Allows for point-in-time recovery
- Chain Dependency: Incremental backups depend on previous backups for complete restoration
Offsite vs. Onsite Backups
Offsite Backups (Default):
- Stored in secure cloud storage
- Protected from local disasters
- Automatically managed by KloudBean
- Accessible from anywhere
- No local storage required
Onsite Backups (Optional):
- Can be downloaded to your local machine
- Useful for additional backup copies
- Helpful for compliance requirements
- Requires manual management
- Provides local control
Best Practices
- Regular On-Demand Backups: Create on-demand backups before major updates or changes
- Test Restorations: Periodically test backup restoration to ensure backups are working correctly
- Monitor Disk Space: Always check server disk space before creating backups
- Document Backup Points: Keep notes on what changes were made before each backup
- Choose Appropriate Restore Type: Select the correct restore type (complete, webfiles only, or database only) based on your needs
- Verify After Restore: Always verify application functionality after restoration
- Maintain Multiple Backup Points: Keep multiple backup points for different recovery scenarios
- Schedule Regular Backups: Configure automatic backup schedules at the server level
Troubleshooting
Backup Failures
- Insufficient Disk Space: Ensure your server has enough disk space before initiating backups
- Application Status: Verify that your application is running and accessible
- Server Resources: Check that your server has sufficient resources (CPU, memory) available
- Network Issues: Verify network connectivity if backups are failing
Restore Issues
- Backup Integrity: Verify that the backup you're trying to restore is complete and not corrupted
- Disk Space: Ensure sufficient disk space is available for restoration
- Application Compatibility: Verify that the backup is compatible with your current application version
- Restore Type Selection: Ensure you've selected the correct restore type for your needs
Backup Not Available
- New Application: If you've just created your application, you may need to wait for the first scheduled backup or create an on-demand backup
- Backup Schedule: Check your server backup schedule to see when the next backup is scheduled
- Manual Backup: Use the "Backup application now" option to create an immediate backup
Important Considerations
Before Creating Backups
- Check Disk Space: Always verify sufficient disk space is available
- Application Status: Ensure your application is in a stable state
- Recent Changes: Consider creating backups after significant changes or updates
Before Restoring
- Create Current Backup: Always create a backup of your current state before restoring
- Choose Correct Backup: Verify you're selecting the correct backup point
- Select Appropriate Type: Choose the restore type that matches what you need to recover
- Plan for Downtime: Be aware that restoration may cause brief application downtime
Next Steps
After successfully managing your application backups:
- Learn about Managing Server Backups to configure backup schedules
- Explore Managing Application Files to work with application files
- Review Security and Performance Settings to optimize your application