FastAPI Deployment
Deploy Python FastAPI applications in a production-ready environment on KloudBean.
Overview
On KloudBean, you get a complete production-ready stack to build and host high-performance FastAPI applications.
You get:
- Git integration to pull your code on the server
- SSH access to the server to run commands manually and using ADM tool for quick deployment
- File Manager access to add, update and manage files with ease
- Optimized and configured Uvicorn for serving your FastAPI application
Launching New FastAPI Application
If you already have a server and want to launch an app on it, go to Applications → Add Application and add a FastAPI app on an existing server.
In this example, we will create a brand new server.
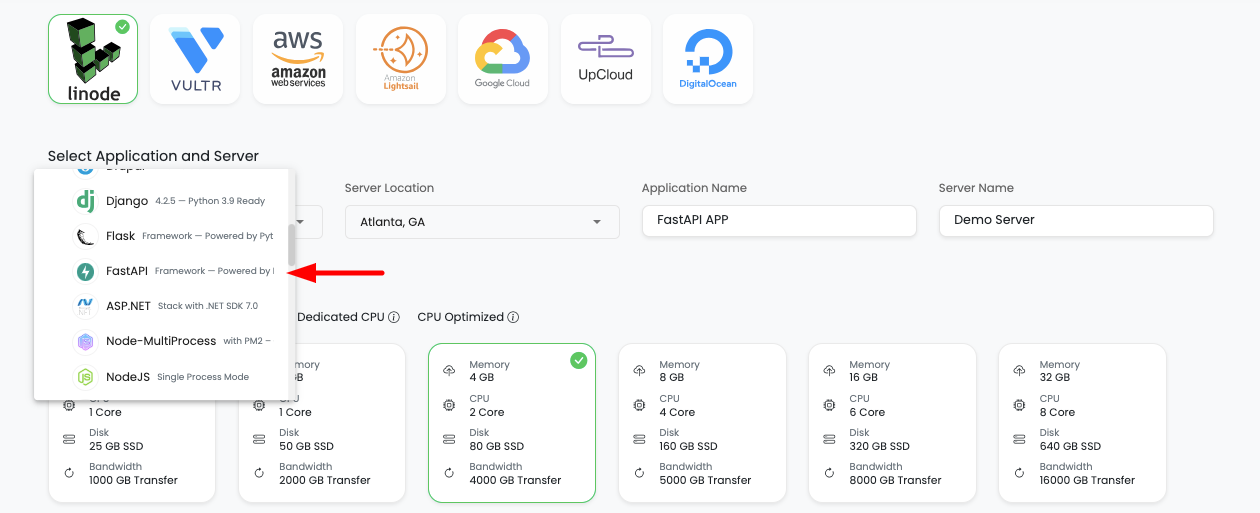
In order to launch your first FastAPI app on a new server, navigate to the server provision page:
- Select Cloud Provider (your choice)
- Select Application (FastAPI)
- Select Datacenter with nearest location
- Add Application Name
- Add Server Name
- Select Server size depending on needs (for FastAPI build minimum recommended size is 2-4GB)
Click on Launch button and proceed with the payment process (trial or payment).
Once payment is completed, server with FastAPI app provisioning will be initiated.
Wait for a while; it will take 5-7 minutes to create your server, configure and deploy a high-performance web stack.
By default, on a new server you will get the following stack versions:
- Python > 3.11
- FastAPI (latest)
- Uvicorn
- MariaDB > 10.6 (optional)
Accessing Application Administration
Once your server is ready, in order to access your FastAPI app, select "Apps" from the header menu to go to the Applications page.
On this page, you will see your application in active status.
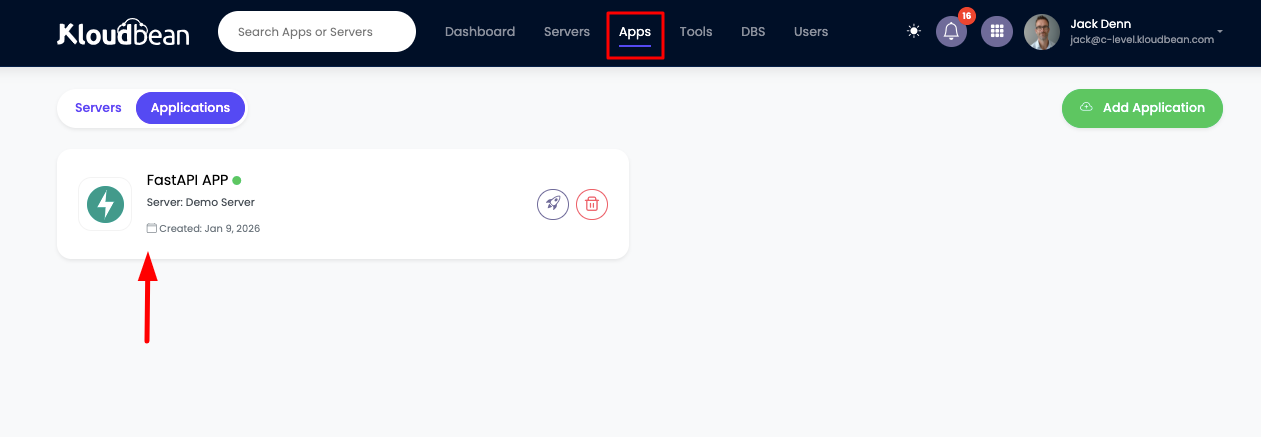
Click on it to navigate to "Application Administration" > "Access" section.
On this section, you will see:
- Application default access URL
- Server public address to point your custom domain to it

Deploy Your Code Via Git
The next step is to deploy your code.
In order to deploy your code, navigate to the "Code Delivery" tab.
Here, on the first tab → "Git Deployment":
- Select your preferred "Git Connection Mode"
- Connect GitHub using OAuth or copy the SSH public key and add it to your SCM provider (GitHub, GitLab, Bitbucket)

- Copy your repo URL and add it here in "Git Repository URL", select branch and "Clone Repository"
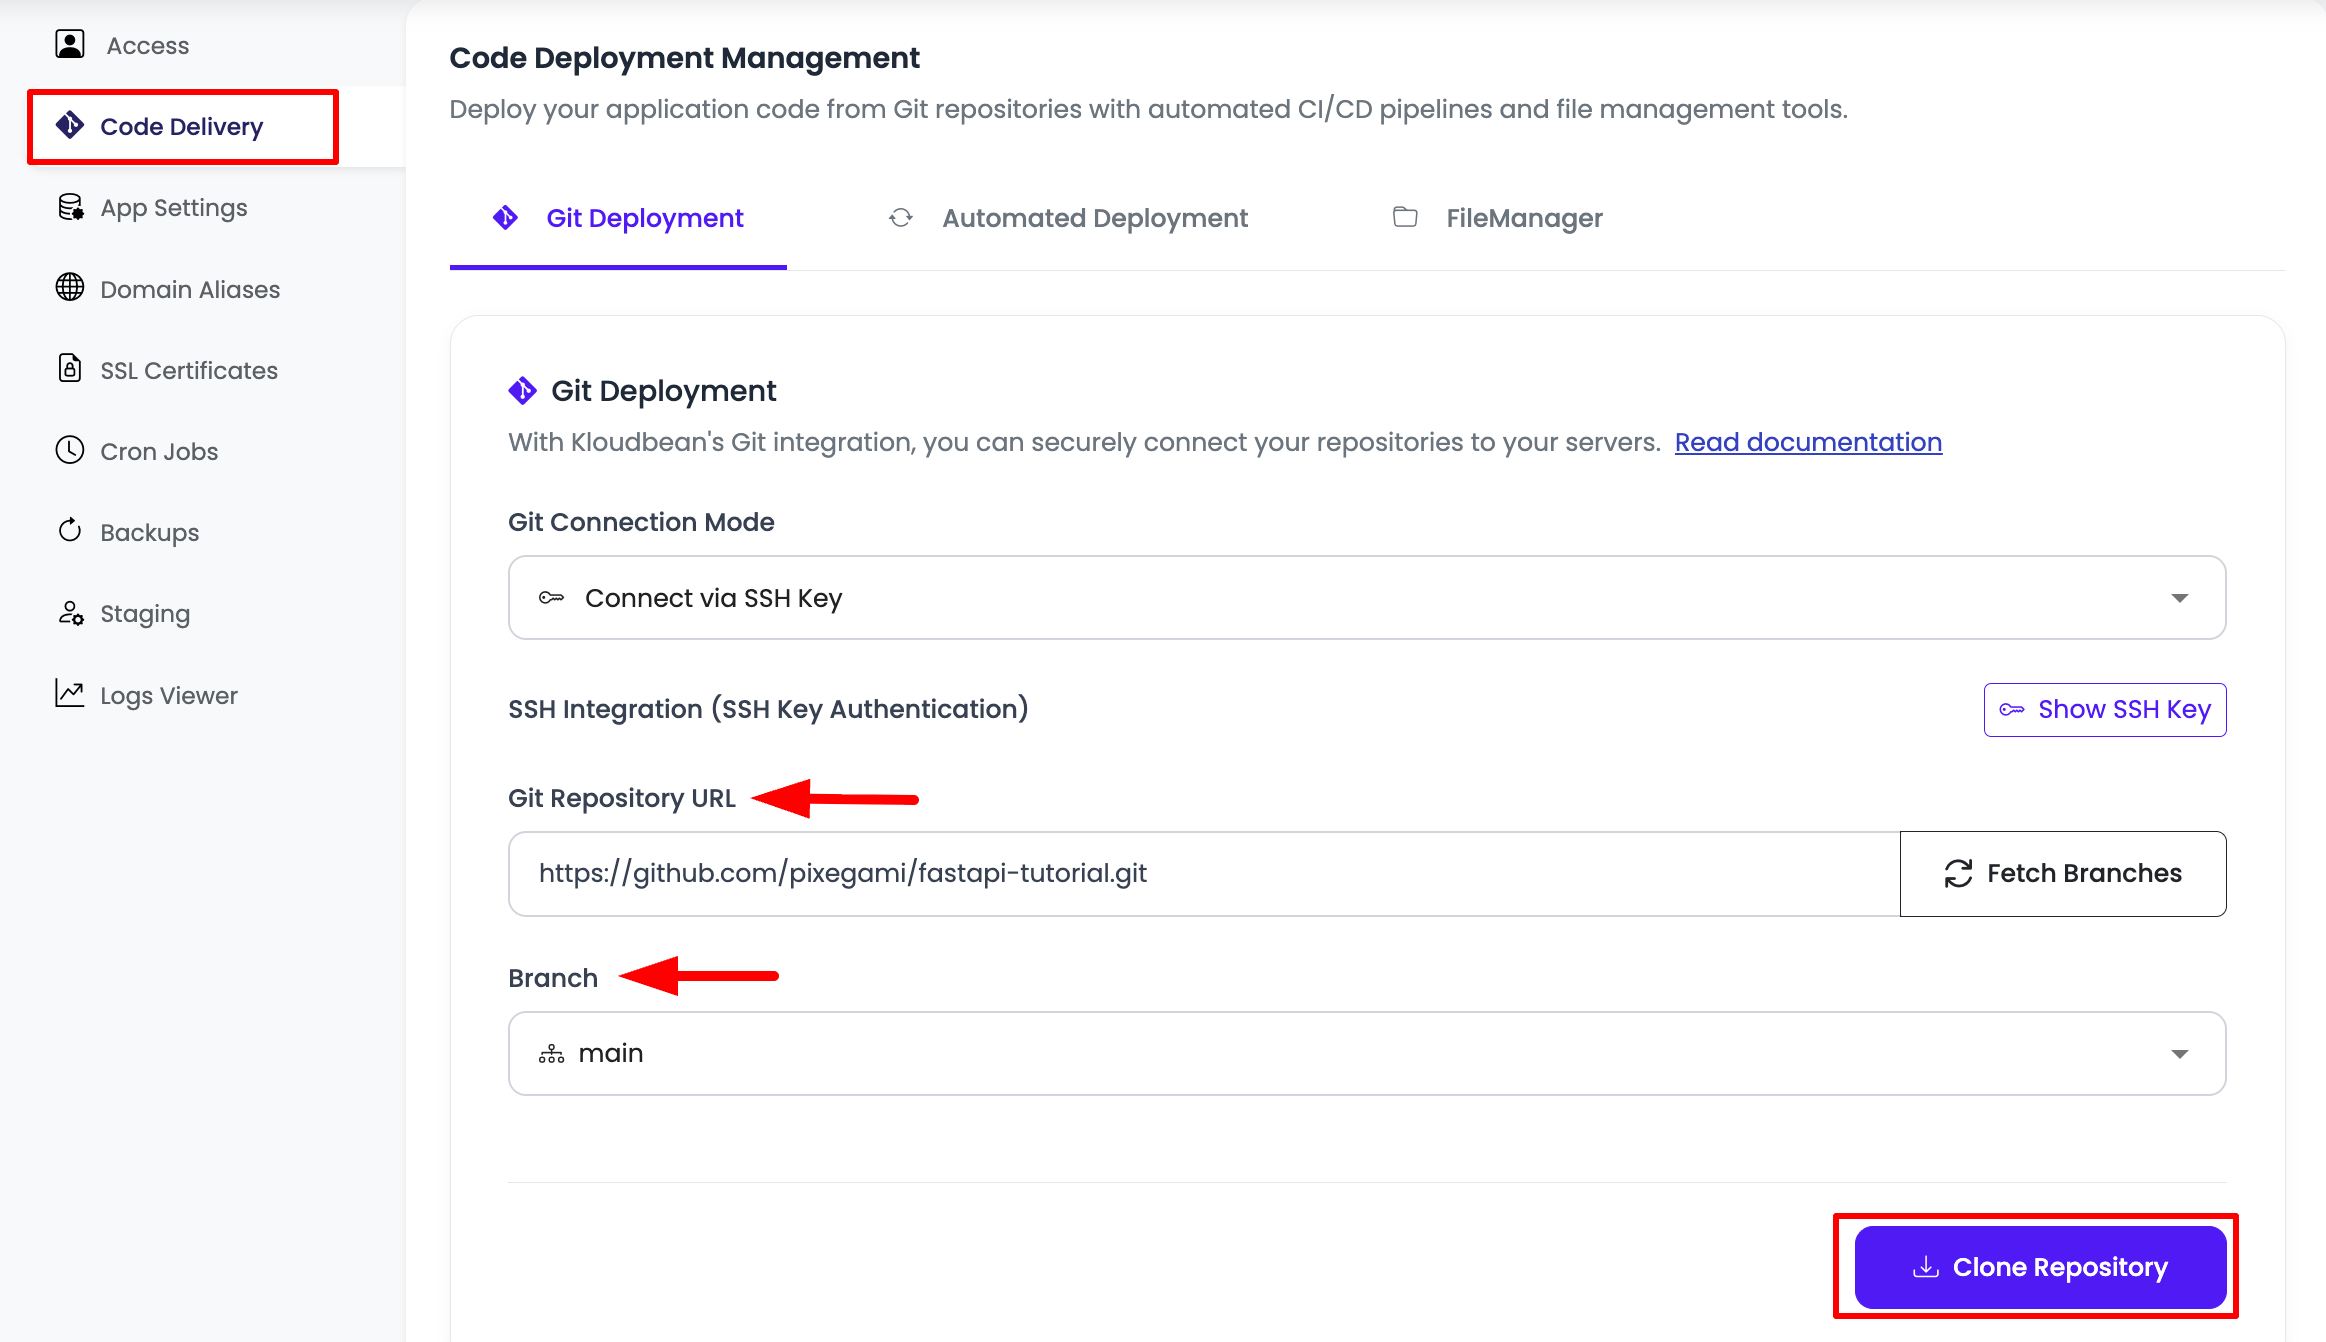
In this example, we're going to deploy an example FastAPI app:
https://github.com/pixegami/fastapi-tutorial.git
Read the detailed guide on connecting Git.
Once the repository is cloned, review and update the Runtime Configuration before starting deployment.
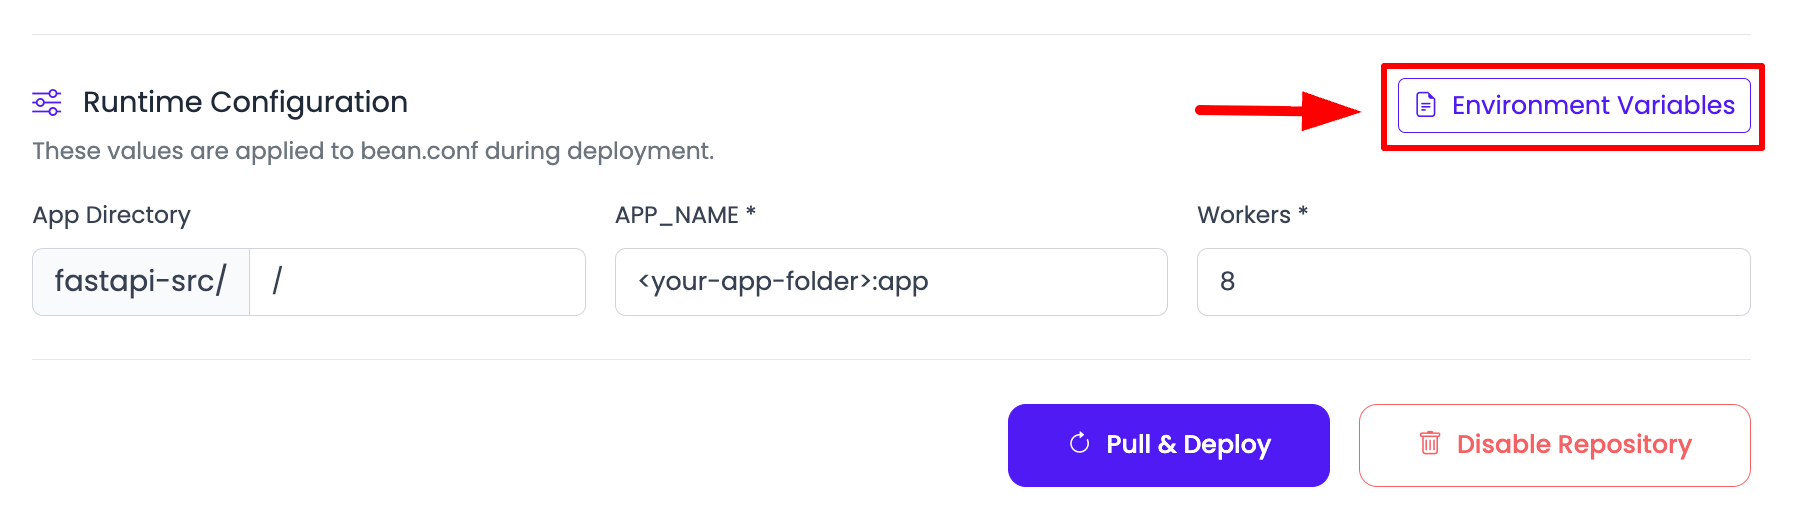
Update Runtime Configurations
Once the repository is cloned, review and update the runtime configurations.
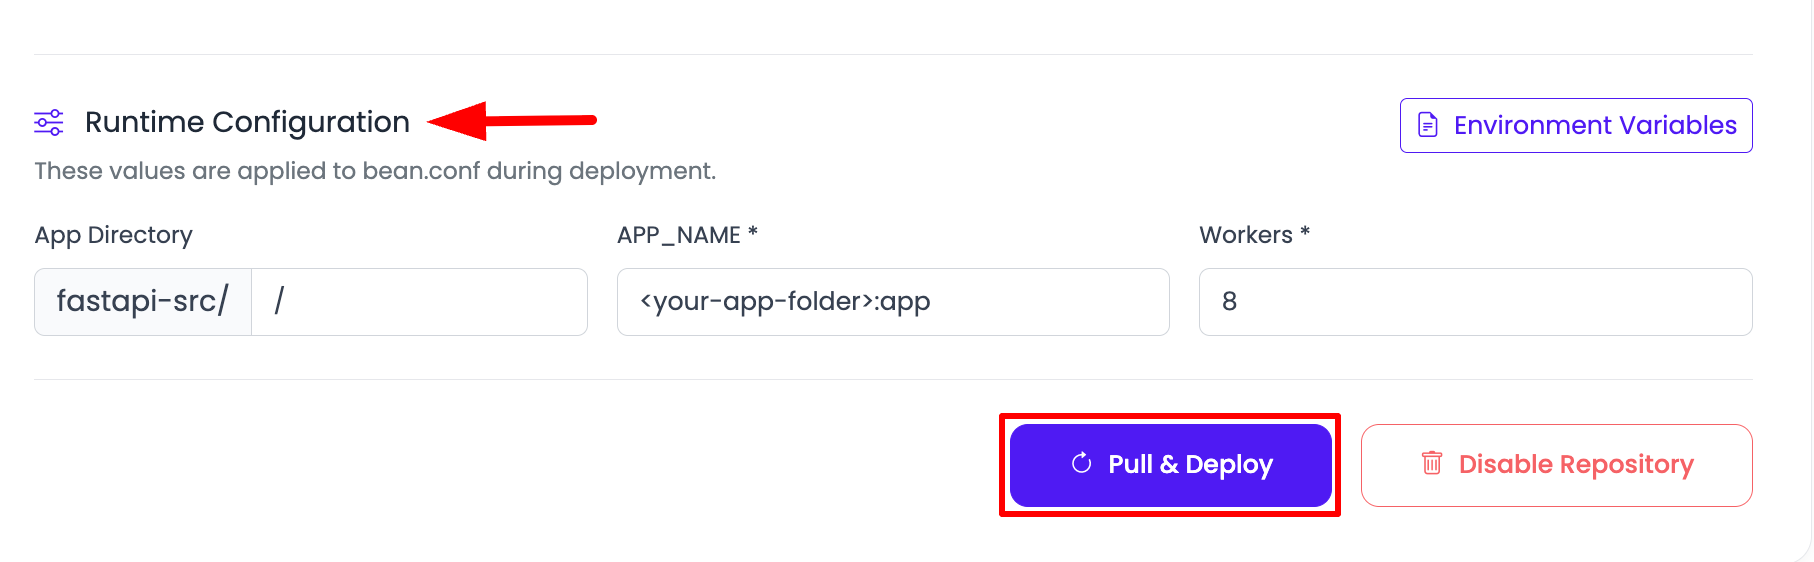
Configure the following fields based on your application requirements:
-
App Directory: Relative path (inside your repository) where your FastApi application code lives.
- Use
/if your app is at repo root. - Use a subfolder path like
backendif your FastApi project is inside that directory.
- Use
-
APP_NAME: Uvicorn app import target in the format
<module>:<fastapi_variable>.- Example:
app:appmeans Uvicorn importsapp.pyand looks forappobject. - If your entry file is in a package/folder, use dotted module path, for example
myservice.main:app.
- Example:
-
Worker: Number of Uvicorn worker processes to run your FastApi app.
- More workers improve concurrency, but also use more RAM/CPU.
- Start with
2-4for small apps, and scale up based on traffic and server size. 8is a common medium/high-capacity default for production servers.
Once these configurations are finalized, click the "Pull & Deploy" button to initiate the deployment process.
When you click "Pull & Deploy", KloudBean will initiate the build process automatically by doing the following at the backend:
- Take latest repo pull
- Enabling
bean.conffor configuration like Node version, app source directory, and build command - Setting required Node version
- Installing packages
- Making build
- Deploying it to web root directory
Adding Environment (.env) File
If you need to add or update .env file, you can do it from UI or using File Manager or optionally using shell.
- Navigate to the " Runtime Configuration" section and click the "Environment Variables" button to add your vars.
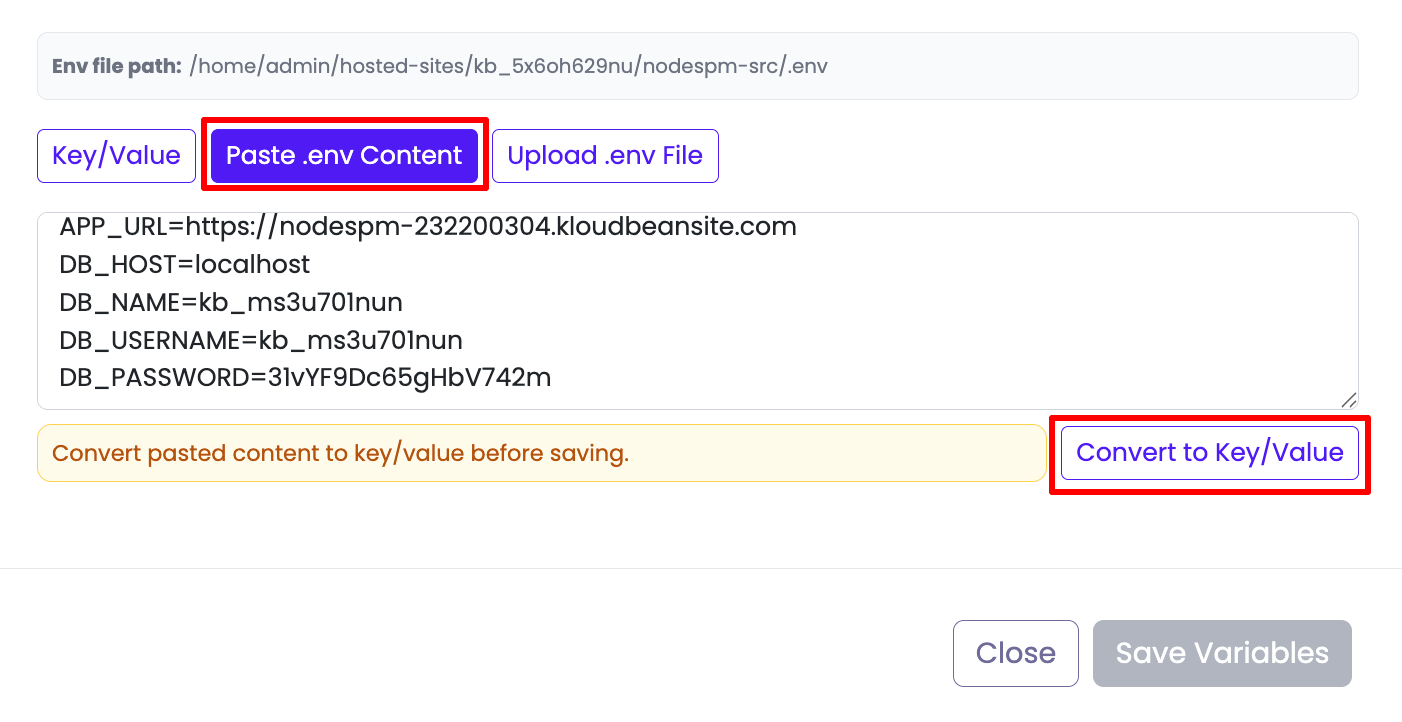
It will open variables key/value editor. Add your required environment variables. Like in this case, I'm going to add environment variables:
APP_URL=https://fastapi-232200304.kloudbeansite.com
DB_HOST=localhost
DB_NAME=kb_ms3u701nun
DB_USERNAME=kb_ms3u701nun
DB_PASSWORD=31vYF9Dc65gHbV742m
-
Select Paste .env Content tab and paste your .env file content. You can also manually add key/value pair.
-
Once added, click Convert to Key/Value, It will convert it to your key/value.
-
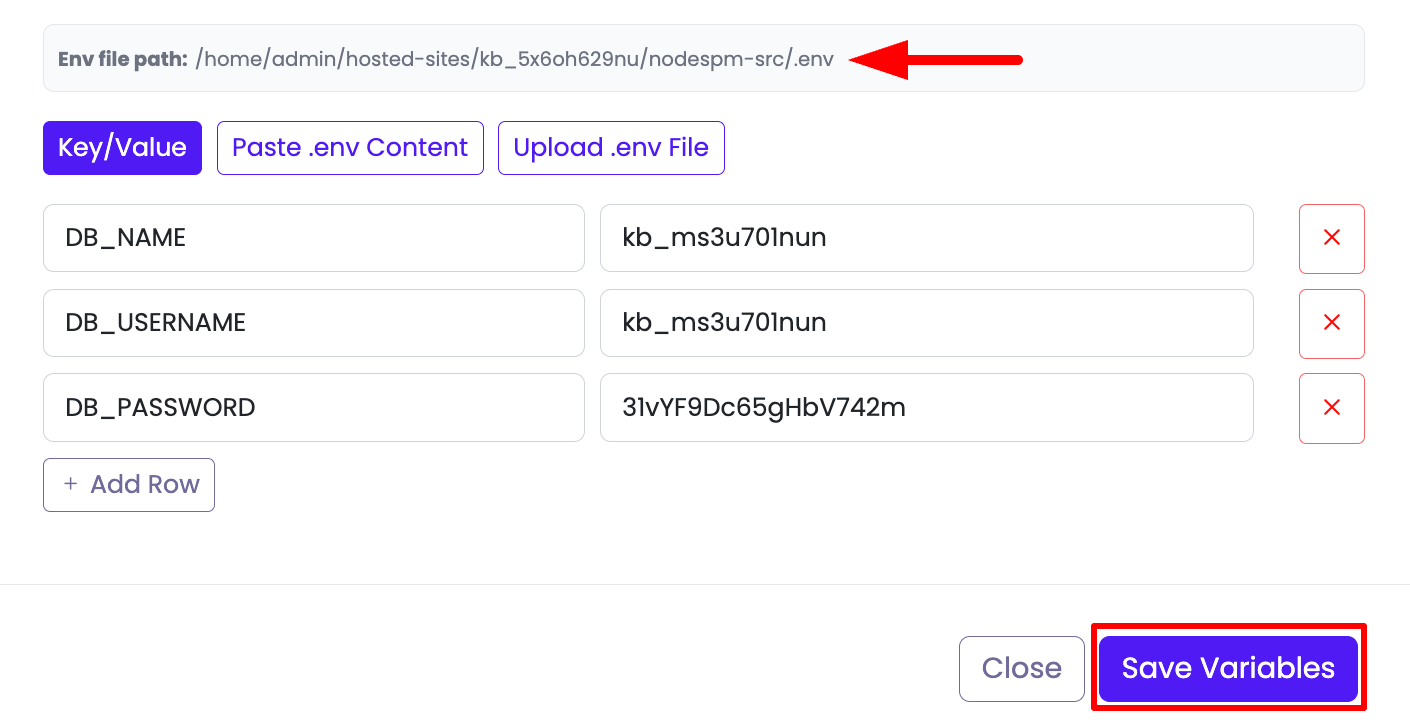
Once updated, click on the "Save Variables" button of the editor, and it will be saved.
Env file path: This path represent there .env file will be saved. If you have any subdirectory (custom app root directory) then .env will be saved in that path.
After saving this, now when you run Build by CI/CD or by manually triggering "Pull & Deploy" and your build process will start.
In order to get database access credentials, read the detailed guide on Viewing Database Credentials.
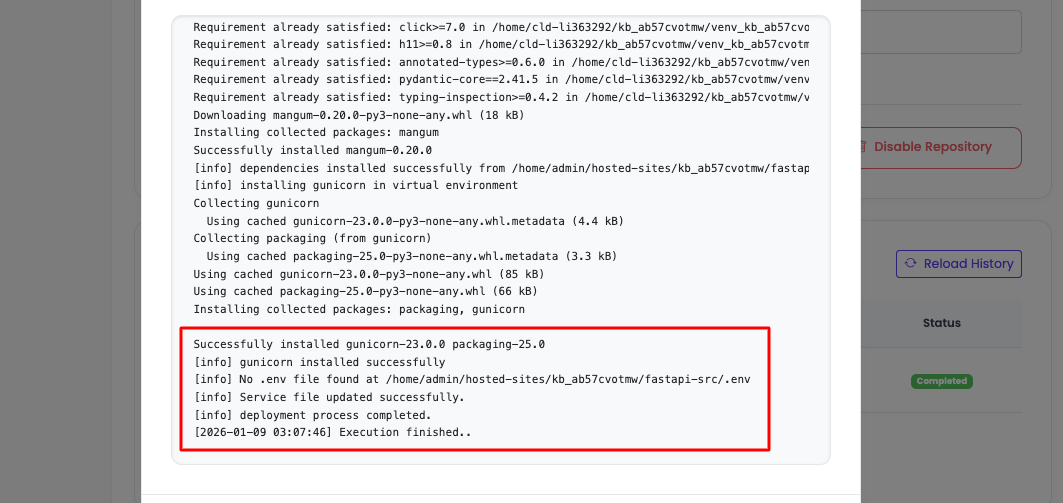
Viewing Build Logs
If you see your build failed or you need to see build and installation logs, click on your current build and a prompt will open to view the logs.
Once your application is started, you can access it from the access URL:
"Application Administration" → Access → Access URL
If you are seeing 503, that means your application is not up and has some errors.
In order to view application logs:
- You can view logs using File Manager
- Or by SSH into the server
Go to directory: /home/admin/hosted-sites/<app_system_user>/app-logs
Important: It is important to check your application logs if your site is responding with a 503 gateway error. It shows that the application is not running.
In this directory, application logs are being added in the following log files:
- app.info.log → information logs
- app.error.log → error logs
You can open these files using File Manager to view the errors.
Deployment Using ADM Tool
Application Deployment Manager (ADM) is one of KloudBean's features that enables you to deploy your app quickly by just executing one command. It supports all FastAPI and Python-based applications.
In order to perform deployment using the ADM tool, you have to access your server using shell.
Read the detailed guide on how to SSH server on KloudBean.
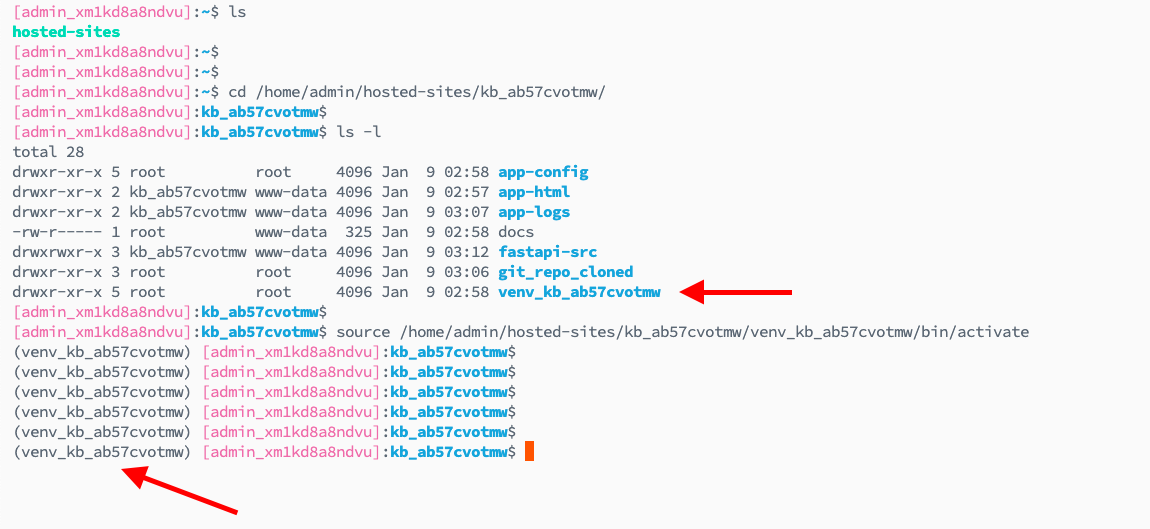
Optionally Enable Python Virtual Environment
When you launch any Python-based framework on KloudBean, you get automatically configured a virtual Python environment with each app. You don't have to manually create one.
In order to enable the virtual environment, run this command:
source /home/admin/hosted-sites/<app_system_user>/venv_<app_system_user>/bin/activate
And your virtual environment will be activated.
Once you are connected to the server, run the following ADM command:
sudo adm
or
sudo adm <app_system_user>
→ to directly execute for the required application.

If you run this command without app_system_user, then you will have to select the app by providing its number in the prompt and click hit enter.
It will start the deployment process with the logs and progress details on the shell screen.

Information: While executing deployment through ADM, you will see the port as well to get to know on which port the app is running.
Handling Build Errors
If you are seeing the build has failed, you can see build logs.
While executing ADM, you might see the app failed. Carefully watch the error and try to fix it.
Here are some common FastAPI build errors and how to fix them:
1. Import Errors
Error: ModuleNotFoundError: No module named 'xxx'
Solution:
- Ensure all dependencies are listed in your
requirements.txt - Check that package names are spelled correctly
- Verify Python version compatibility with the packages
2. ASGI Application Not Found
Error: Could not import application 'app:app'
Solution:
- Verify your
bean.confhas the correctAPP_NAMEformat:<module>:<variable> - Ensure your FastAPI app instance is named
app(e.g.,app = FastAPI()) - Check that the file structure matches the
APP_DIRinbean.conf
3. Port Already in Use
Error: Address already in use
Solution:
- This usually resolves automatically on redeployment
- If persistent, check if another process is using the port
- Restart the application using ADM tool
4. Database Connection Errors
Error: Database connection failures
Solution:
- Verify database credentials in
.envfile - Check that database server is running and accessible
- Ensure database name, user, and password are correct
- Verify network connectivity between app and database
5. Dependency Version Conflicts
Error: Package version conflicts during installation
Solution:
- Pin specific versions in
requirements.txt(e.g.,fastapi==0.104.1) - Remove conflicting packages and use compatible alternatives
- Update packages to latest compatible versions
Once the error is fixed, then run the build again using "Pull & Deploy" or using the ADM tool from shell.
Next Steps
- Learn how to enable automated deployment
- Add custom domain
- Install SSL certificates for your site