React Deployment
On KloudBean, you get a complete production-ready stack to build and host high-performance React applications with ease in just a few steps.
You get:
- Git Integration: Pull your code on the server
- SSH Access: Access to the server to run commands manually and using ADM tool for quick deployment
- File Manager Access: Add, update, and manage files with ease
Launch New React Application
If you already have a server and wish to launch an app on it, go to Applications → Add Application and add a React app on the existing server.
In this example, we will create a brand new server.
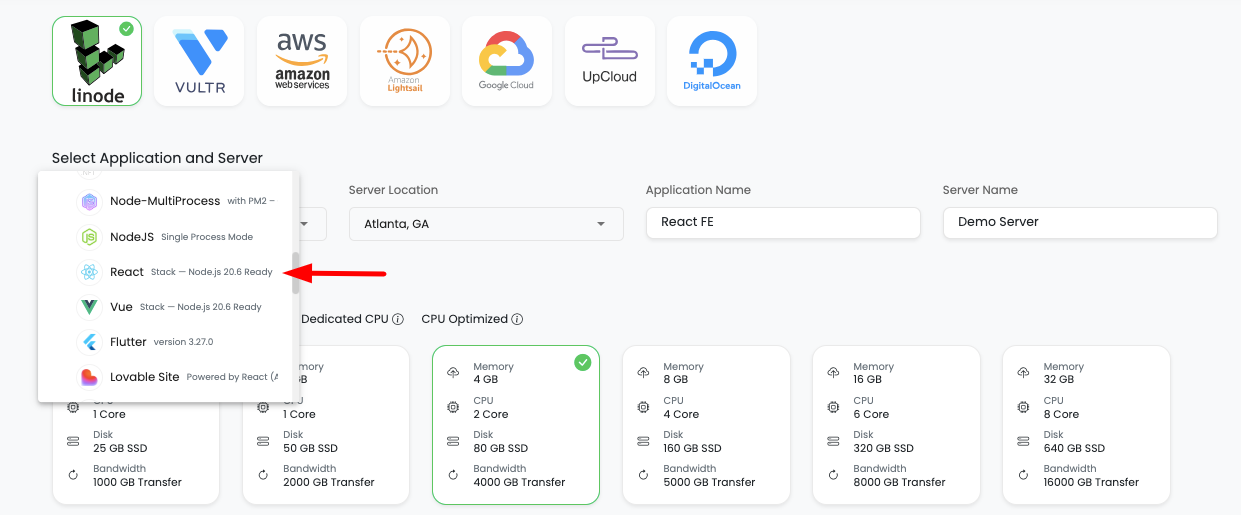
In order to launch your first React app on a new server, navigate to the server provision page:
- Select Cloud Provider (your choice)
- Select Application → React
- Select Datacenter with nearest location
- Add Application Name
- Add Server Name
- Select Server size depending on needs (for React build, minimum recommended size is 2-4GB)
- Click on "Launch" button and proceed with the payment process (trial or payment)
Once payment is completed, server with React app provisioning will be initiated.
Wait for a while; it will take 5-7 minutes to create your server, configure, and deploy a high-performance web stack.
By default, on a new server you will get the following stack versions:
- Node: 20.X+
- npm: Latest
- nvm: Latest
- MariaDB: 10.6+ (optional)
Access Application Administration
Once your server is ready, in order to access the React app, select "Apps" from the header menu to go to the Applications page.
On this page, you will see your application in active status.
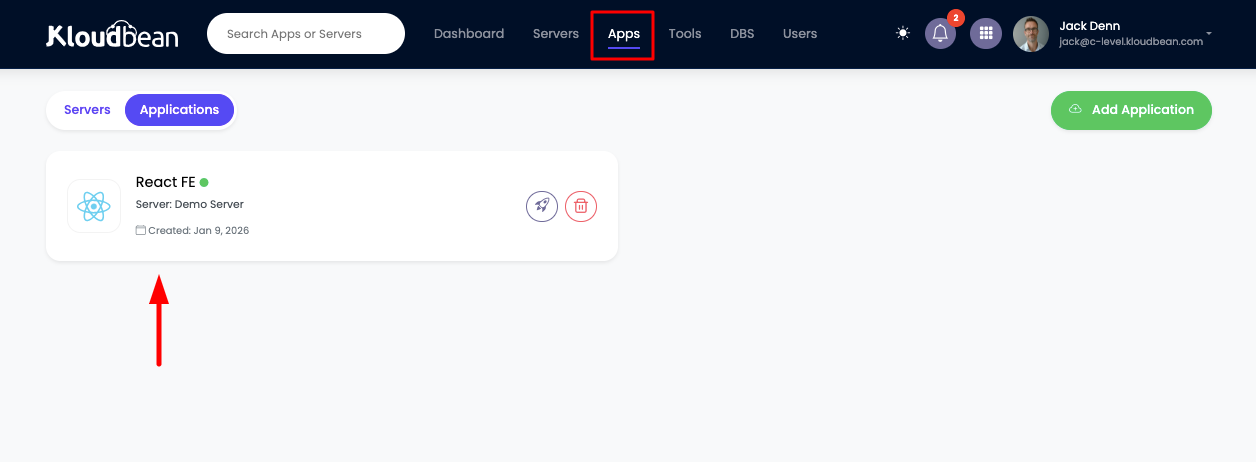
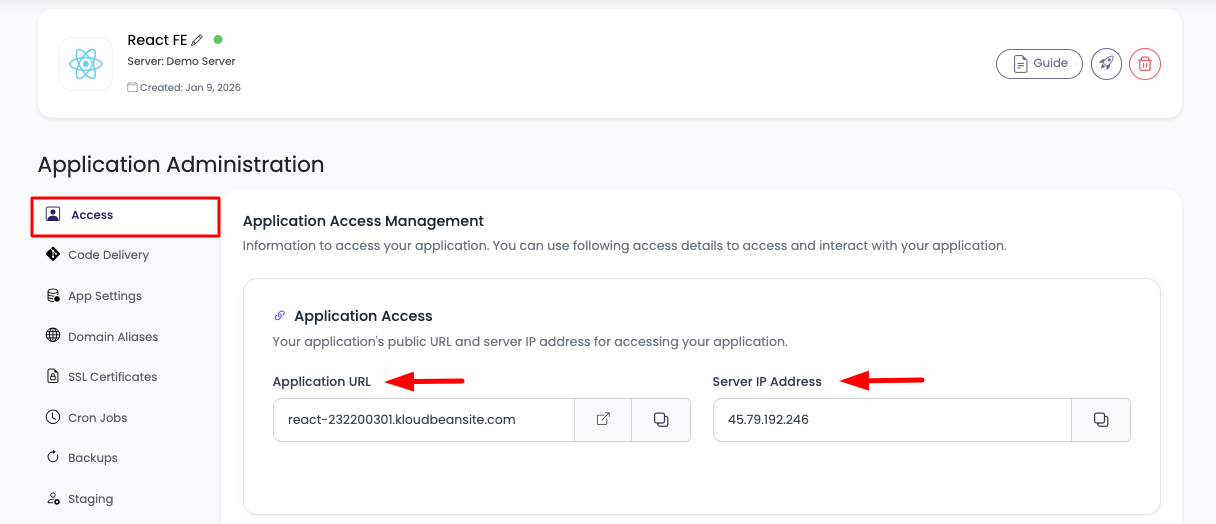
Click on it to navigate to "Application Administration" → "Access" section.
On this section, you will see:
- Application default access URL
- Server public address to point your custom domain to it
Deploy Your Code Via Git
The next step is to deploy your code.
In order to deploy your code, navigate to the "Code Delivery" tab.
Here, on the first tab → "Git Deployment":
- Select your preferred "Git Connection Mode"
- Connect GitHub using OAuth or copy the SSH public key and add it to your SCM provider (GitHub, GitLab, Bitbucket)
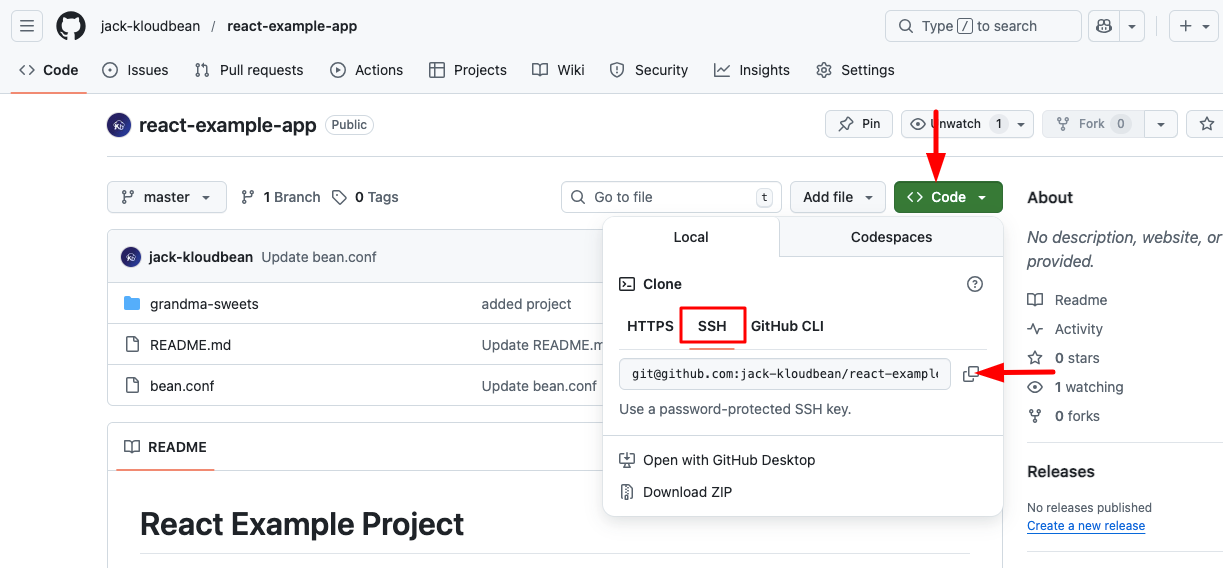
- Copy your repo URL and add here in "Git Repository URL" and Click Fetch Branches, select branch and "Clone Repository". In this example, I'm going to deploy an example React app:
[email protected]:jack-kloudbean/react-example-app.git
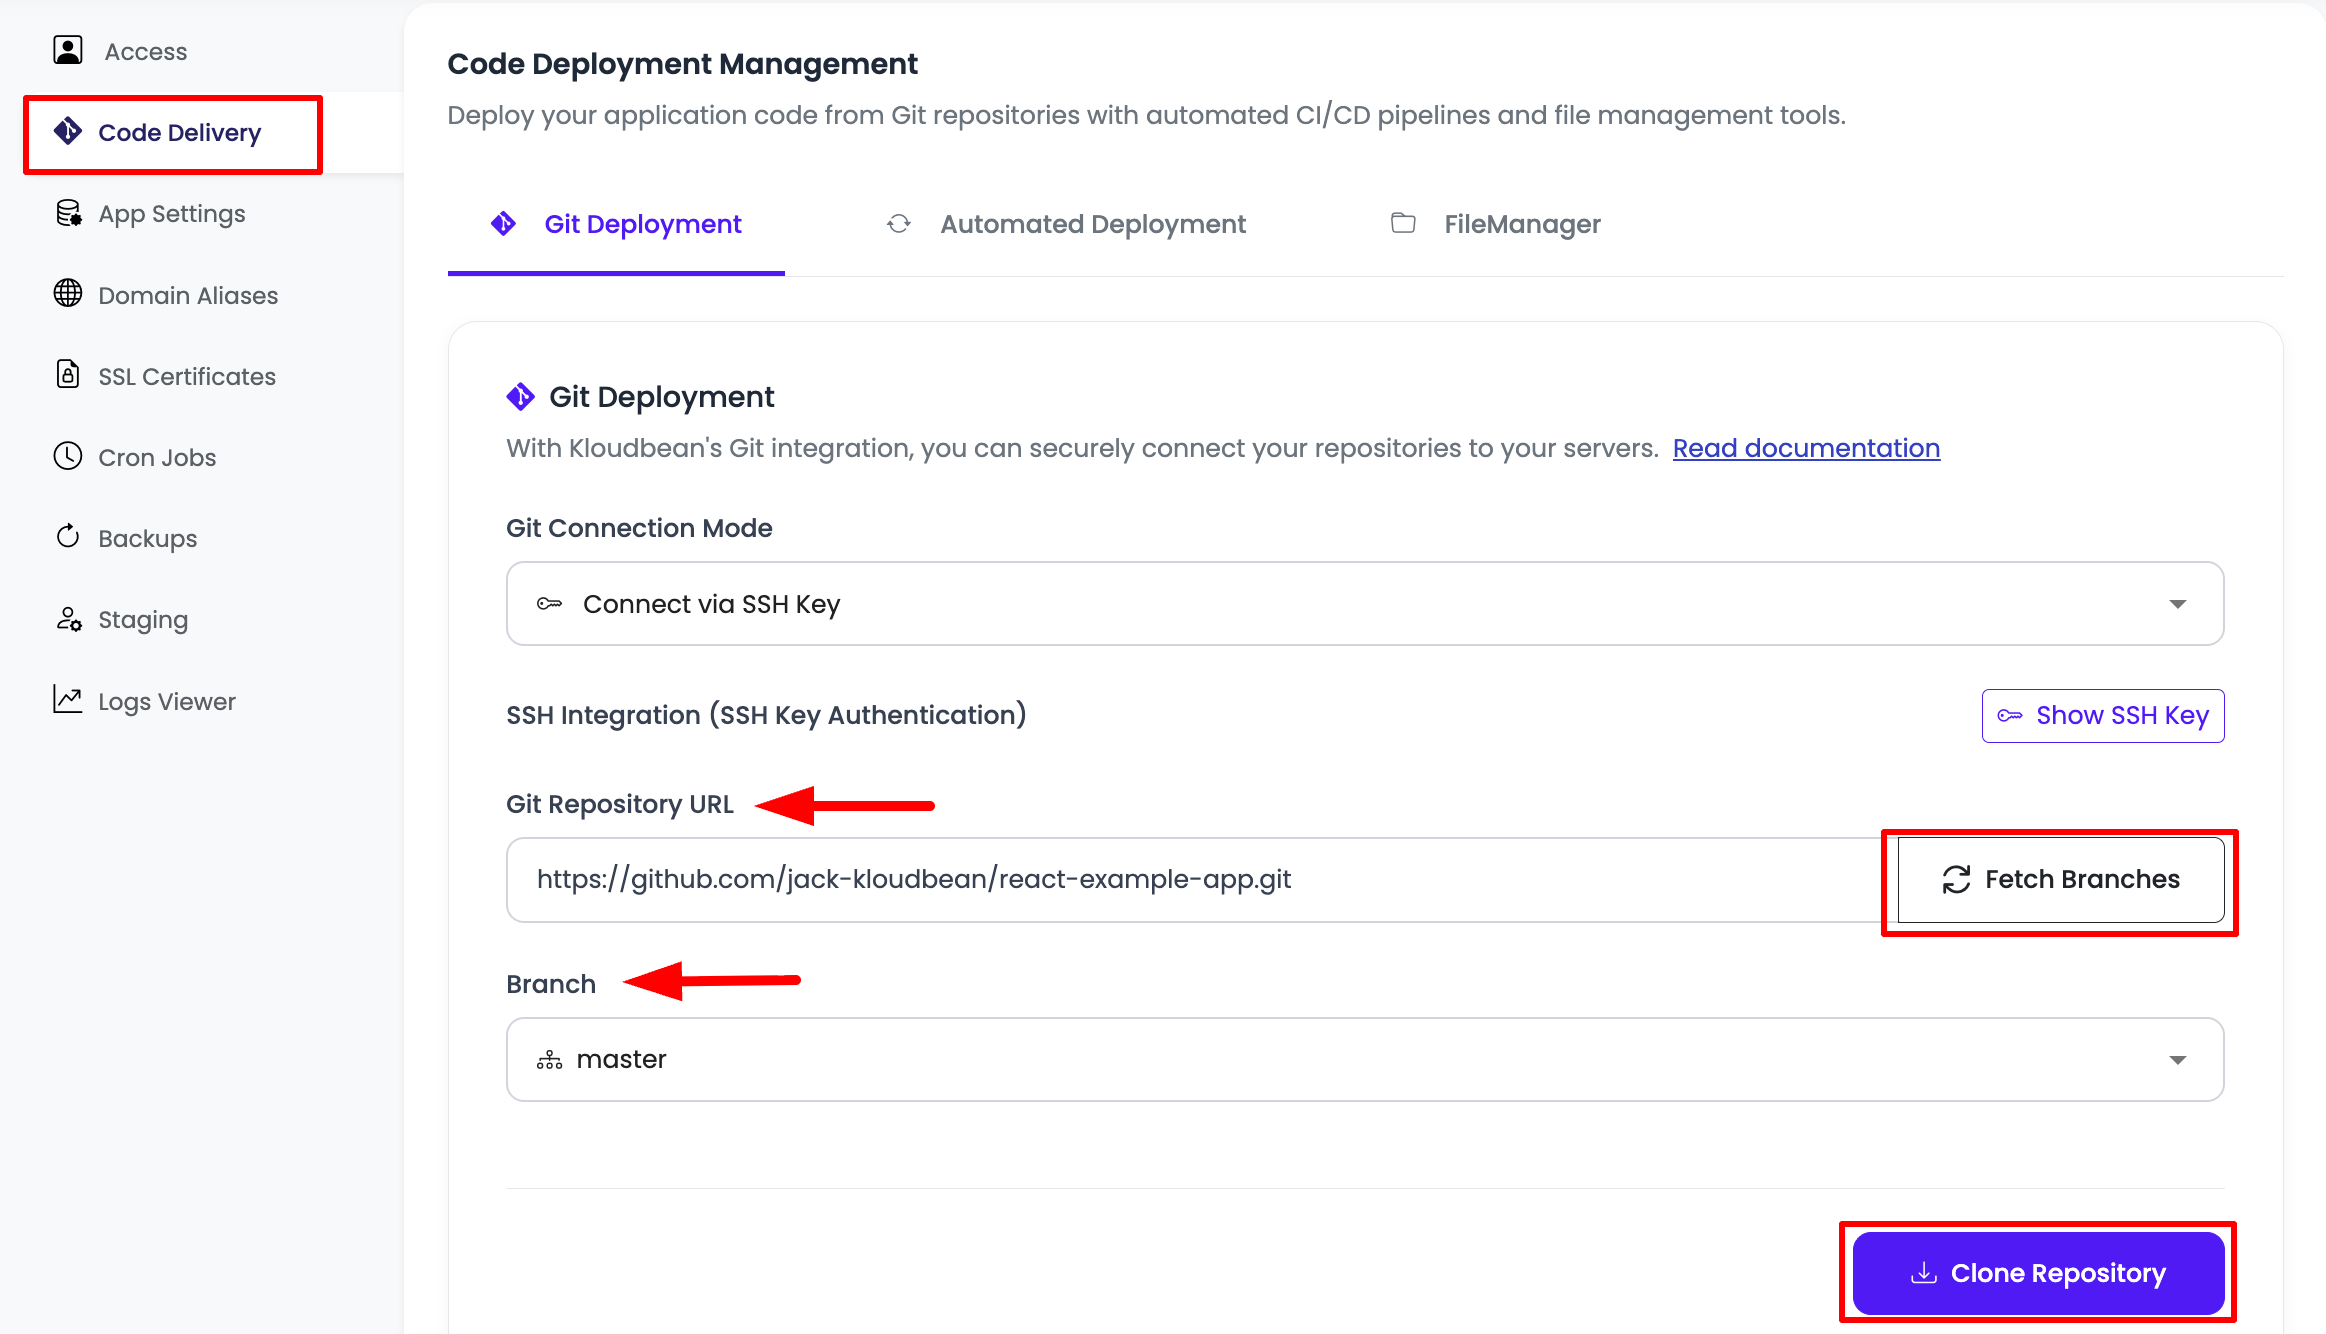
- Once branches are loaded, select branch and "Clone Repository".
Once the repo is cloned, the next step is to update Runtime Configurations. Read the detailed guide on Connecting git.
Update Node Runtime Configurations
Once the repository is cloned, review and update the Node runtime configurations before starting deployment.
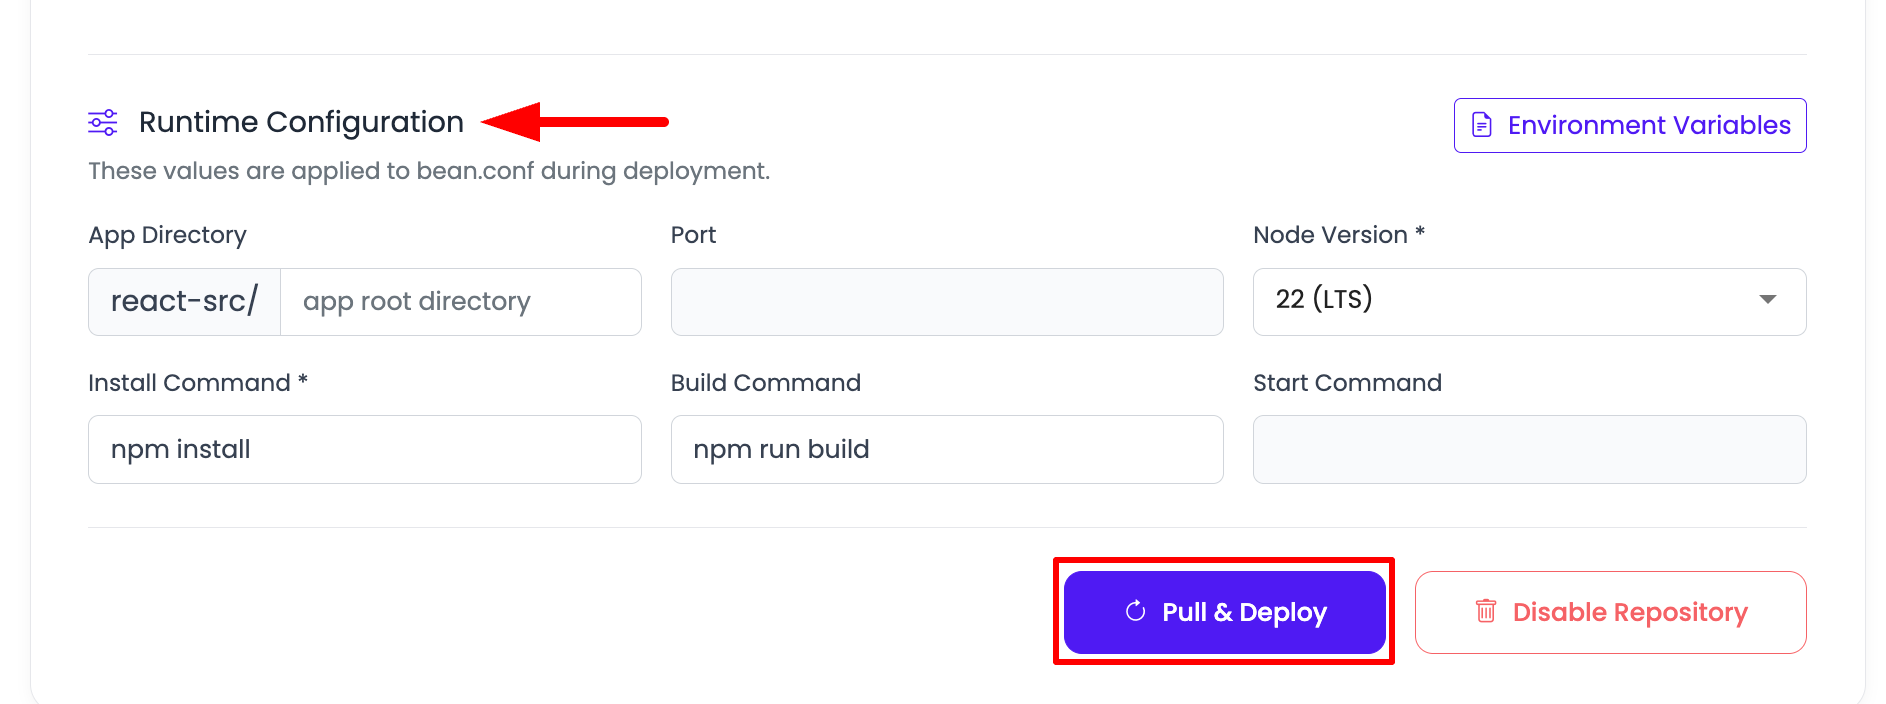
Configure the following fields based on your application requirements:
- App Directory: The root directory of your application code. This is the directory where your
package.jsonfile exists. If your project is in the repository root, keep the default path. If your project is inside a subdirectory, update this field to that directory. - Node Version: Select the appropriate Node.js version from the dropdown. Choose the version that matches your project's runtime requirements.
- Install Command: The command used to install project dependencies. The default command is
npm install. Depending on your project, you can also use commands likenpm ci,npm install --production, ornpm install --legacy-peer-deps. - Build Command: The command used to build your application before deployment. For example, if your project is written in TypeScript or uses a framework that requires compilation, you can use a command like
npm run build. If your application does not need a build step, you can leave this field blank.
Once these configurations are finalized, click the "Pull & Deploy" button to initiate the deployment process.
When you click "Pull & Deploy", KloudBean will initiate the build process automatically by doing the following at the backend:
- Take latest repo pull
- Enabling
bean.conffor configuration like Node version, app source directory, and build command - Setting required Node version
- Installing packages
- Making build
- Deploying it to web root directory
View Build Logs
Once the build process starts, you can view build logs in live mode. In order to view logs, click on the row of your deployment.
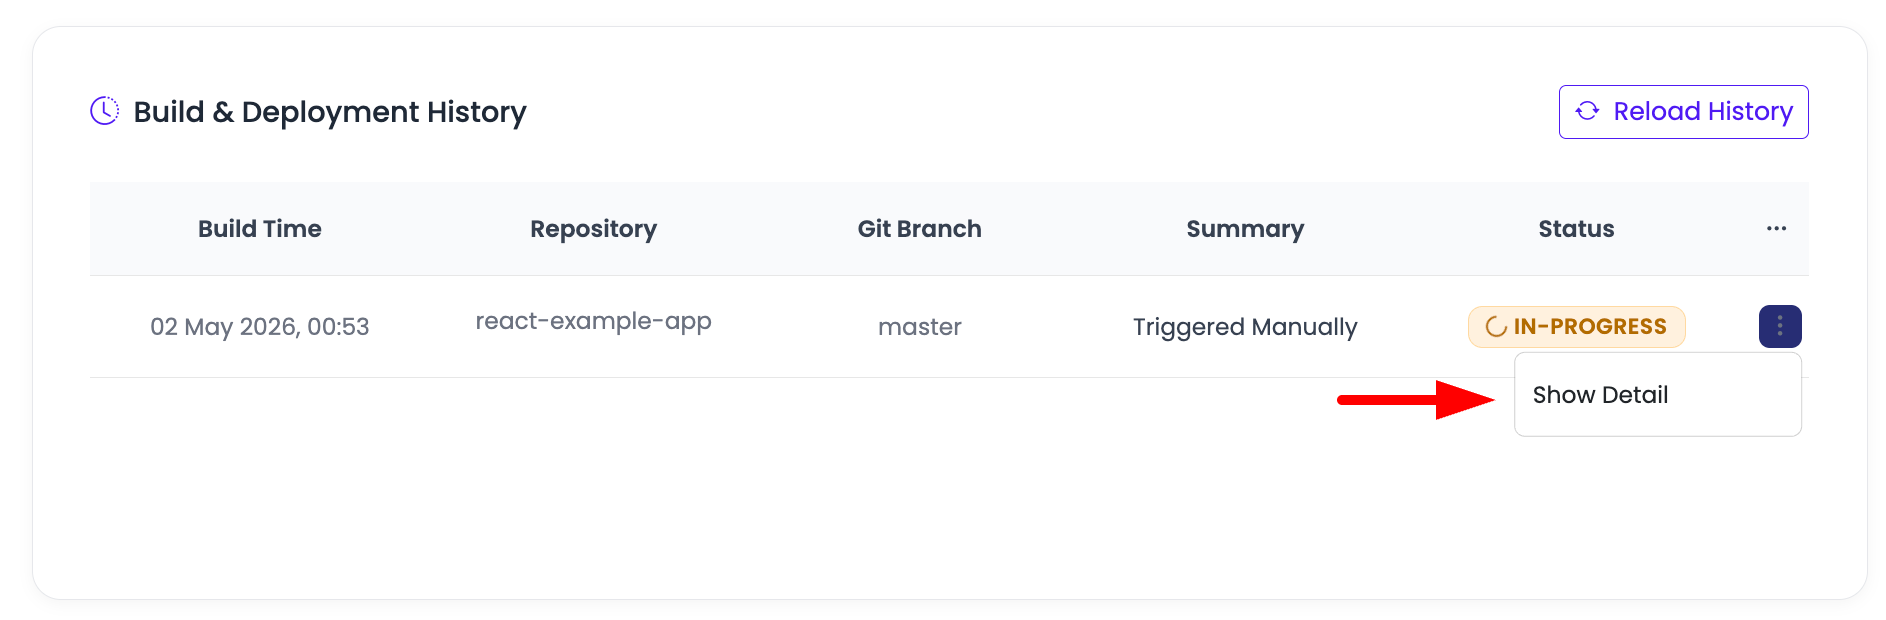
Once you click on it, it will open a prompt with the logs of that particular build.
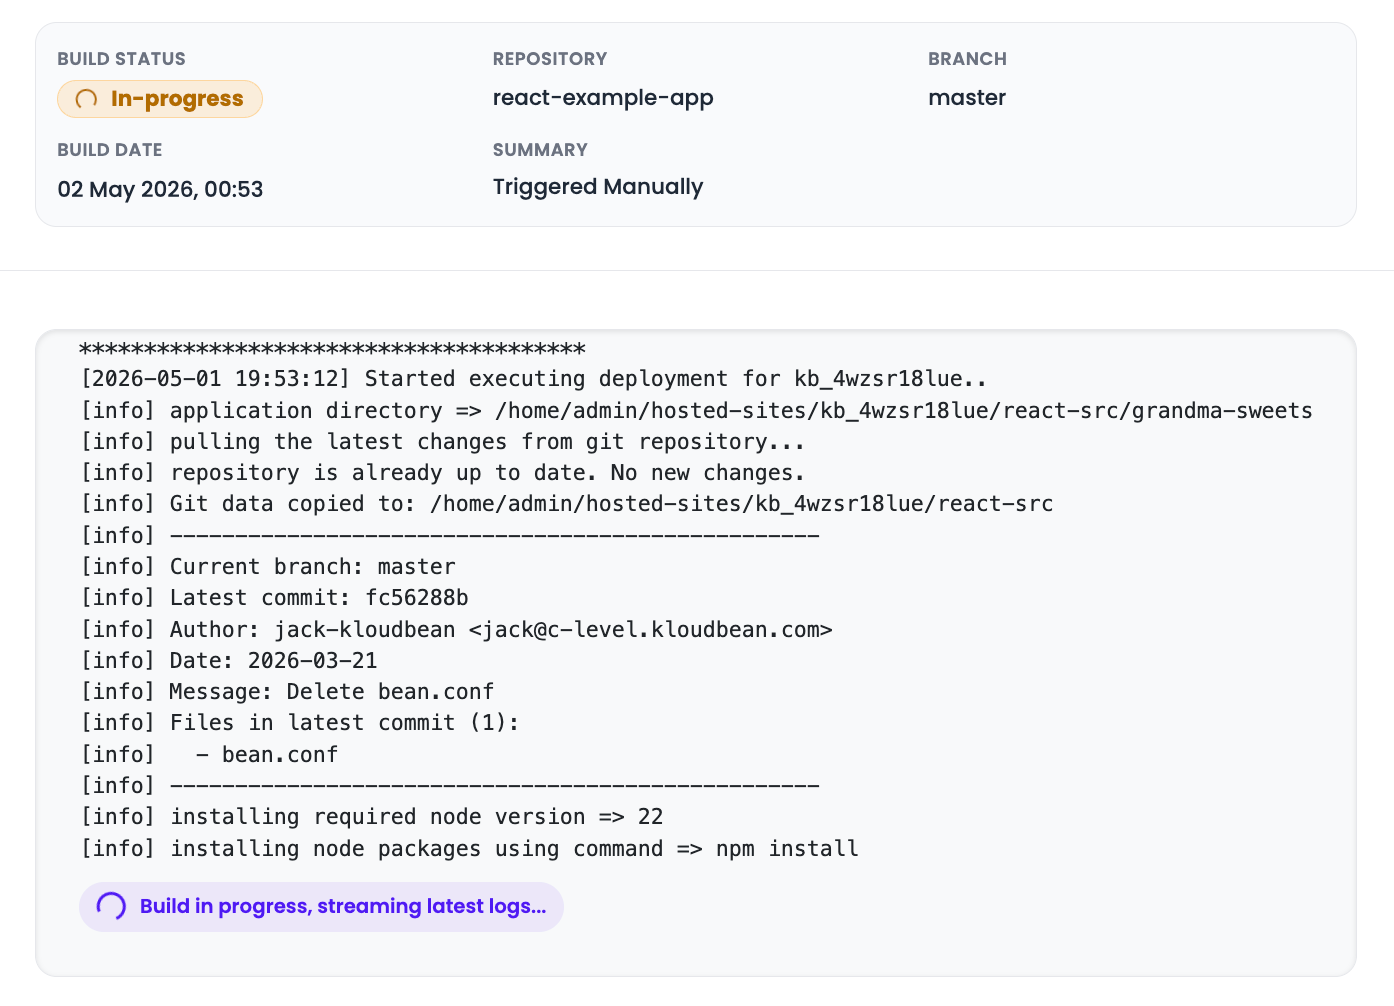
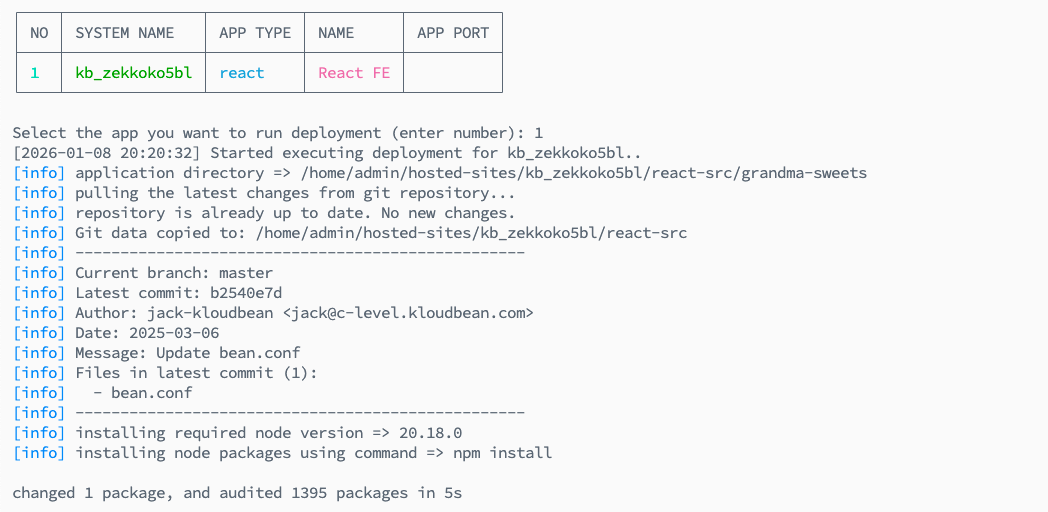
In the logs, you can also get information about:
- Current branch
- Latest commit
- Author
- Files in latest commit
This information is useful to get the info about the commit.
Deployment Using ADM Tool
Application Deployment Manager (ADM) is one of KloudBean's features which enables you to deploy your app quickly by just executing one command. It supports all Node and Python-based applications.
In order to perform deployment using the ADM tool, you have to access your server using shell.
Read the detailed guide on how to SSH server on KloudBean: Getting Server Access Credentials.
Once you are connected to the server, run the following ADM command:
sudo adm
or
sudo adm <app_system_user>
to directly execute for the required application.
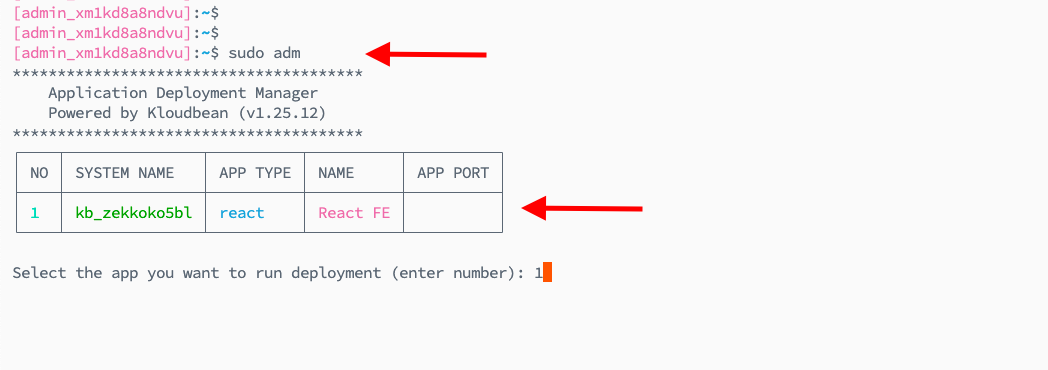
If you run this command without app_system_user, then you will have to select the app by providing its number in the prompt and click hit enter.
It will start the deployment process with the logs and progress detail on the shell screen.
Next Steps
- Enable automated deployment: Enabling Automated Deployment
- Add a custom domain: Adding Domains and Aliases
- Install SSL certificates: Installing Let's Encrypt Certificates