Laravel Deployment
On KloudBean, you get a complete production-ready stack to host high-performance PHP Laravel applications with ease in just a few steps.
You get:
- Git Integration: Pull your code on the server
- SSH Access: Access to the server to run Composer and Artisan commands
- File Manager Access: Add, update, and manage files with ease
Launch New Laravel Application
If you already have a server and wish to launch an app on it, go to Applications → Add Application and add a Laravel app on the existing server.
In this example, we will create a brand new server.
In order to launch your first Laravel app on a new server, navigate to the server provision page:
- Select Cloud Provider
- Select "Laravel" from application dropdown
- Add Application Name
- Add Server Name
- Select Server size (for Laravel, minimum recommended size is 4GB)
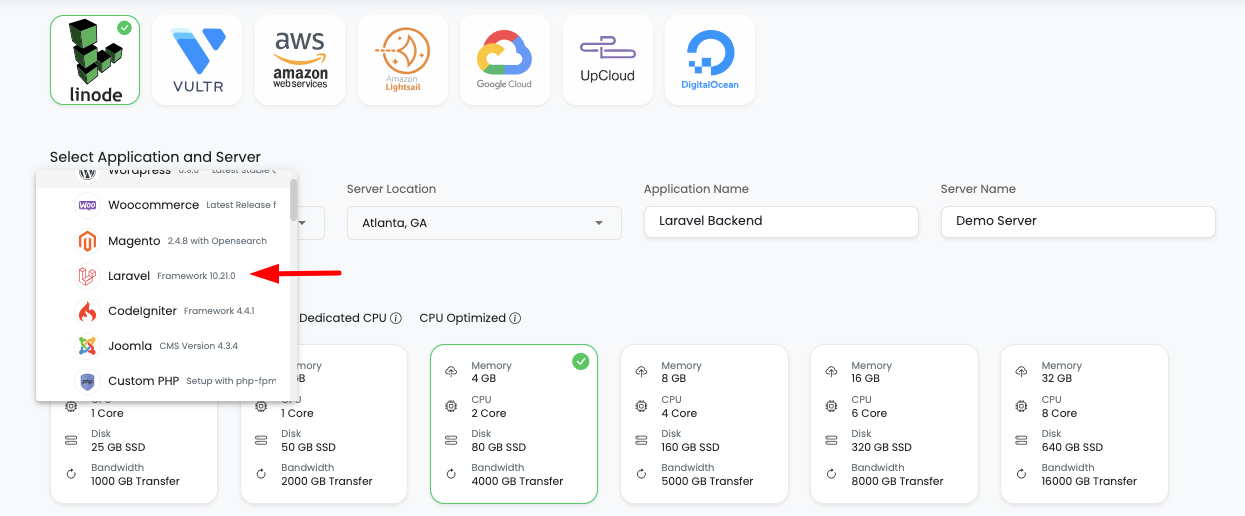
- Click on "Launch" button and proceed with the payment process (trial or payment)
Once payment is completed, server with Laravel app provisioning will be initiated.
Wait for a while; it will take 5-7 minutes to create your server, configure, and deploy a high-performance PHP web stack.
By default, on a new server you will get the following stack versions:
- PHP-FPM: 8.2+
- MariaDB: 10.6+
- Node: 20.X
- Composer: Latest
- Redis: Latest
Access Application Administration
Once your server is ready, in order to access the Laravel app, select "Apps" from the header menu to go to the Applications page.
On this page, you will see your application in active status.
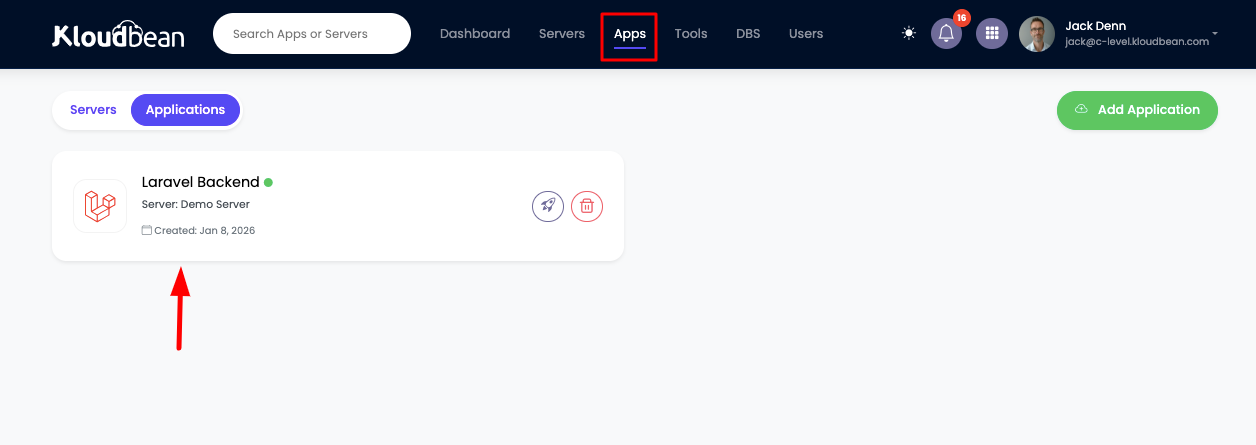
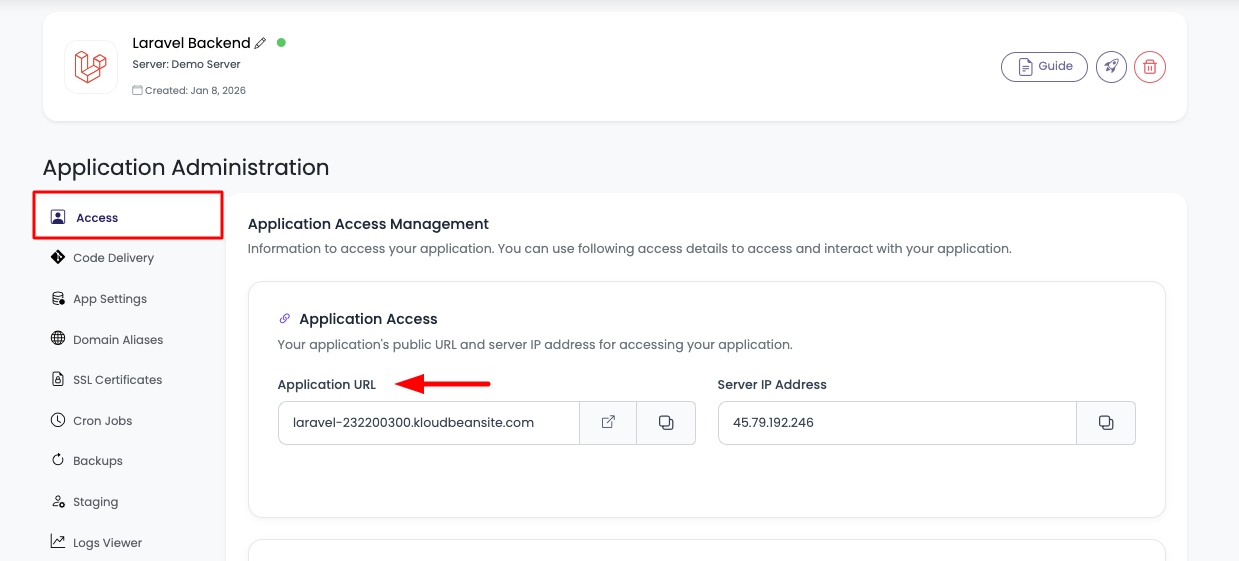
Click on it to navigate to "Application Administration" → "Access" section.
On this section, you will see:
- Application default access URL
- Server public address to point your custom domain to it
Deploy Your Code
The next step is to deploy your code.
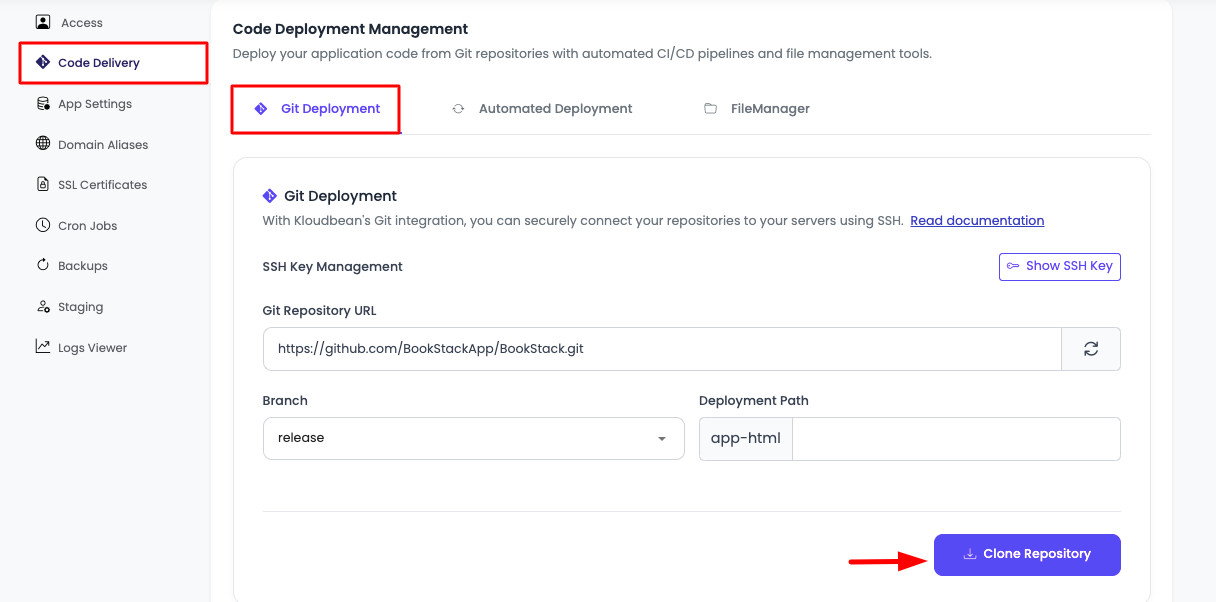
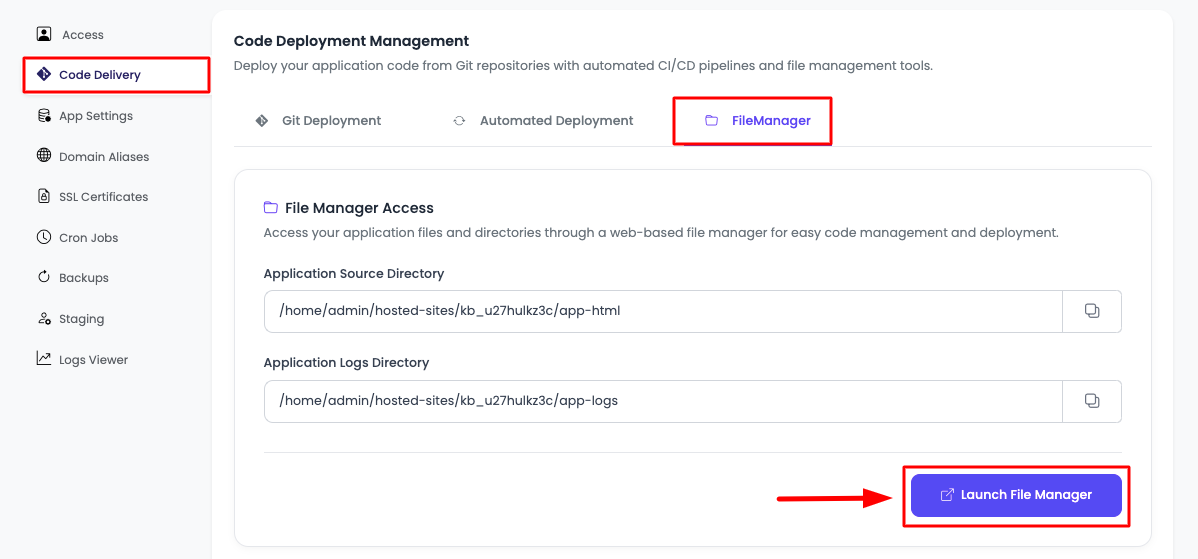
In order to deploy your code, navigate to the "Code Delivery" tab.
Here, stay on the first tab, which is "Git Deployment".
Click on "Enable Git Integration" and add your repo URL to connect your repository and clone it.
In this example, I'm going to deploy the open-source Laravel app "BookStack":
https://github.com/BookStackApp/BookStack.git
In order to connect a private repo, read the detailed guide on Connecting Git Repository.
Once the repo is cloned, the next step is to access your code files using the file manager.
Navigate to the third tab "FileManager" and click the "Launch FileManager" button to open it in a new tab.
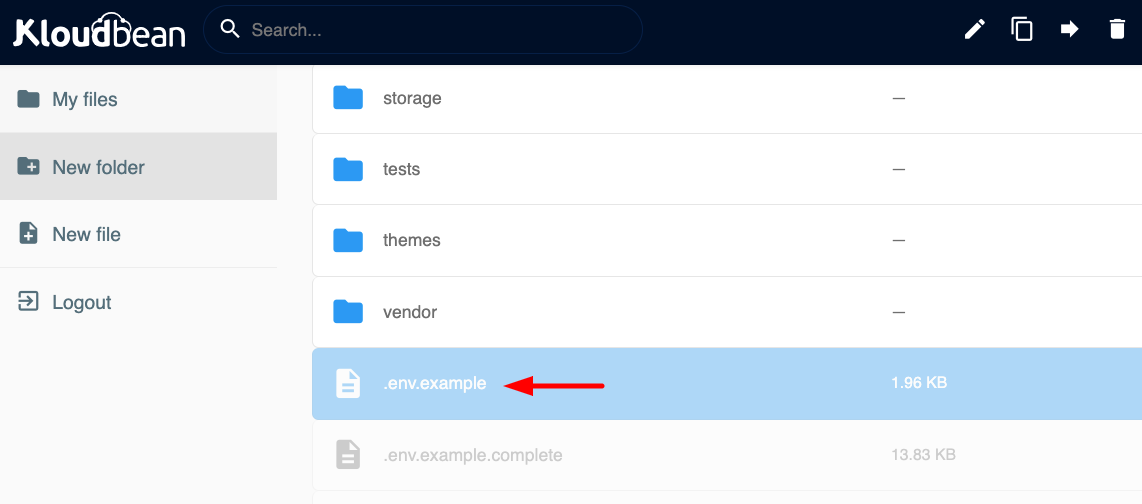
Once you are in the file manager, here you will see all your files.
Updating .env File
To add variables like site URL and database variables:
- Locate the
.envfile, or rename.env.example, or you can create a new file and name it.envand add environment variables in it.
- Double-click on the
.envfile to edit it. Once the editor opens, update the required variables.
In this example, I updated:
APP_URL=https://laravel-232200300.kloudbeansite.com

# Database details
DB_HOST=localhost
DB_DATABASE=kb_u27hulkz3c
DB_USERNAME=kb_u27hulkz3c
DB_PASSWORD=PydV7ZOqwb612ce469
In order to get database access credetials, read the detailed guide on Viewing Database Credentials.
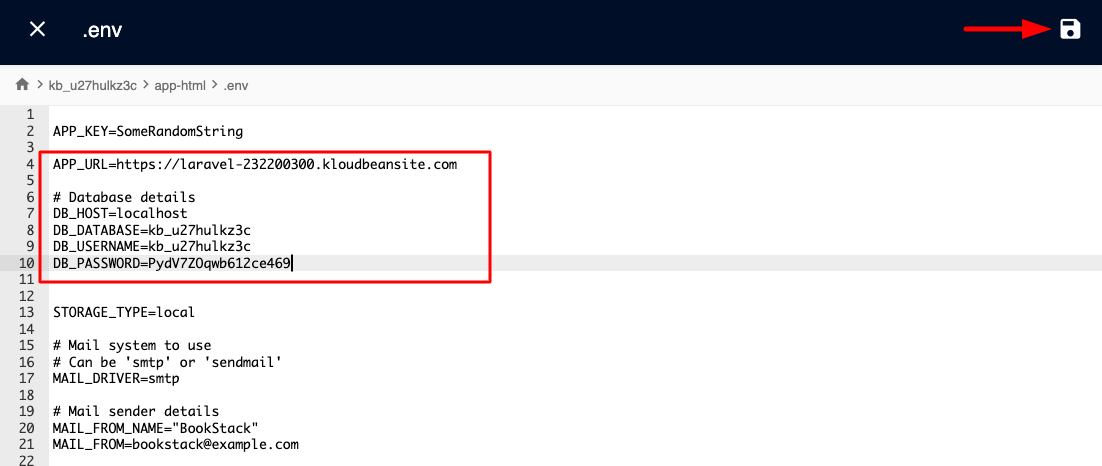
- Once updated, click on the "Save" icon on the top right corner of the editor, and it will be saved.
Execute Composer and Artisan Commands
The next step is to execute the required Composer and Artisan commands to initialize the application and perform migrations.
In order to execute these commands, you have to SSH into the server to run commands.
To SSH into the server, read our detailed guide: Getting Server Access Credentials.
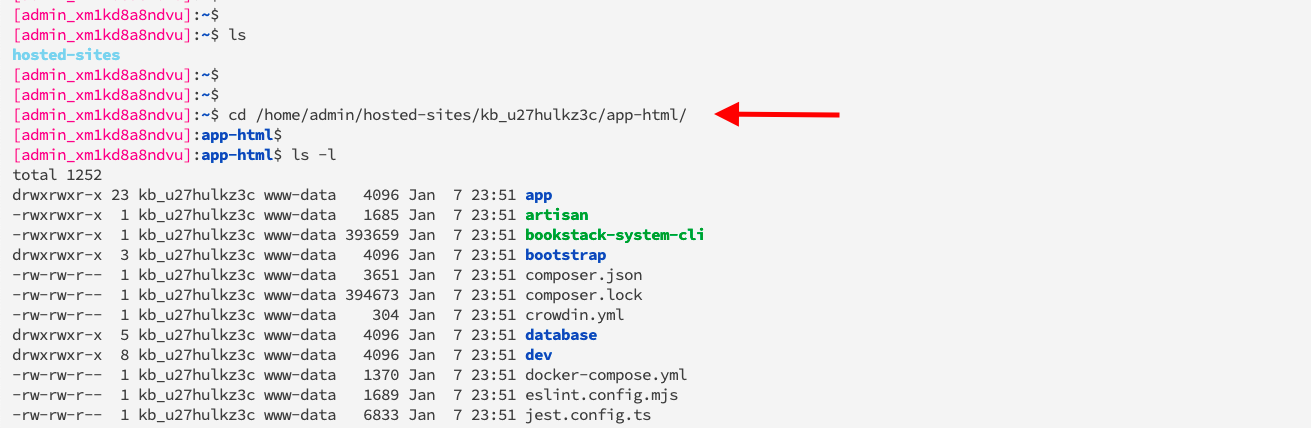
Once you are connected to the server, execute the cd command to navigate to your application root directory:
cd /home/admin/hosted-sites/<app_system_user>/app-html/
Once you are inside that directory, you can view your files using the command:
ls -l
In this directory, execute the command:
composer install --no-dev

The next step is to execute the command artisan key generate to generate a unique application key.
php artisan key:generate

Now Execute artisan migrate commands to update the database.
php artisan migrate
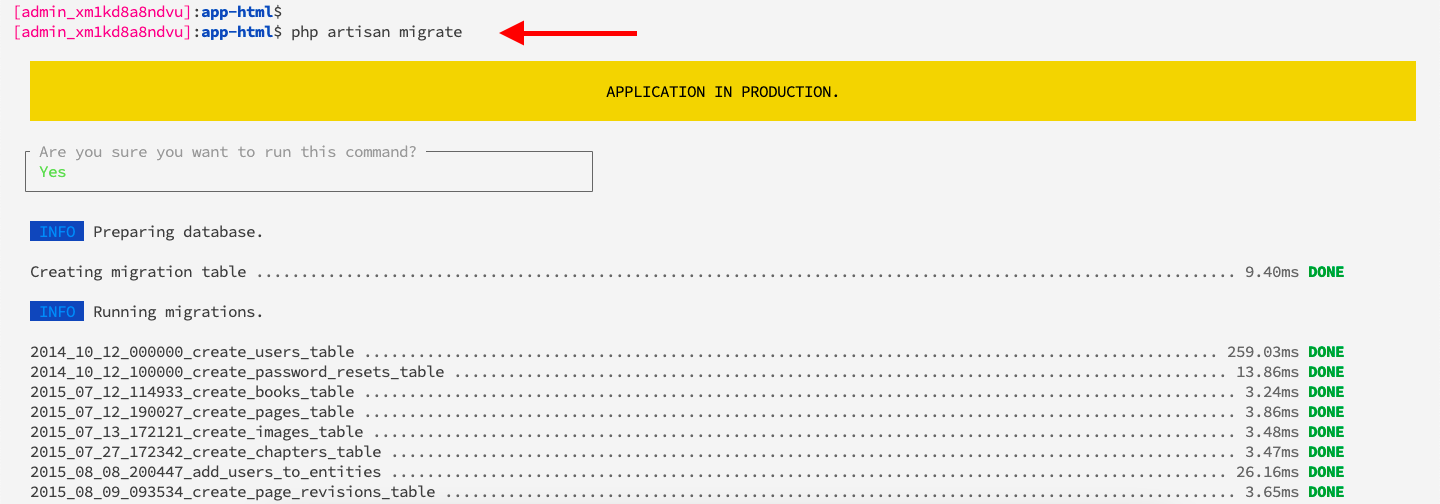
Done! You can now login using the default admin details [email protected] with a password of password. You should change these details immediately after logging in for the first time.
Congratulations! Your code is deployed and ready to access in a production-ready, high-performance, and secure environment.
Your application is now ready and good to access. Go to "Application Administration" → "Access" → "Access URL", and access your app.
If you see old content, follow the following steps to clear your cache:
Purge Cache
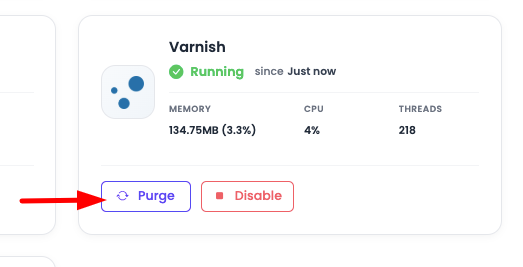
Purge Varnish Cache
To purge Varnish cache, go to "Server Administration" → "Service Management" → Varnish → click "Purge".
Clear App Cache
Execute the following Artisan cache commands:
php artisan cache:clear
php artisan config:clear
php artisan route:clear
php artisan view:clear
Adding Supervisor Queue
Laravel queues allow you to defer time-consuming tasks (such as sending emails, processing images, generating reports, or handling API requests) so that your web requests can respond quickly. Supervisor is a process monitor for Linux that automatically restarts your Laravel queue workers if they fail, ensuring your queues continue processing jobs reliably.
Common Laravel Artisan queue commands you might want to run with Supervisor include:
php artisan queue:work- Process jobs from a specific queuephp artisan queue:listen- Listen to a queue and process jobsphp artisan queue:restart- Restart all queue workers
Installing Supervisor
Before you can add a queue, you need to ensure Supervisor is installed on your server.
To validate or install Supervisor:
- Navigate to "Server Administration" → "Services" → "Package Management"
- You will see Supervisor listed in the services
- Check its status - if it shows as not installed, click on "Install" to install it

Supervisor installation typically takes about a minute to complete.
Once Supervisor is installed, you're ready to add a queue to your Laravel application.
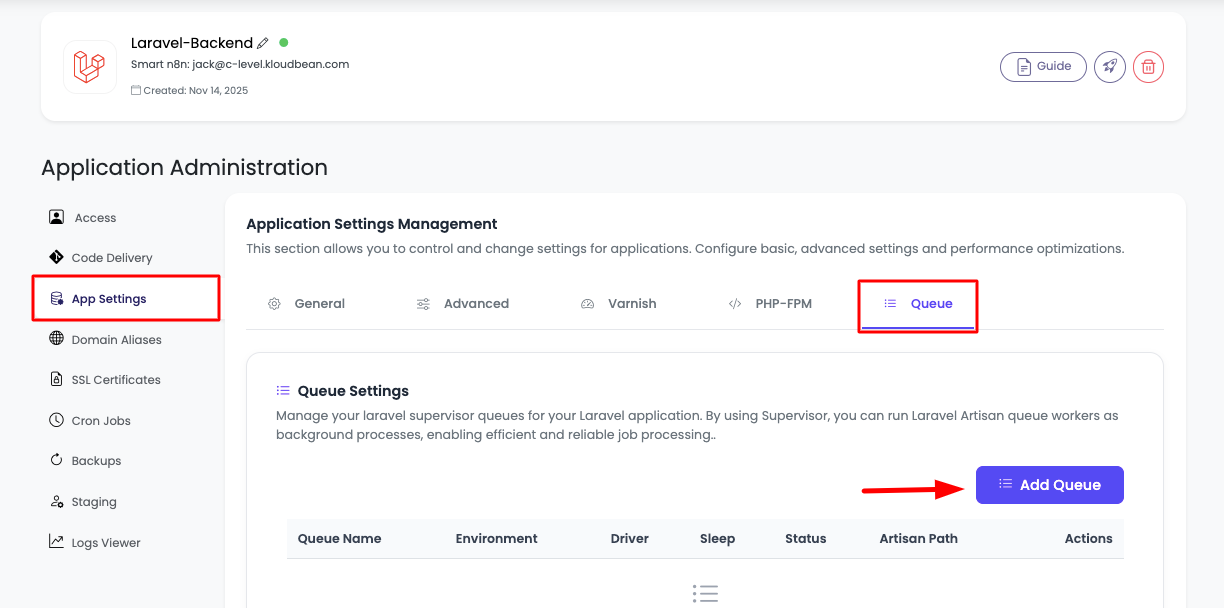
Adding a Queue
To add a queue to your Laravel application:
- In your "Application Administration", navigate to "App settings" → "Queue"
- You will see a list of existing queues, or an empty list if no queues have been added yet
- Click on "Add Queue" to add a new queue
A configuration prompt will open where you can customize your queue details with the following options:
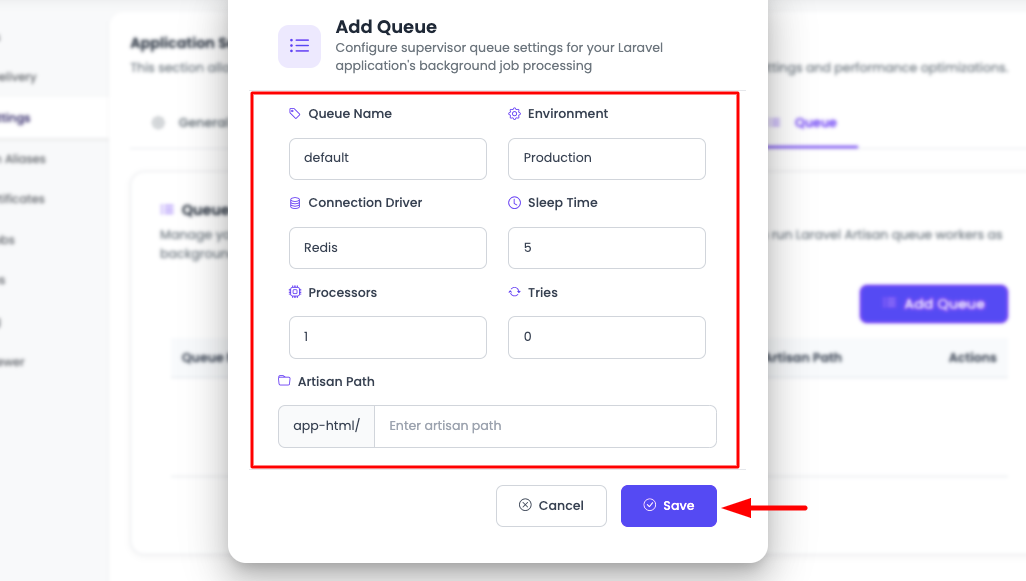
Queue Configuration Options
Queue Name
- A unique identifier for your queue (e.g.,
default,emails,notifications,reports) - Use descriptive names that indicate the queue's purpose
Environment
- Options:
ProductionorDeployment - Production: Select this for your live/production environment where your application is actively serving users
- Deployment: Select this for staging or development environments where you're testing changes before going live
Connection Driver
- Options:
Redis,database,SQS,Beanstalkd,Sync - Redis (Recommended): Best for high-performance applications. Requires Redis to be installed and configured in your
.envfile. Fast and efficient for handling large volumes of jobs. - Database: Uses your database to store jobs. Good for simple setups but can impact database performance with high job volumes. No additional services required.
- SQS: Amazon Simple Queue Service. Use if you're running on AWS infrastructure and want managed queue services.
- Beanstalkd: Lightweight work queue service. Good for distributed systems but requires separate Beanstalkd installation.
- Sync: Runs jobs synchronously (immediately) without queuing. Not recommended for production as it blocks requests.
Sleep Time
- The number of seconds the worker will "sleep" when there are no jobs available
- Default is usually
3seconds - Lower values (1-2) check for jobs more frequently but use more CPU
- Higher values (5-10) use less CPU but may delay job processing
Processors
- The number of queue worker processes to run simultaneously
- Start with
1for low traffic, increase to2-4for higher volumes - Each processor consumes memory, so balance based on your server resources
- More processors = faster job processing but higher resource usage
Tries
- The maximum number of times a job should be attempted before being marked as failed
- Default is usually
3 - Set higher (5-10) for critical jobs that might fail due to temporary issues
- Set lower (1-2) for jobs that should fail fast if they can't complete
Artisan Path
- The path to your Laravel application after
app-html - For most Laravel apps, this is typically empty or
/ - If your Laravel app is in a subdirectory (e.g.,
app-html/laravel-app/), specify the subdirectory path here - Example: If your
artisanfile is at/home/admin/hosted-sites/<app_system_user>/app-html/artisan, leave this empty - Example: If your
artisanfile is at/home/admin/hosted-sites/<app_system_user>/app-html/my-app/artisan, entermy-app
Once you've configured all the settings, click "Save" to add the queue. The queue will be added and start working immediately.

Managing Queues
On the queue list page, each queue row provides options to:
- Restart Queue: Restarts the queue worker process. Useful after deploying code changes or if you suspect the queue has stopped processing jobs.
- Delete Queue: Removes the queue configuration and stops the worker process. Use this when you no longer need a specific queue.
Best Practice: After deploying code changes that affect queue jobs, restart your queues to ensure the new code is being used.
Next Steps
- Add a custom domain: Adding Domains and Aliases
- Install SSL certificates: Installing Let's Encrypt Certificates