Creating Buckets
Learn how to create a new S3-compatible storage bucket on KloudBean for storing your objects and files. Creating buckets on KloudBean is a simple, few-step process.
Overview
When Do You Need an S3 Bucket?
S3 buckets are essential for storing and managing various types of data and files. You need an S3 bucket when you want to:
- Store Application Assets: Host images, videos, documents, and other media files for your applications
- Backup Data: Create backups of important files and data
- Content Delivery: Serve static content like CSS, JavaScript, and images for web applications
- File Sharing: Store files that need to be accessed by multiple applications or services
- Data Archiving: Archive old data that needs to be retained but not frequently accessed
- Application Storage: Store user uploads, generated reports, logs, and other application-generated content
S3 buckets provide scalable, reliable, and cost-effective storage with S3-compatible API access, making them ideal for modern cloud applications.
Flexibility on KloudBean
You have the flexibility to create as many buckets as you need. On KloudBean, it's an easy few-step process to create a new bucket whenever you need additional storage containers for your data.
Creating a Bucket
Step 1: Access S3 Object Storage
In order to create your new bucket, navigate to the dashboard and click on the "S3 Object Storage" card.
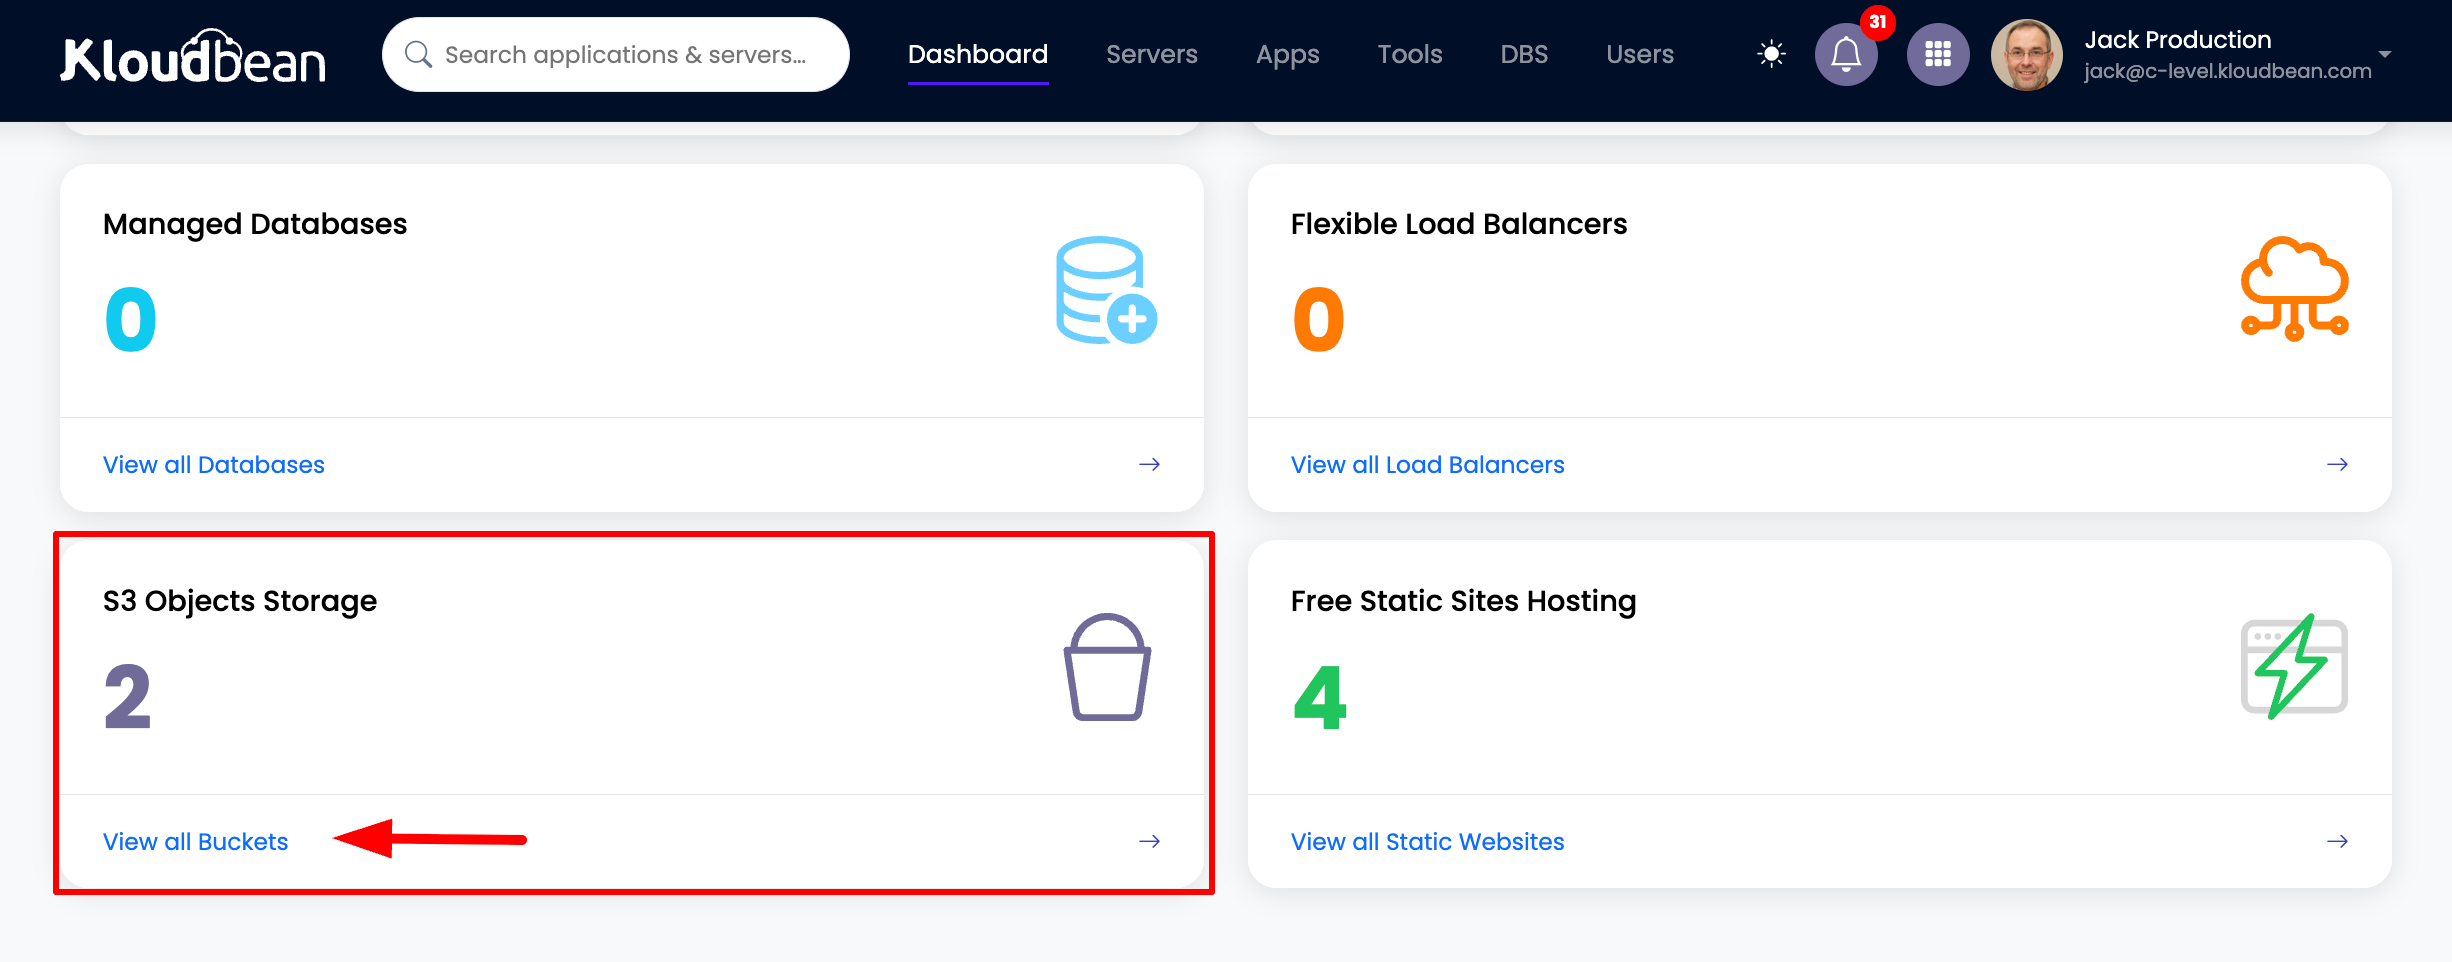
This will take you to the S3 buckets section, where your current buckets are listed, and there is a button to create a bucket.
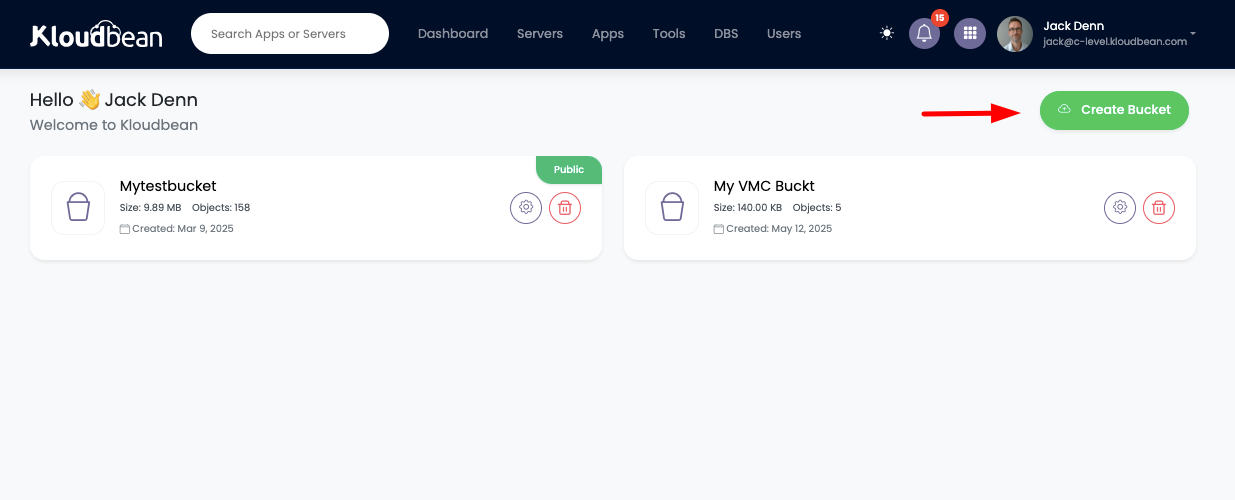
Step 2: Create New Bucket
In order to create a bucket, click on the "Create Bucket" button.
Step 3: Enter Bucket Name
Once you click, it will open a prompt to enter the bucket name.
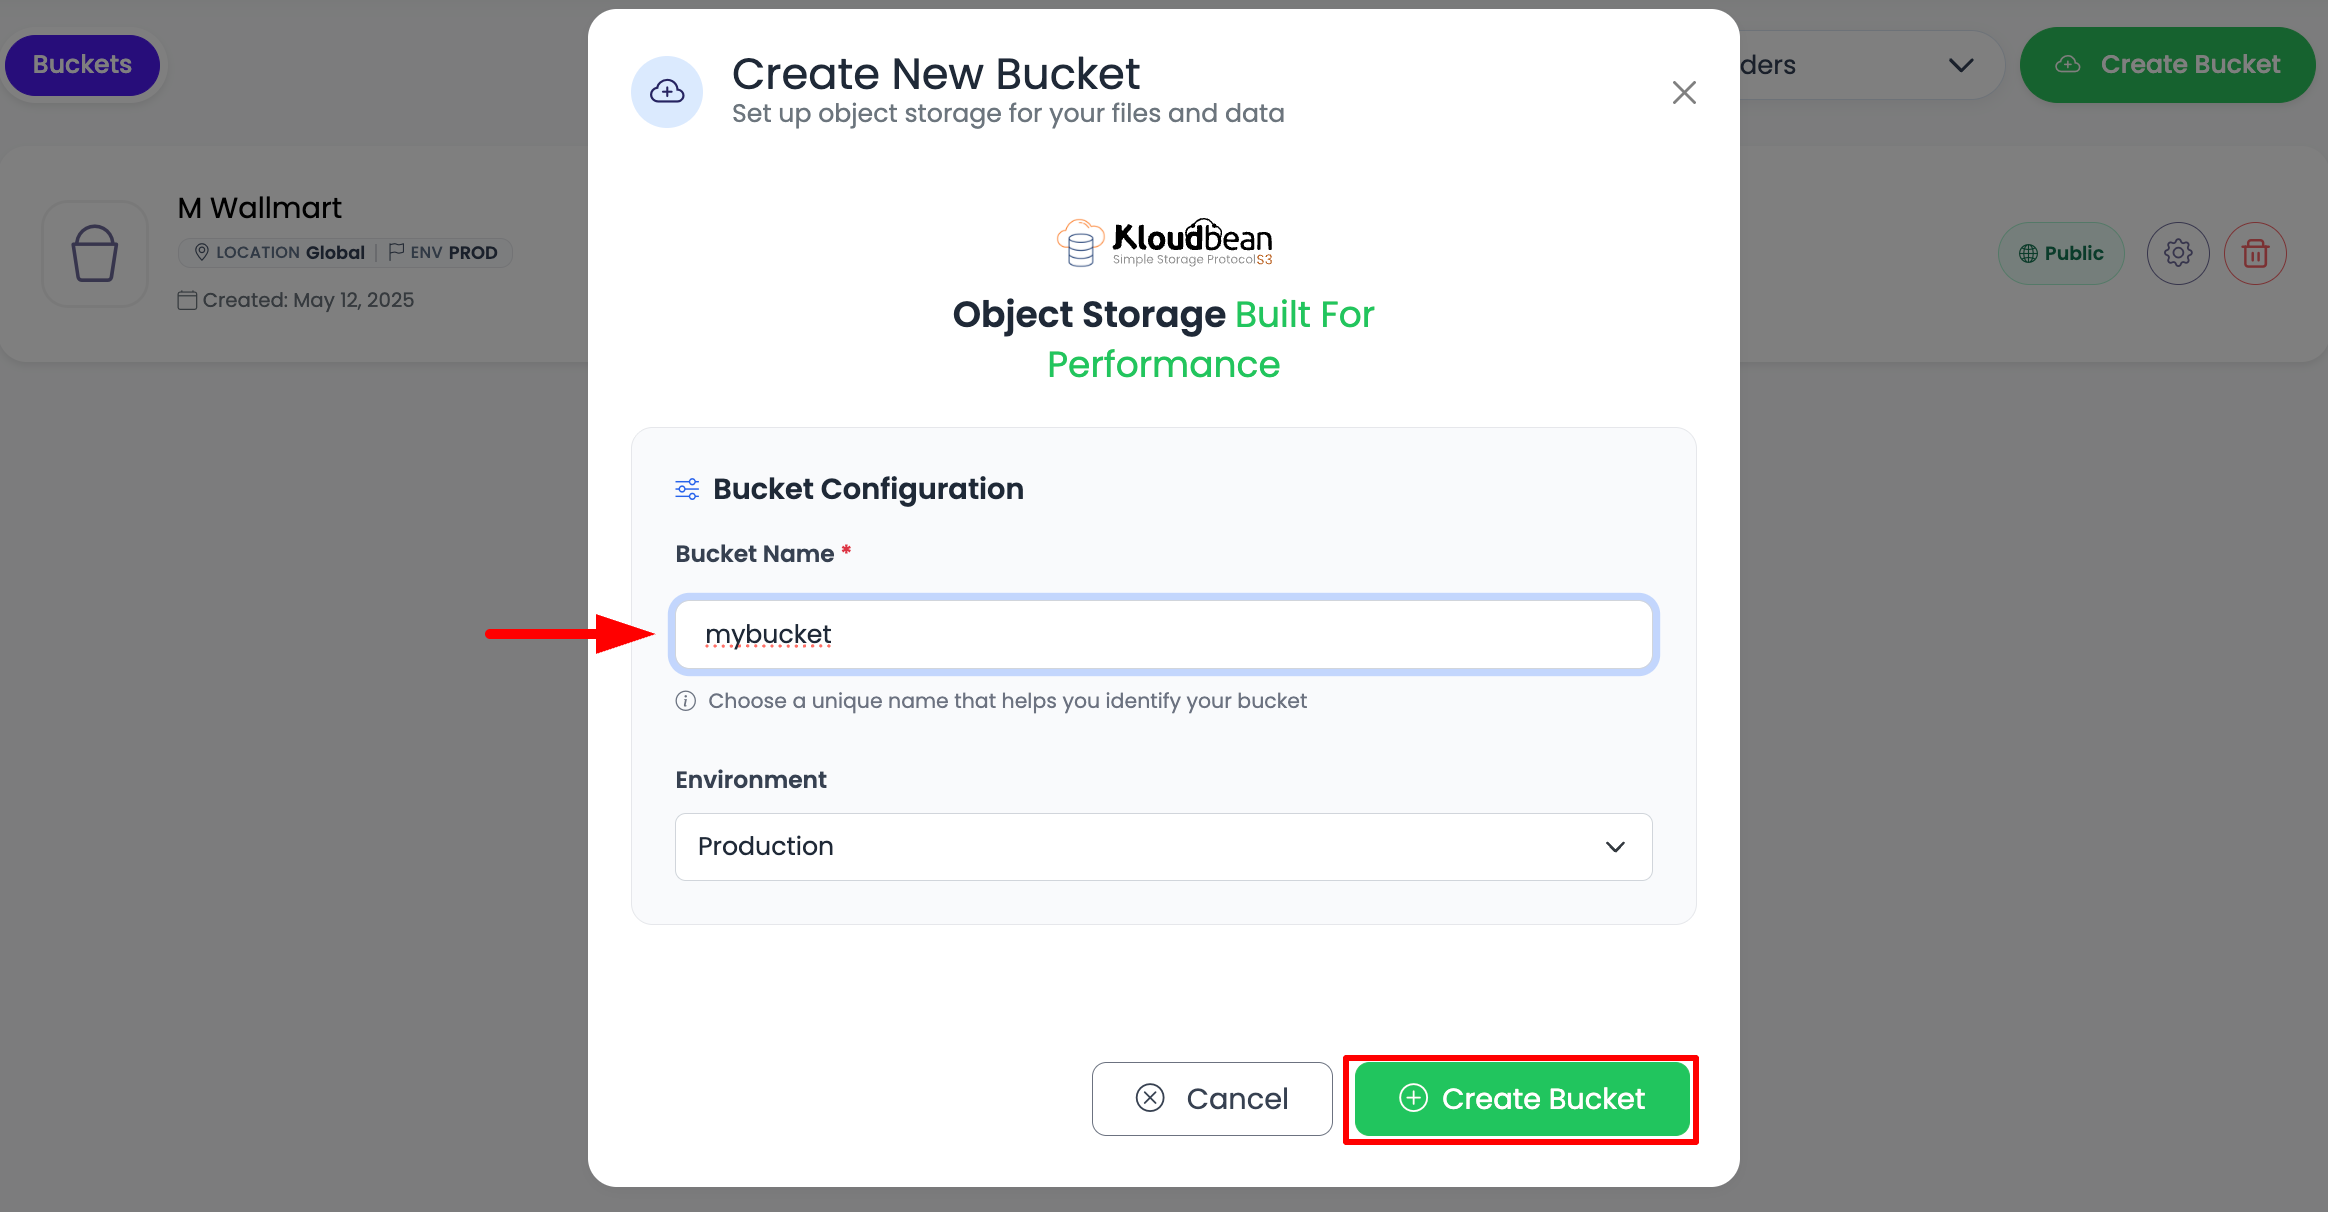
Insert your bucket name. Make sure it does not contain any spaces or special characters—they are not accepted.
Bucket Naming Rules:
- Must be unique across all KloudBean buckets
- 3-63 characters long
- Lowercase letters, numbers, and hyphens only
- Must start and end with a letter or number
- Cannot contain spaces or special characters
- Examples:
my-bucket,app-storage,media-files-2024
Step 4: Bucket Created
Once the bucket is created, it will be listed in the buckets page where you can open it and use it for further purposes.
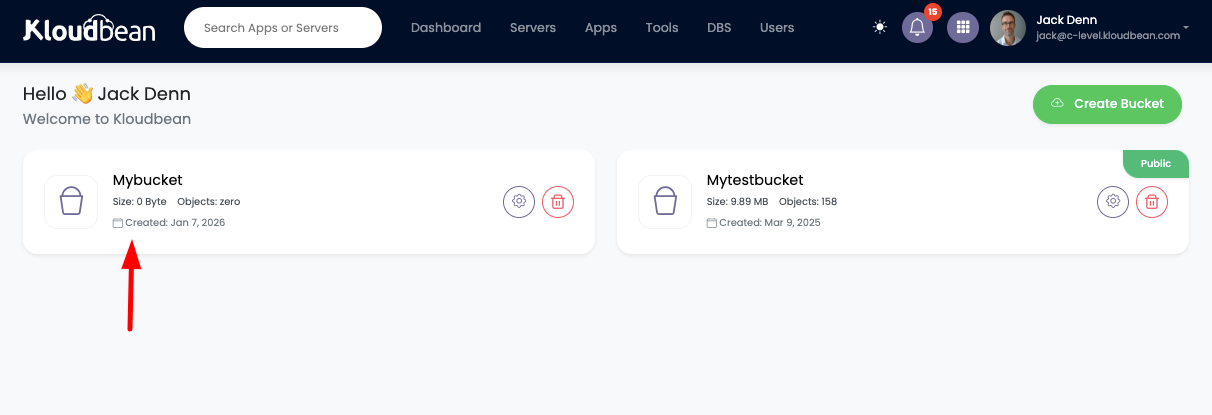
Congratulations! Your bucket is ready now.
Post-Creation
After creating your bucket, you can:
- Upload Objects: Start uploading files and objects to your bucket
- Configure Permissions: Set up access permissions for your bucket
- Manage Objects: Organize and manage your stored objects
- Set Up Access: Configure API access keys if needed
Bucket Naming Best Practices
Good Bucket Names
- Descriptive:
user-uploads,product-images,app-backups - Organized:
app-storage-prod,media-files-2024 - Consistent: Follow a naming convention across all buckets
- Lowercase: Use lowercase letters only
Avoid
- Spaces: No spaces in bucket names
- Special Characters: Avoid special characters (only hyphens are allowed)
- Generic Names: Avoid generic names like
bucket1ortest - Personal Information: Don't include sensitive data in bucket names
Troubleshooting
Bucket Name Already Exists
- Choose Different Name: Bucket names must be unique across KloudBean
- Check Existing Buckets: Review your existing buckets list
- Use Suffix: Add a suffix like date or number (e.g.,
my-bucket-2024) - Try Alternative: Use an alternative naming convention
Bucket Creation Fails
- Check Name Format: Verify the name follows the rules (no spaces, no special characters)
- Review Length: Ensure the name is between 3-63 characters
- Refresh Page: Try refreshing the page and creating again
- Contact Support: Get assistance if issues persist
Cannot See New Bucket
- Refresh Page: Wait a few seconds and refresh the page if the new bucket doesn't appear
- Check Bucket List: Scroll through the buckets list to find your new bucket
- Verify Creation: Check if you received a confirmation message
Next Steps
- Upload Objects: Learn how to upload objects to your bucket - visit Uploading Objects
- Manage Permissions: Configure bucket access - visit Managing Bucket Permissions
- Generate API Keys: Set up API access for programmatic access - visit Generating Access API Keys