Uploading Objects
Learn how to upload files and folders to your S3-compatible storage bucket on KloudBean. Once your bucket is ready, you can easily upload objects and folders through the web interface.
Overview
Once your bucket is ready, you can upload objects as well as folders. KloudBean provides a simple web interface for uploading files and folders directly to your bucket, with support for drag-and-drop functionality.
Prerequisites
- An existing S3 bucket on KloudBean that is ready to use
- Files or folders ready to upload
- Access to bucket with upload permissions
Uploading Objects
Step 1: Access Objects Tab
To upload, navigate to your bucket → Objects tab.
Here you will see all the objects in the bucket, which is empty at the moment.
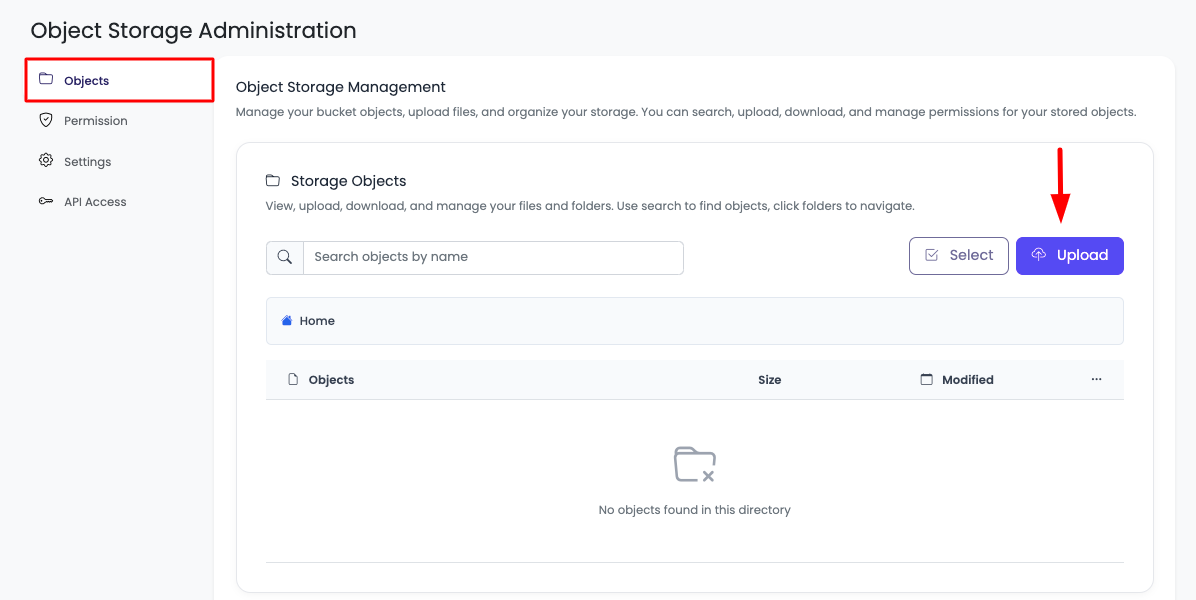
Step 2: Initiate Upload
Click on "Upload" to upload files or folders.
Step 3: Select Files or Folders
Once you click, it will open a prompt where you will select either:
- Select Files: Choose individual files to upload
- Select Folder: Choose an entire folder to upload
Select accordingly and then click "Upload File".

Step 4: Drag and Drop (Optional)
Optionally, you can also drag and drop your files on this prompt, and they will be added automatically.
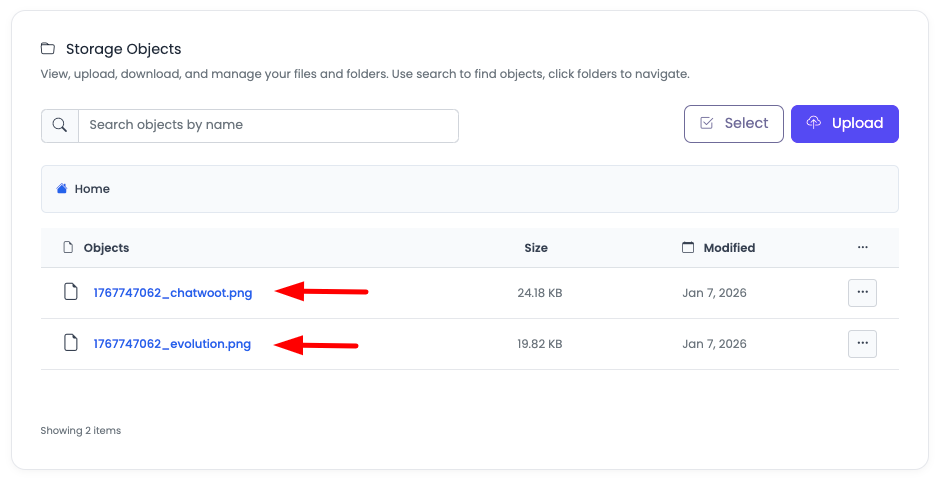
Step 5: Upload Complete
You will see that objects are uploaded and are visible in the bucket.
To view an object, you can simply click on the object, and it will open.
Upload Features
File Selection
- Single File: Select individual files to upload
- Multiple Files: Select multiple files at once
- Entire Folders: Upload complete folder structures
- Drag and Drop: Drag files directly into the upload area
Upload Process
- Progress Tracking: Monitor upload progress in real-time
- Automatic Organization: Files maintain their folder structure
- Immediate Availability: Files are available immediately after upload
- Error Handling: Failed uploads are clearly indicated
Viewing Uploaded Objects
Accessing Objects
Once objects are uploaded:
- View in List: All objects are listed in the Objects tab
- Click to Open: Click on any object to open/view it
- Object Details: View object name, size, and upload date
- Navigate Folders: Browse through folder structures if uploaded
Object Management
- View Objects: Click on objects to view them
- Download Objects: Download objects directly from the bucket
- Manage Permissions: Set permissions for individual objects
- Organize: Create folders and organize objects
Best Practices
- Organize Files: Use folders to organize your files logically
- Use Descriptive Names: Name files clearly for easy identification
- Check File Sizes: Be aware of file size limits before uploading
- Verify Uploads: Verify that files uploaded correctly after completion
- Organize Structure: Plan your folder structure before uploading
- Use Folders: Upload folders to maintain directory structures
- Review Objects: Review uploaded objects to ensure they're correct
Troubleshooting
Upload Fails
- Check Permissions: Verify you have upload permissions for the bucket
- File Size: Check if file size exceeds limits
- Network Issues: Ensure stable network connection
- Storage Space: Verify bucket has available storage space
- File Format: Ensure file format is supported
Files Not Appearing
- Refresh Page: Refresh the page to see newly uploaded files
- Check Upload Status: Verify upload completed successfully
- Wait a Moment: Allow a few seconds for files to appear
- Check Folder: Ensure you're looking in the correct folder
Cannot View Objects
- Check Permissions: Verify object permissions allow viewing
- Browser Issues: Try a different browser or clear cache
- Object Format: Ensure object format is supported by browser
- Contact Support: If issues persist, contact support
Next Steps
- Learn about Accessing and Downloading Objects
- Explore Updating Object Permissions for access control
- Review Updating Bucket Permissions for bucket-level settings