Launching and Deploying New Static Site
Learn how to launch and deploy static websites on KloudBean. This guide covers creating a new static site, uploading your site artifacts, and managing deployments.
Overview
What is a Static Site?
A static site is a website that consists of fixed content delivered to users exactly as stored. Unlike dynamic websites that generate content on-the-fly using server-side processing, static sites are pre-built HTML, CSS, and JavaScript files that are served directly to visitors. Static sites are ideal for portfolios, documentation sites, landing pages, blogs, and marketing websites. They offer faster load times, better security, easier deployment, and lower hosting costs compared to dynamic sites.
KloudBean Static Site Hosting
On KloudBean, it's very easy to use the free feature of deploying static sites. All you have to do is launch a static app and upload your site artifacts into it. You can make multiple deployments—each time you upload content, it creates a new deployment. You can also add custom domains to your static sites for a professional web presence.
Launching Static Site
Step 1: Access Static Site Hosting
In order to launch a static site, navigate to the dashboard and click on the "Static Web sites hosting" card.
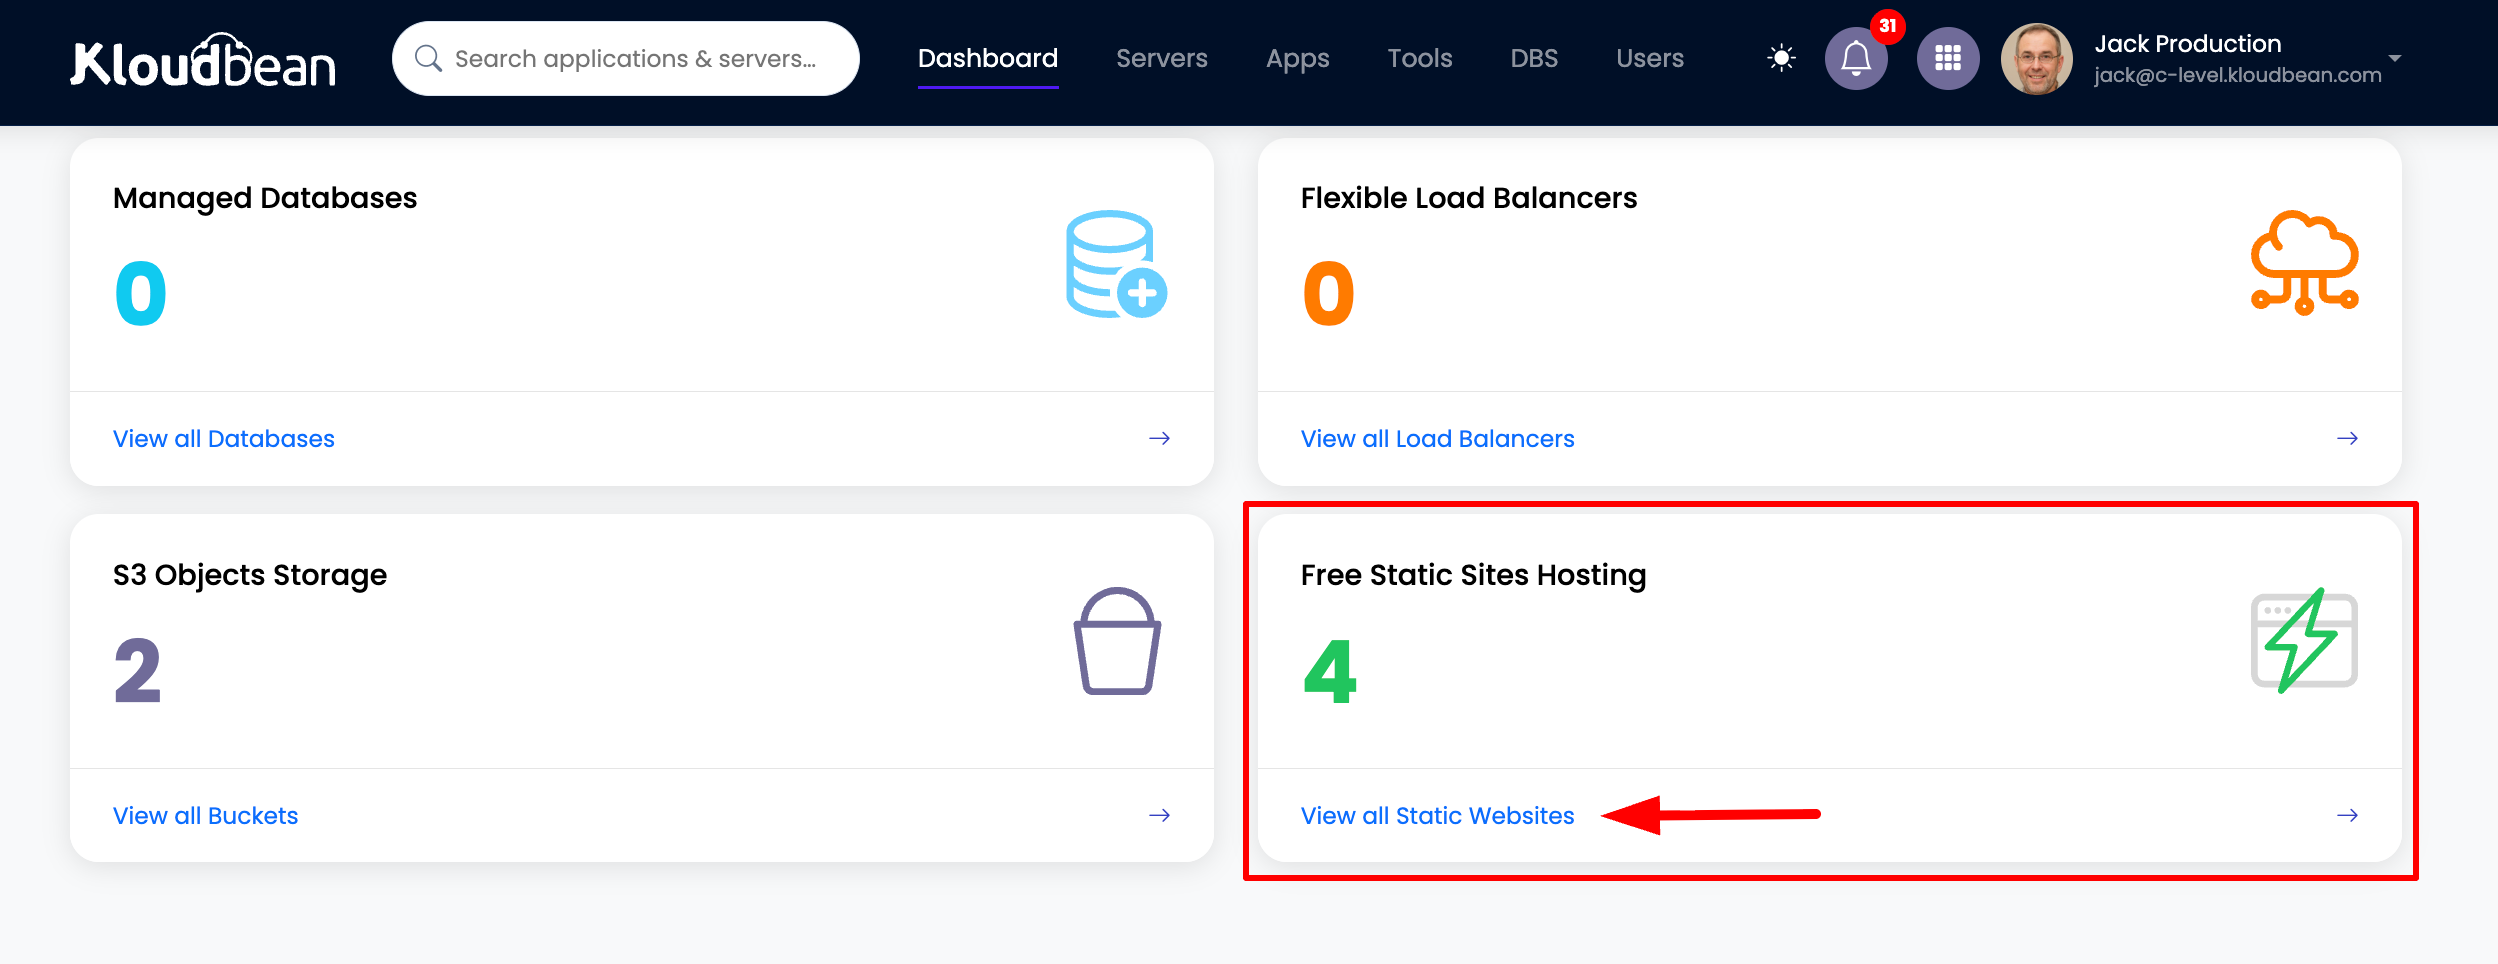
Once clicked, you will be on the all static sites page.

This is where all your current static sites are listed (if you have any). In order to add a new site, click "Add static site".
Step 2: Create New Static Site
Once you click the "Add static site" button, a prompt will open asking you to add a static site name.
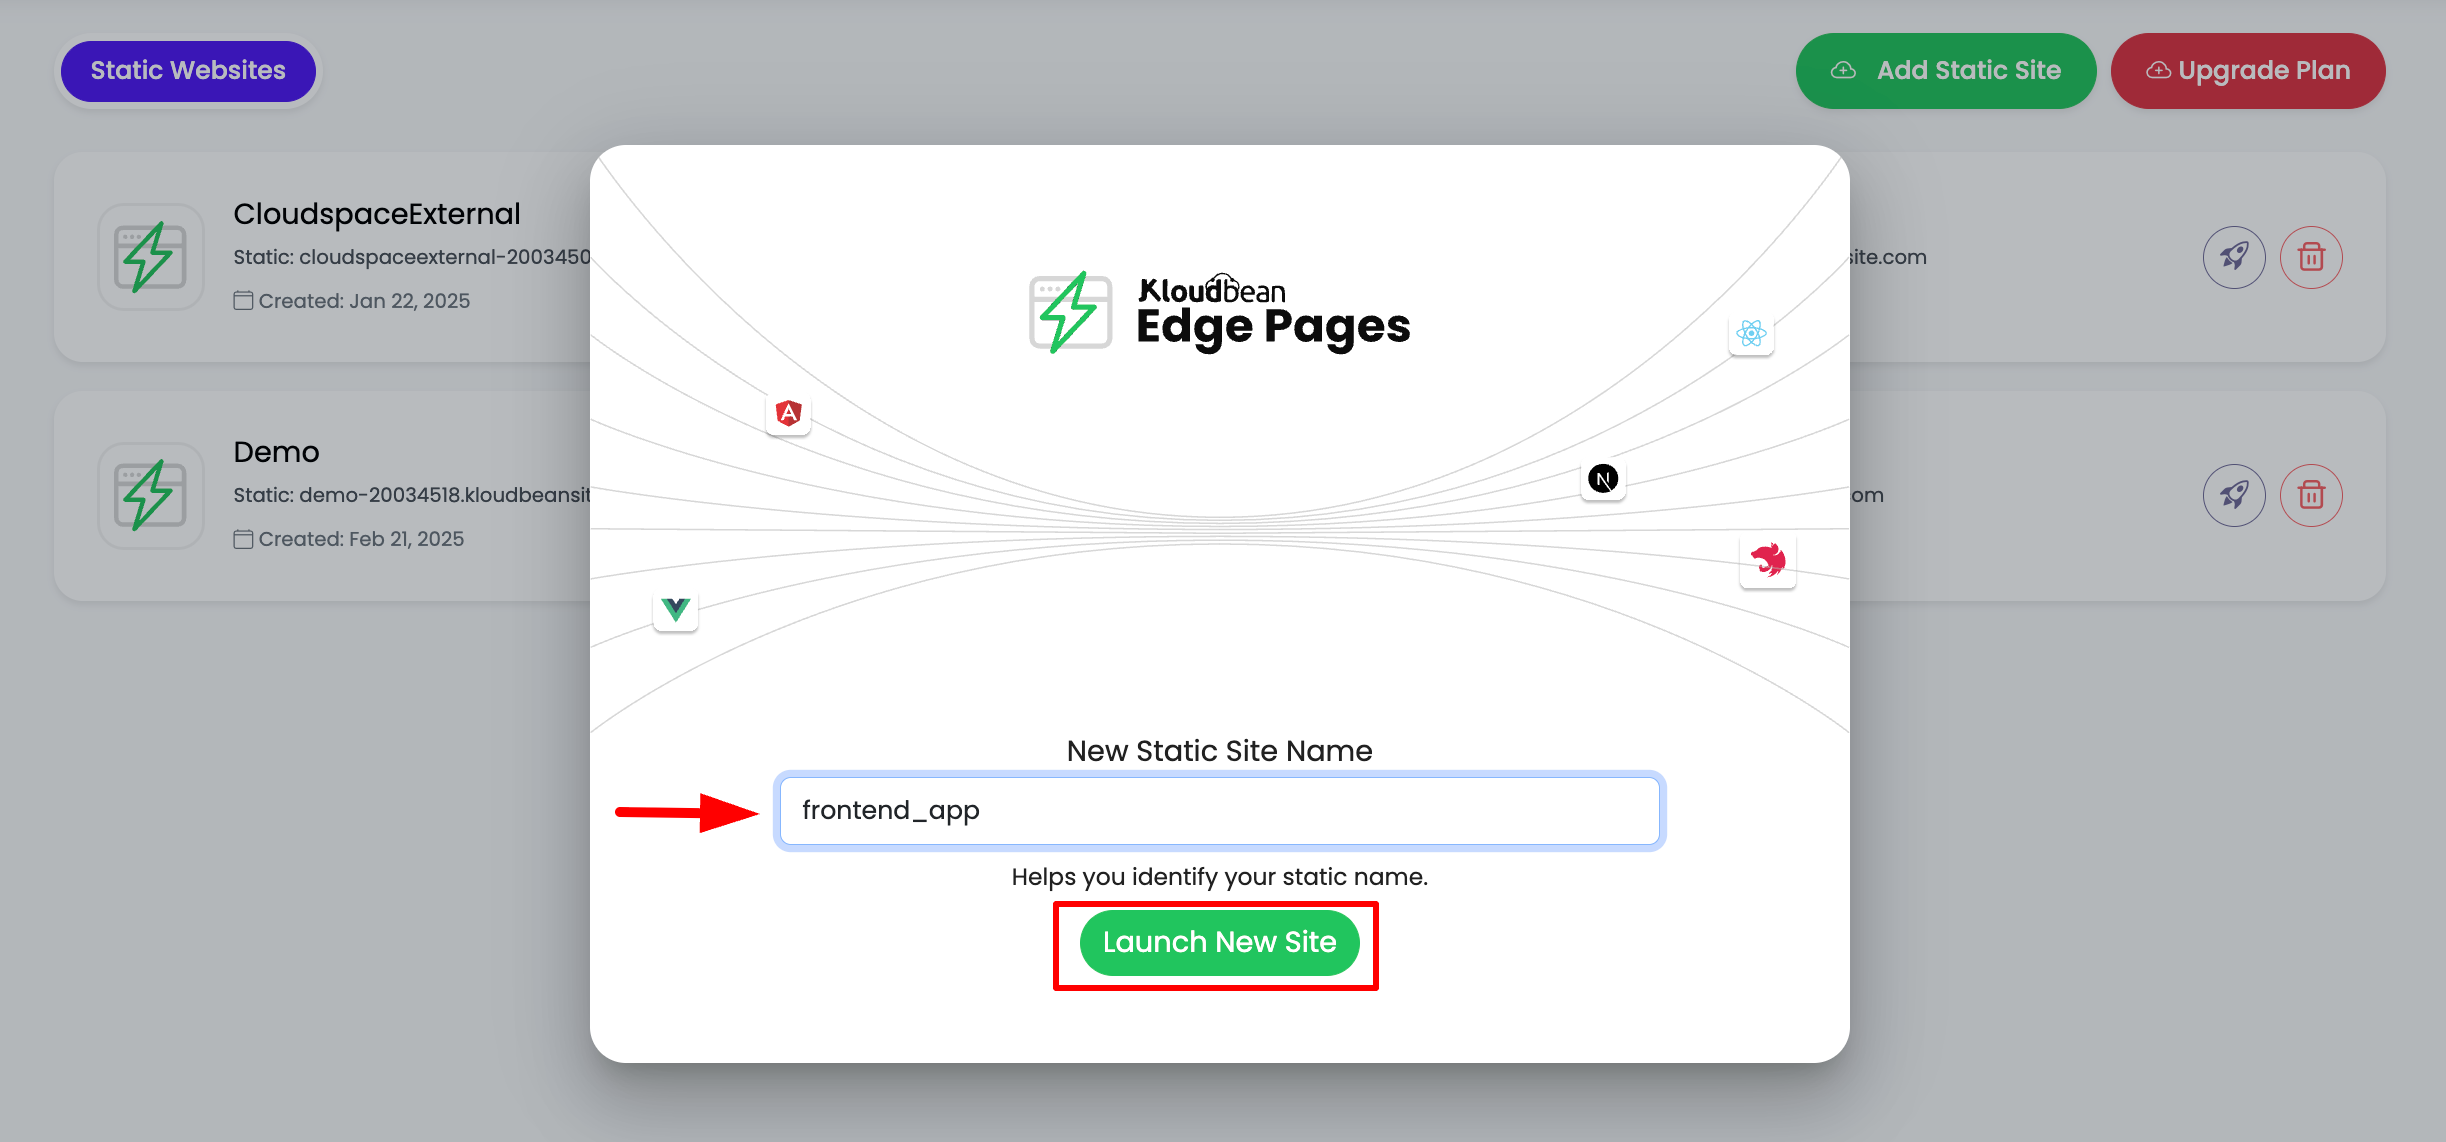
Add your site name and click "Launch new site". Make sure not to add any unnecessary spaces or special characters, as the name will be added to the URL as well.
Step 3: Wait for Initialization
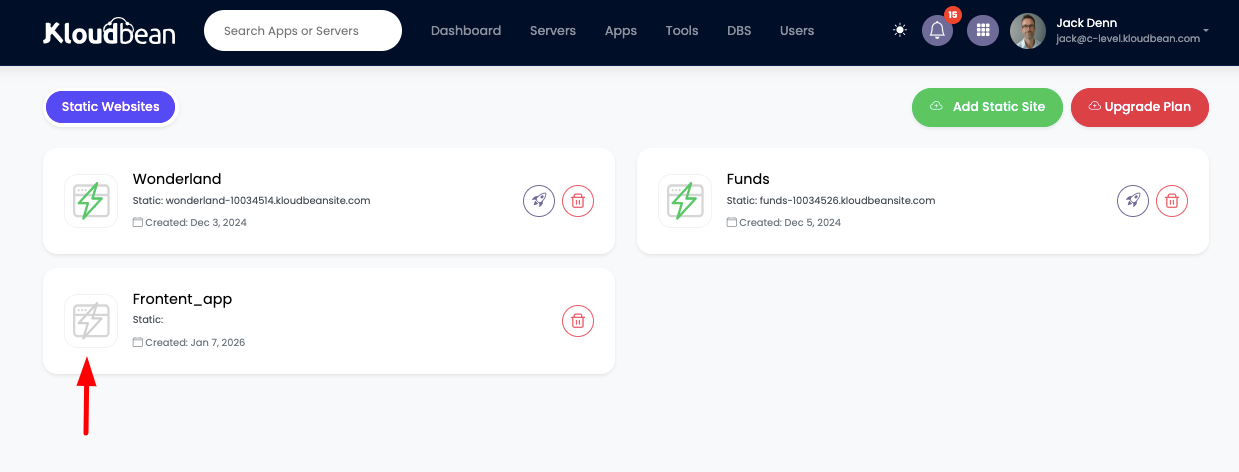
Once added, wait for a few seconds and refresh the page if the new site does not appear. However, you will see the new site is created, but its icon color will be Gray. This means the site is still not complete—it is getting initialized and global CDNs are being enabled.
Once you click on the site, you will be inside the Website Administration section.
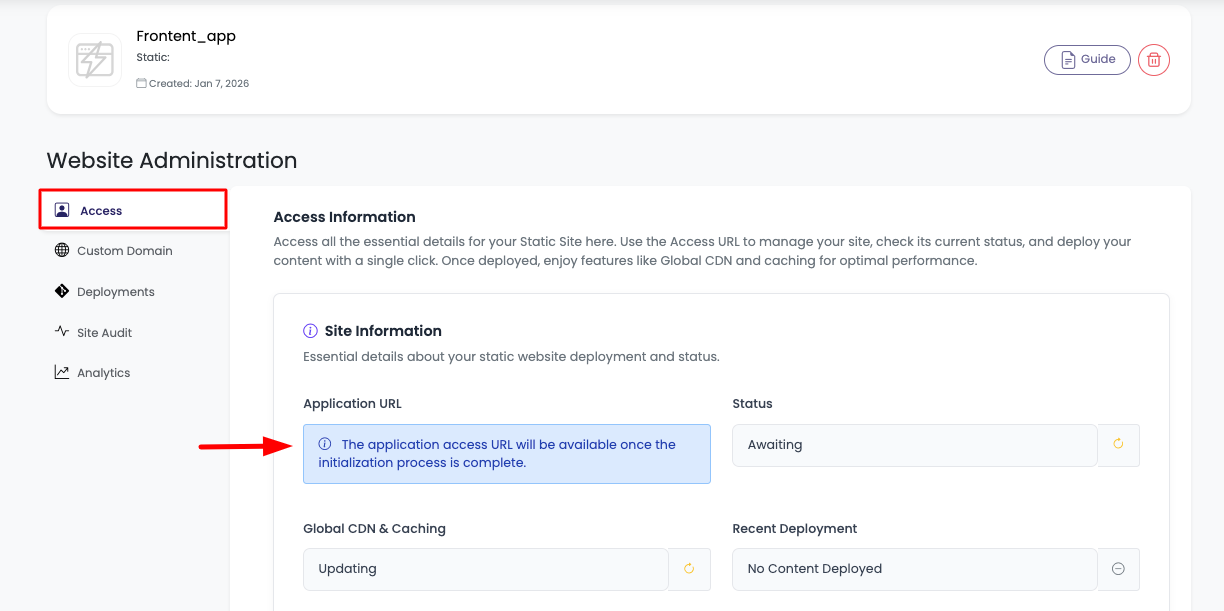
Step 4: Site Initialization Complete
On this page, you will see the site is still getting initiated. You have to wait for 5-10 minutes until it completes.
Once done, you will see:
- Application URL: Your site's default URL
- Status: Active
- Global CDN & Caching: Enabled
- Accessibility Status: Live (means site is live)
- Recent Deployment: Which might be empty as it's a fresh creation
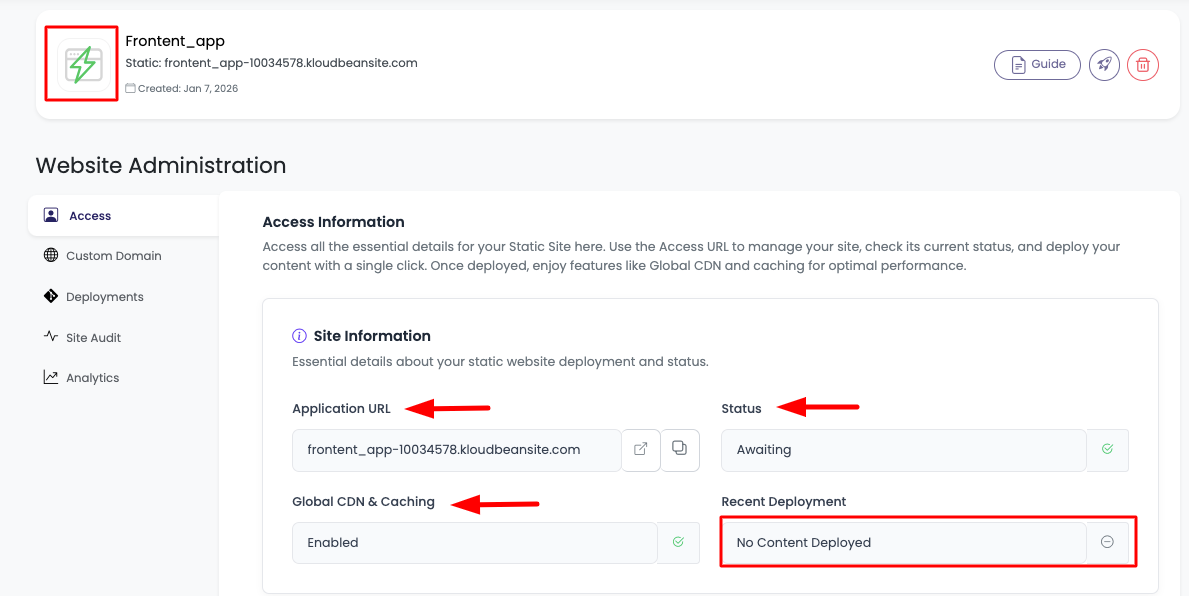
Also, the site icon will become green. This means you can now access the site, and it is now deployment-ready.
Uploading Site Content (Artifacts)
Step 1: Access Deployment Section
In order to upload your first site or make a deployment, scroll down to the "Deployment" section where you will have a button "Deploy Now".
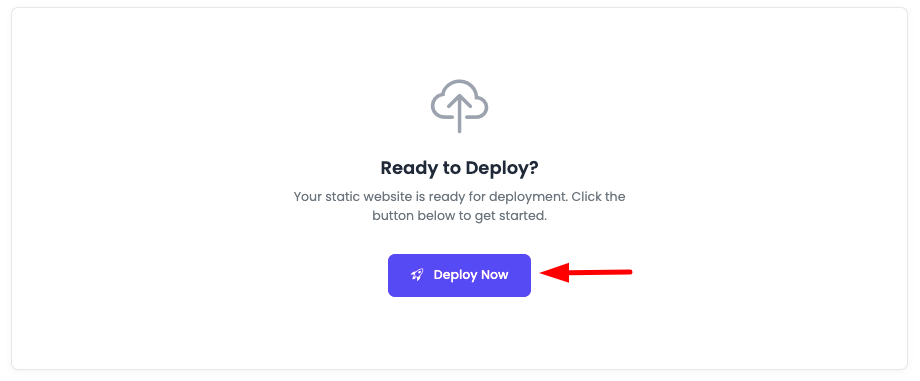
Click on "Deploy Now". It will take you to the "Deployment" tab.
Step 2: Select ZIP File
On the deployment tab, there is a button to select a ZIP file from your local machine.
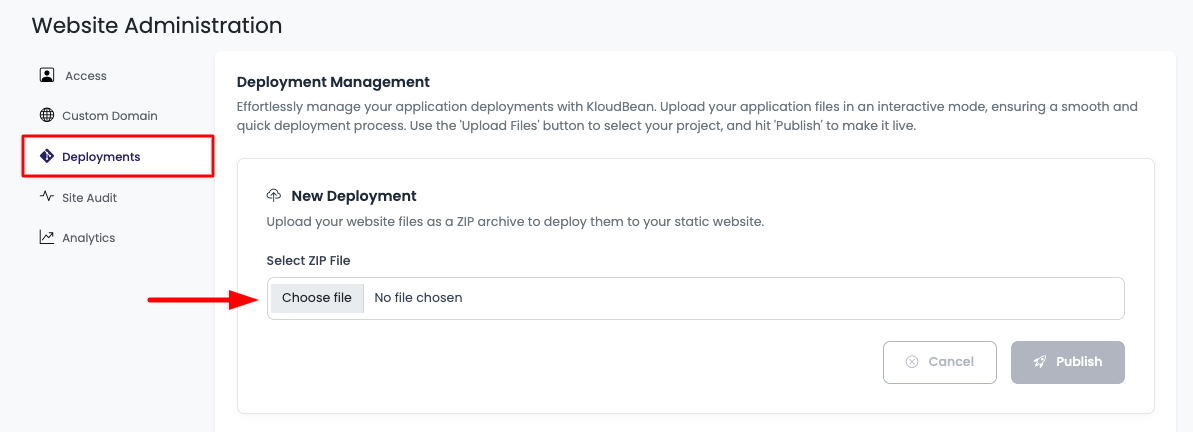
Click on "Choose File" and select a file from your local machine.
Important Requirements:
- Only upload ZIP files—no other format is acceptable
- Individual file size cannot be more than 25MB
- Total file size cannot be larger than 500MB
Step 3: Upload and Publish
Once the file is selected, click the "Publish" button.
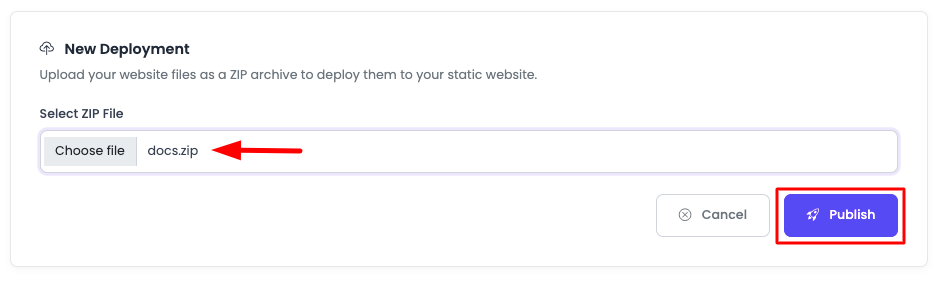
It will start uploading the file. Your file should not have any issues, such as:
- It does not contain
index.htmlorindex.htmfile in any directory
Wherever the system finds the index file, that will be considered as the root directory of the site.
Step 4: Deployment Complete
Once files are uploaded 100%, you will see the deployment status in the deployment section, which will also show:
- Number of files
- Deployment status
- Option to view files
- Access that specific deployment link
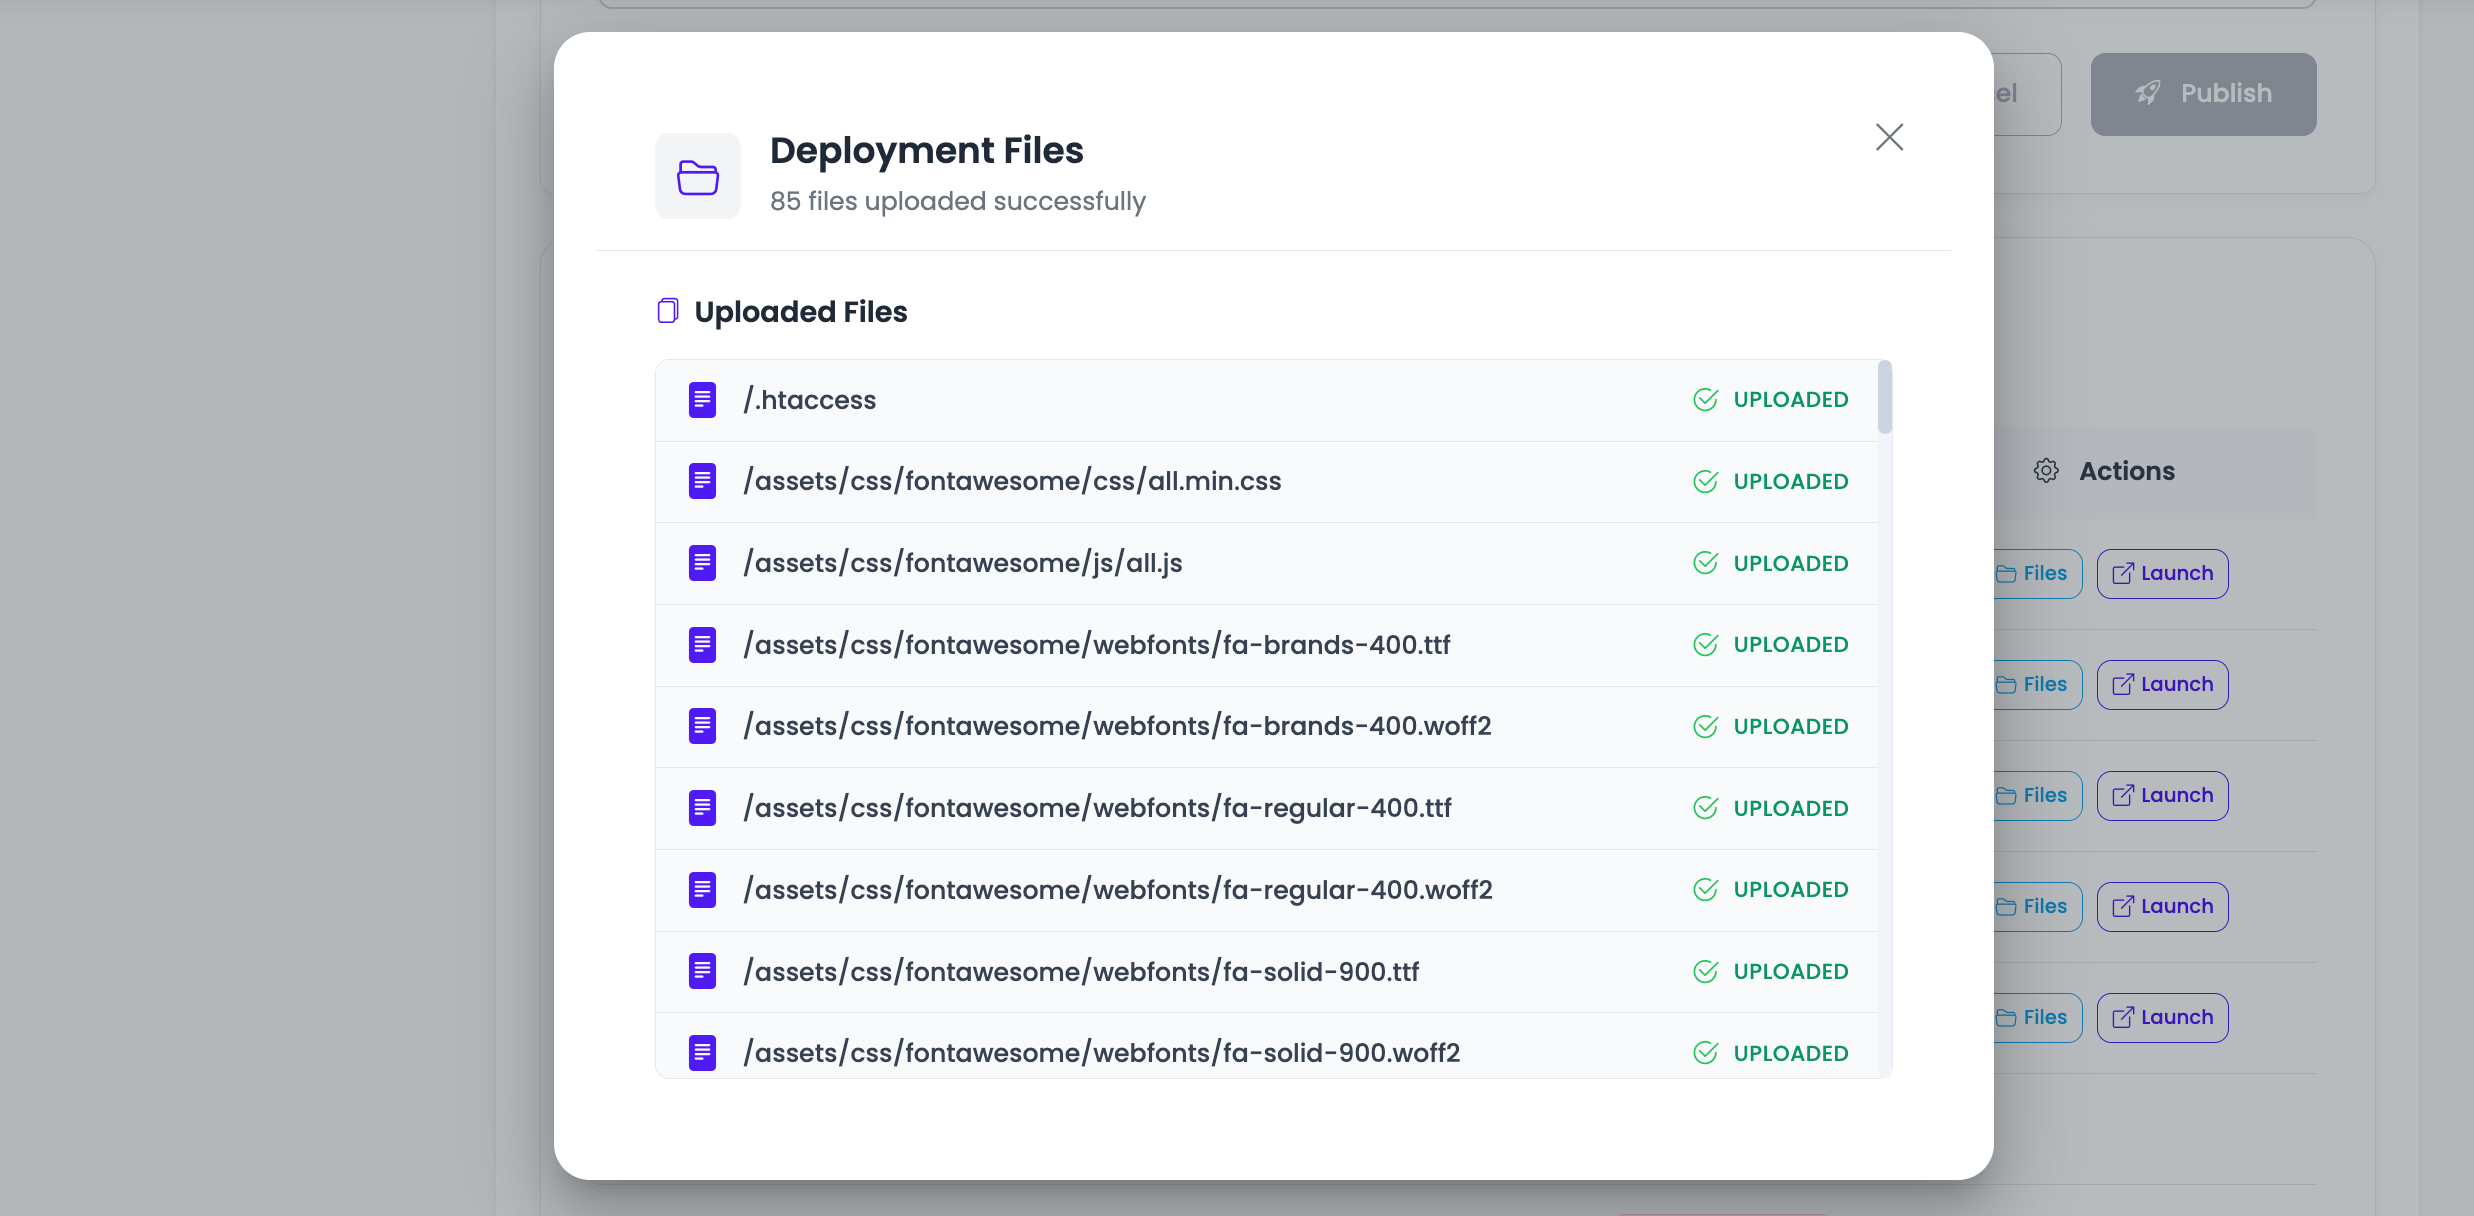
If you click on "Files", then it will open a prompt with the list of all the files in this deployment.
Once the deployment was complete, your main site will be showing the latest deployment content.
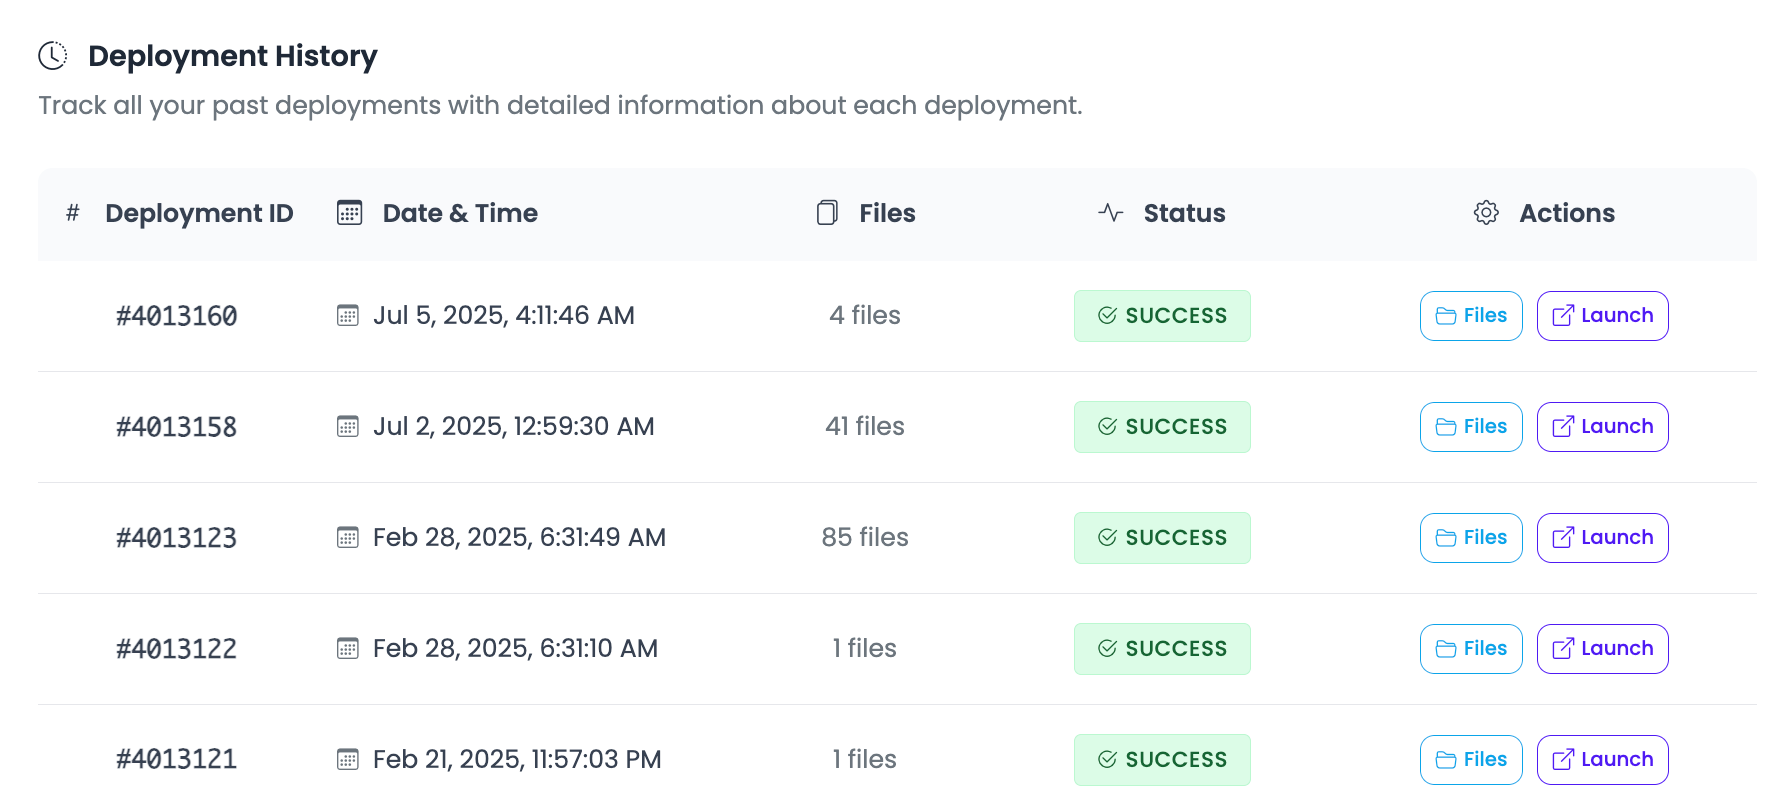
Multiple Deployments
You can make multiple deployments to your static site. Each time you upload new content, it creates a new deployment entry in the deployment history. You can:
- View all previous deployments
- Access specific deployment URLs
- View files in each deployment
- Track deployment status and timestamps
Next Steps
- Learn about Adding Custom Domains
- Explore site management and optimization options