OpenAI Compatibility
Kertex AI exposes an OpenAI-compatible API in addition to the native Gemini surface. Point any OpenAI client or tool at the environment's /v1 base URL, use your Kloudbean token as the API key, and it works — same models, same limits, same metering as the native endpoint.
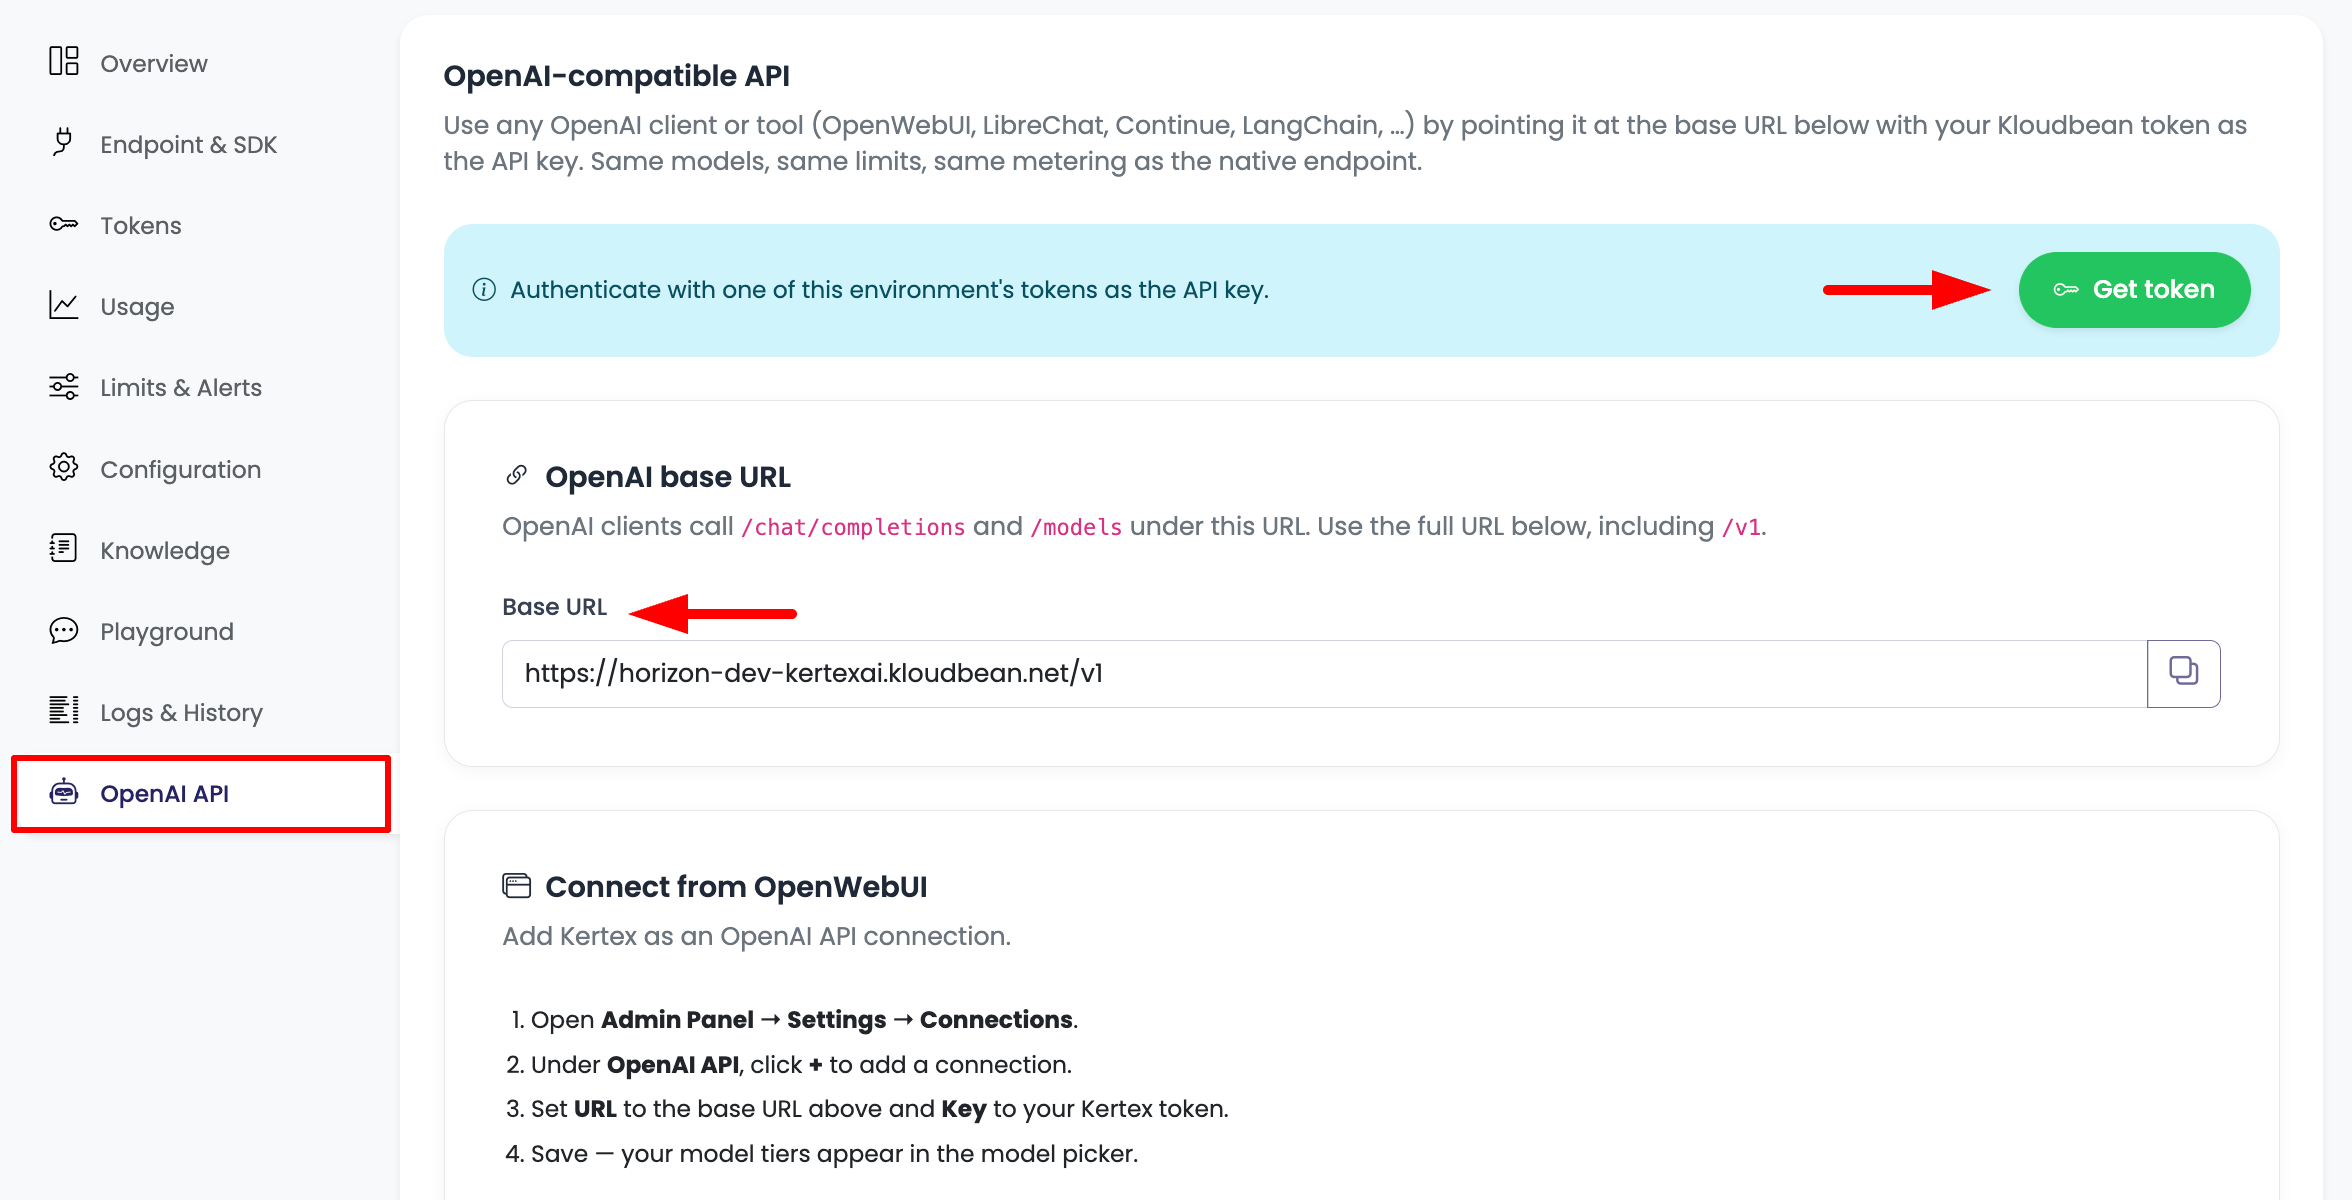
Base URL
OpenAI clients call /chat/completions and /models under this URL. Use the full URL including /v1:
https://<environment-host>/v1
Example:  https://horizon-dev-kertexai.kloudbean.net/v1
This is different from the native Gemini base URL (which has no version) — OpenAI clients need the /v1. You can copy the exact URL from the OpenAI API tab in your console.
Authentication
Use one of the environment's tokens as the API key. OpenAI clients send it as Authorization: Bearer <token>, which Kertex accepts natively. The Get token button on the OpenAI API tab takes you straight to token management.
Supported endpoints
| Endpoint | Purpose |
|---|---|
POST /v1/chat/completions | Chat completions (streaming and non-streaming). |
GET /v1/models | Lists your tier aliases so clients can populate a model picker. |
Pass a Kertex tier alias (kertexai-fast, kertexai-advanced, kertexai-light) as the model.
Using the OpenAI Python SDK
pip install openai
from openai import OpenAI

client = OpenAI(
    base_url="https://horizon-dev-kertexai.kloudbean.net/v1",
    api_key="kb_dev_your_token_here",
)

resp = client.chat.completions.create(
    model="kertexai-fast",
    messages=[
        {"role": "system", "content": "You are a helpful assistant."},
        {"role": "user", "content": "Give me one tip for faster API responses."},
    ],
)
print(resp.choices[0].message.content)
Streaming works the same way:
stream = client.chat.completions.create(
    model="kertexai-fast",
    messages=[{"role": "user", "content": "Count to five."}],
    stream=True,
)
for chunk in stream:
    delta = chunk.choices[0].delta.content or ""
    print(delta, end="", flush=True)
curl
curl "https://horizon-dev-kertexai.kloudbean.net/v1/chat/completions" \
  -H "Content-Type: application/json" \
  -H "Authorization: Bearer kb_dev_your_token_here" \
  -d '{
        "model": "kertexai-fast",
        "messages": [{"role": "user", "content": "Hello!"}]
      }'
Connect from OpenWebUI
- Open Admin Panel → Settings → Connections.
- Under OpenAI API, click + to add a connection.
- Set URL to the
/v1base URL above and Key to your Kertex token. - Save — your model tiers appear in the model picker.
The same pattern works for LibreChat, Continue, LangChain, and any other OpenAI-compatible client: set the base URL to https://<environment-host>/v1 and the API key to your Kertex token.
What's preserved
Requests through the OpenAI layer run the same pipeline as native calls — token authentication, spend caps, rate limits, and metering all apply identically. Only the wire format differs; Kertex translates between OpenAI and Gemini for you. In the Logs & History tab these calls appear with the action openai.chat.completions.
Next steps
- Limits & Alerts → — the caps that apply to OpenAI-client traffic too.
- Supported Models → — the tier aliases to use as
model.