A custom domain provides a branded, professional touch for your application’s web traffic. This guide explains how to associate a custom domain with your virtual load balancer (vLB) in Kloudbean. You’ll learn how to configure DNS settings, update domain records, and ensure that your application traffic is seamlessly routed through your custom domain, offering a more personalized experience for your users.
Now, let's go ahead and see a demo of how we can update a custom domain for virtual load balancer.
Step 1: Access Virtual LBs section.
When we select the FLB where we are wish to view or update virtual LB's, Go to the tab Virtual LB, where all vLB belongs to that FLB are listed.
Select the Virtual LB that we want to update custom domain for.
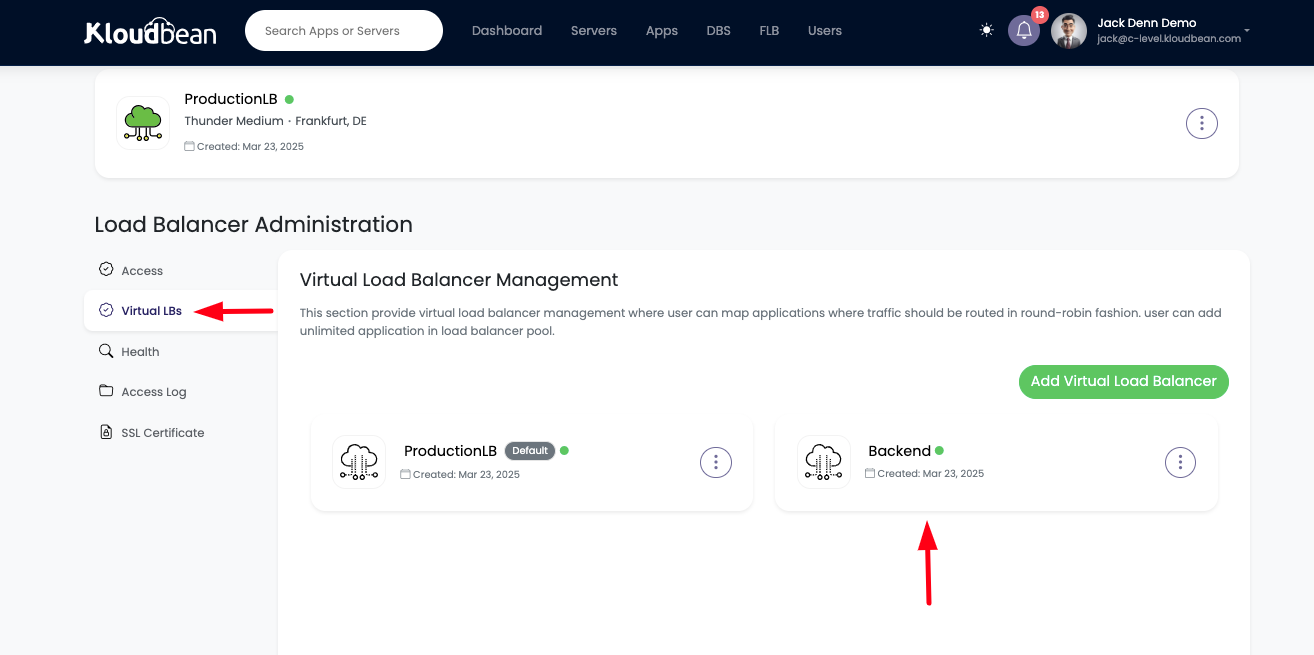
Step 2: Select the required Virtual Load Balancer.
Note following 2 fields, that are very important in order to add custom domain for virtual load balancer:
Endpoint: This URL we will use as CNAME value to point custom domain to virtual load balancer. Copy this url to add it as cname record in respective DNS provider.
Domain: This is where we will add out custom domain. We will only be able to add domain if our CNAME record is pointed properly.
Let's add custom domain and try to save it.
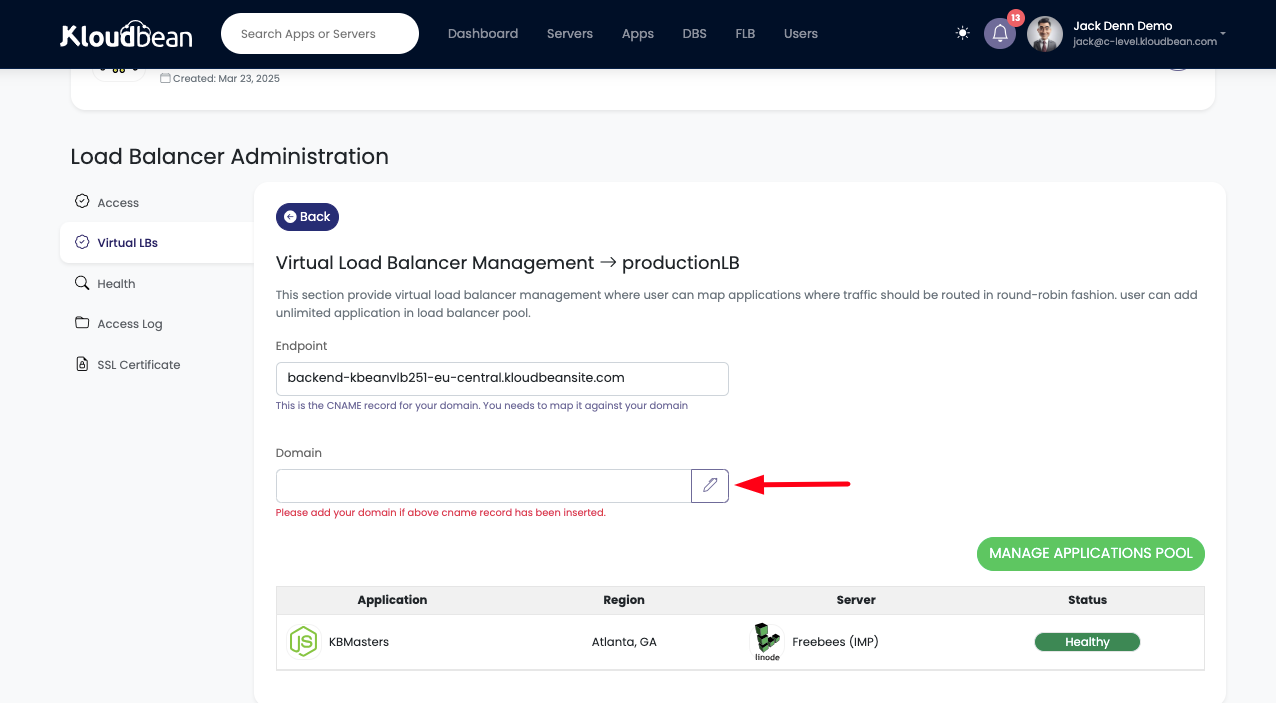
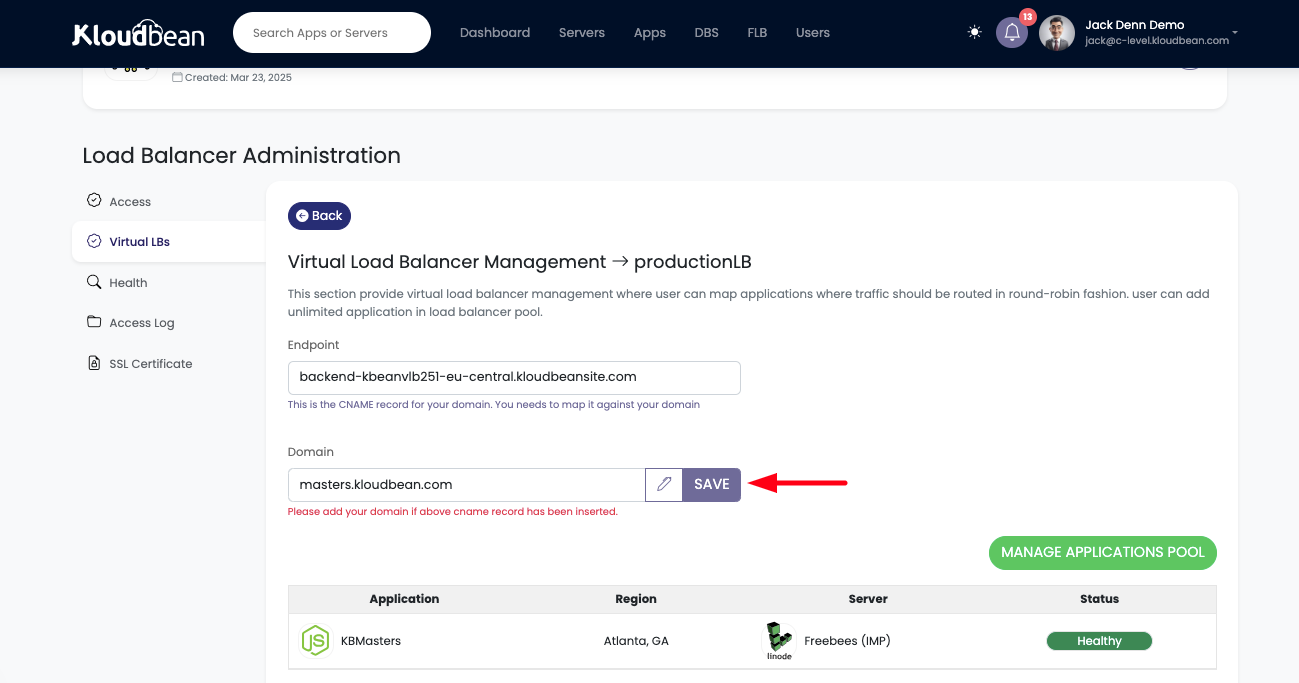
Step 3: Enter the custom domain and Save.
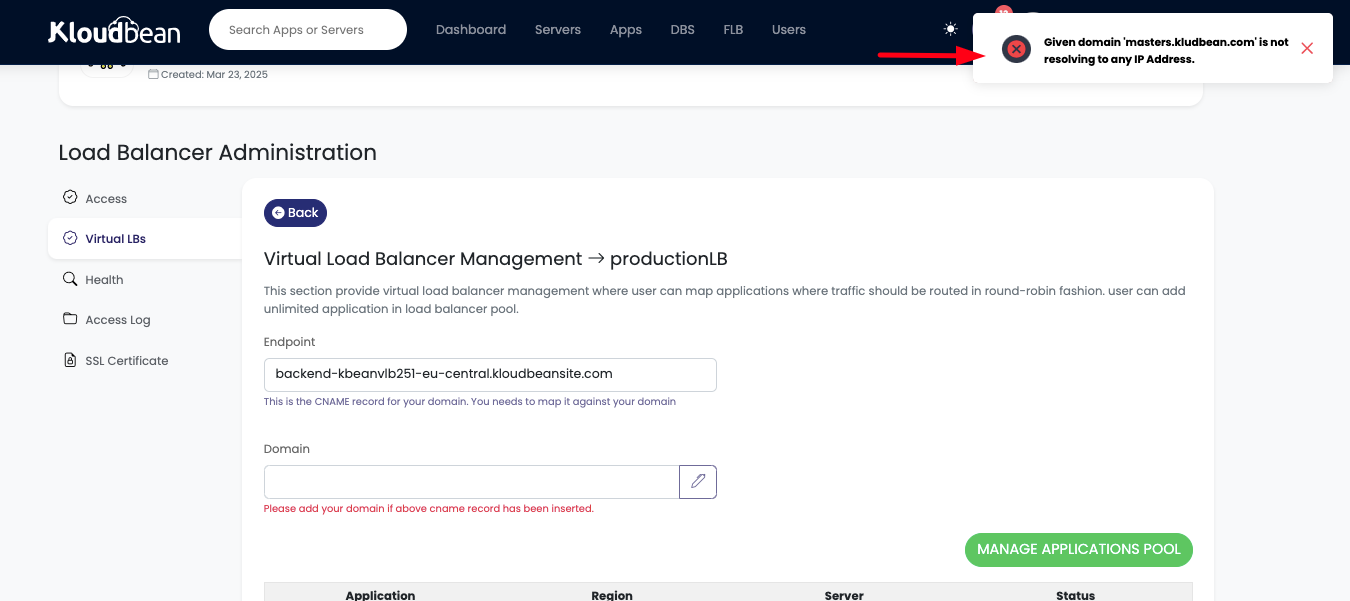
At this point when we add custom domain, before pointing CNAME record and try to save, we will face an error, it's because as of yet we have not added CNAME record on respective DNS provider. Kloudbean do not allow to domain until DNS is added.
When we are trying to Save custom domain, at this point we might face this error, stating;
Error: Given domain is not resolving to any IP Address.
So in order to add domain, we must first update DNS.
Step 4: Point domain to vLB endpoint as CNAME record.
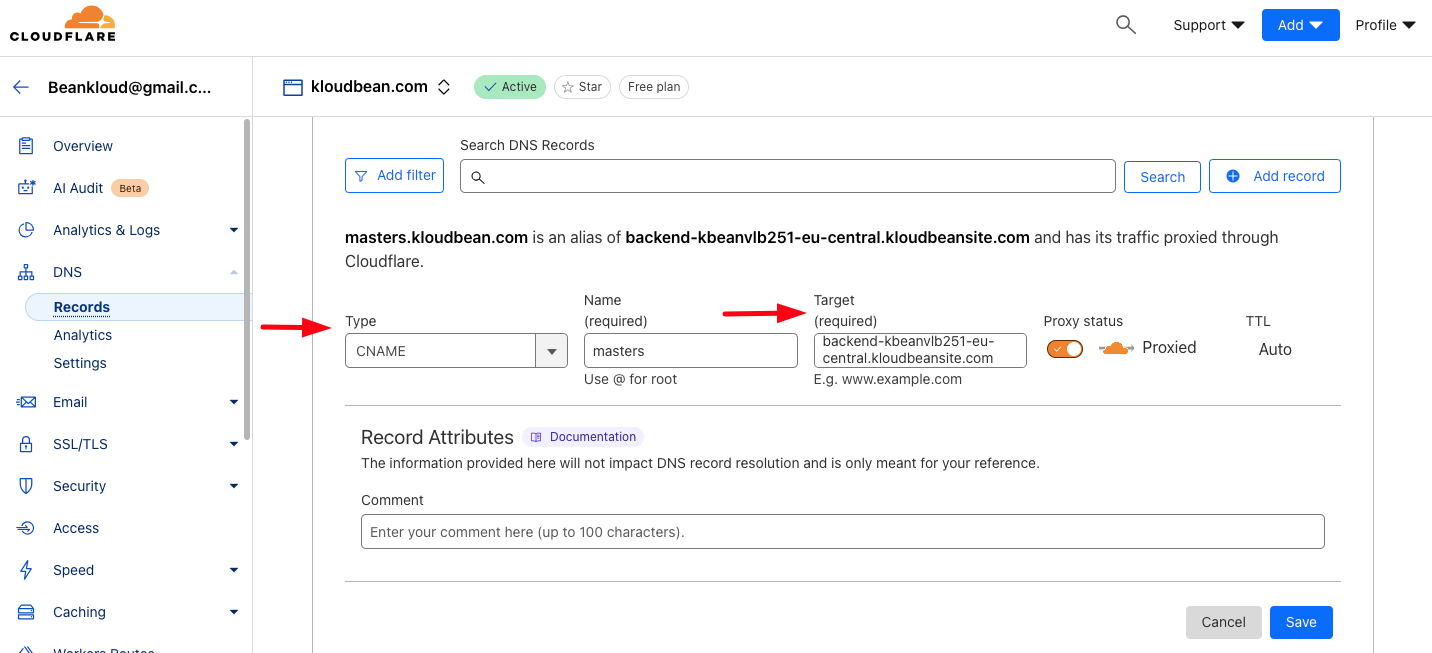
In order to add DNS record to point custom domain to vLB endpoint. we are going to add CNAME record on Cloudflare.
In this demo;
my custom domain is masters.kloudbean.com
So I will add following DNS CNAME record
Type: CNAME
Name: masters
Target: backend-kbeanvlb251-eu-central.kloudbeansite.com
Hit Save button to add this record.
Step 5: Add and Save domain after adding CNAME record.
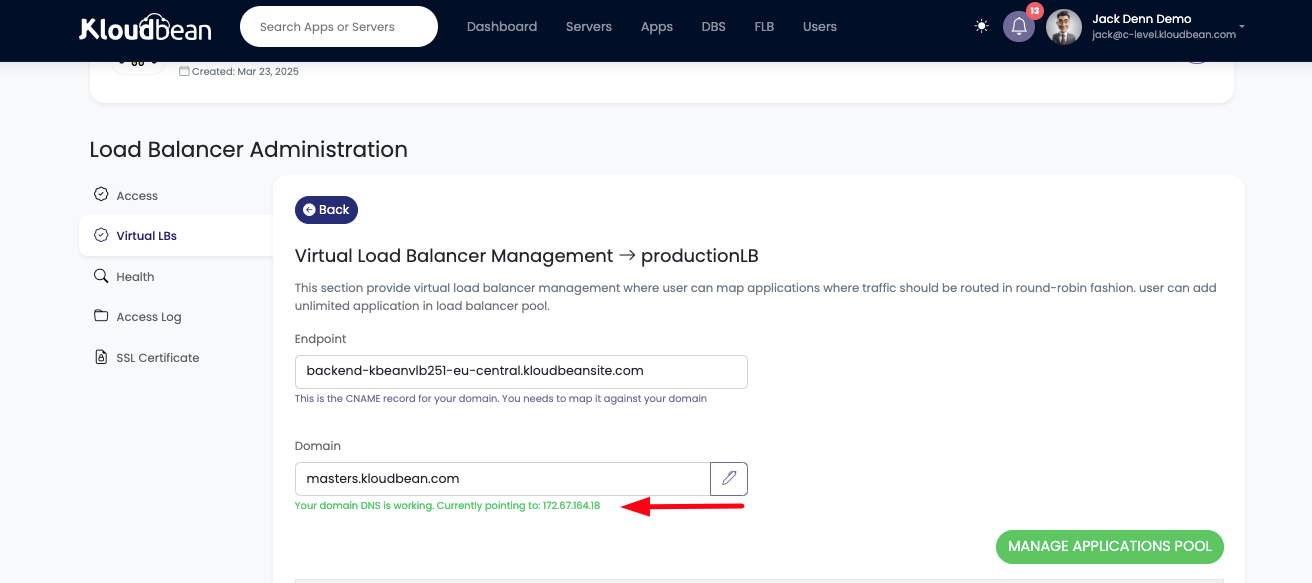
Once CNAME record is added, we are good to add domain now.
Add domain and click on Save button, It should be saved successfully with a green message, showing the IP address where domain points.
Step 6: Accessing the custom domain.
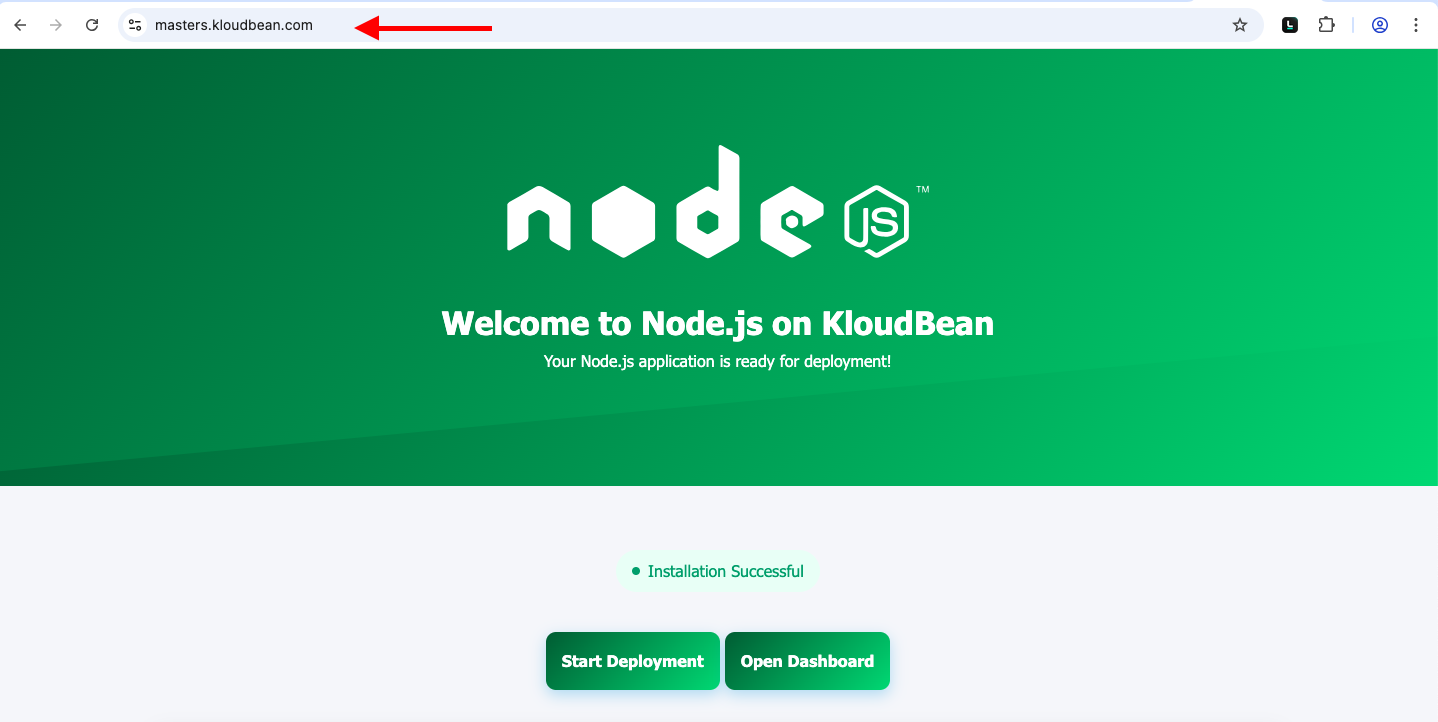
Once domain is added, now we can access our site using custom domain.
That’s all for updating custom domain for Virtual Load Balancer (vLB) to efficiently manage traffic using Kloudbean's powerful and user-friendly Flexible Load Balancer product.
Conclusion.
Adding a custom domain to your virtual load balancer in Kloudbean is simple, enhancing your application’s professionalism and branding. Follow the steps outlined in this guide to make the process quick and efficient.
If you need assistance, our support team is available 24/7 to help.