When managing multiple applications, especially in microservices architectures, you may need separate load balancers for each application tier (e.g., frontend, backend, middleware). Instead of purchasing and configuring different load balancers for each service, Kloudbean allows you to create multiple virtual load balancers (vLBs) on a single load balancer machine. This approach simplifies management and reduces costs, as you can efficiently balance traffic across multiple applications without the need for additional load balancers. This guide walks you through the process of setting up and configuring multiple vLBs to suit your application’s needs.
Now, let's go ahead and see a demo of how we can create a virtual load balancer on existing FLB on Kloudbean.
Step 1: Access Virtual LB section.
When we select the FLB where we are wish to add more virtual LB's, Go to the tab Virtual LB, where all vLB belongs to that FLB are listed.
Click on Add Virtual Load Balancer.
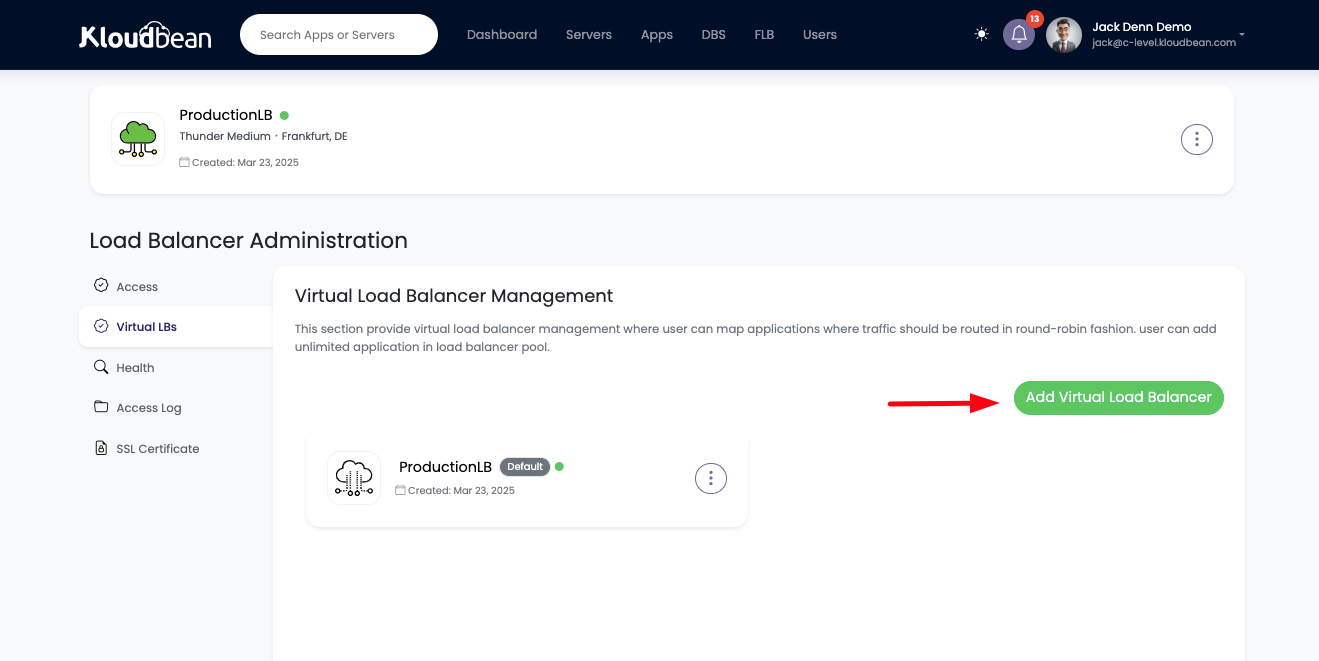
Step 2: Add Virtual Load Balancer.
Once we click on Add Virtual Load Balancer, a prompt will open asking for following inputs;
- Virtual load balancer Name: This is the name of vLB and endpoint url prefix.
- Virtual load balancer Domain: Optional field, we can update it later as well.
- Add Applications to the Pool: Applications we want to attach with this vLB.
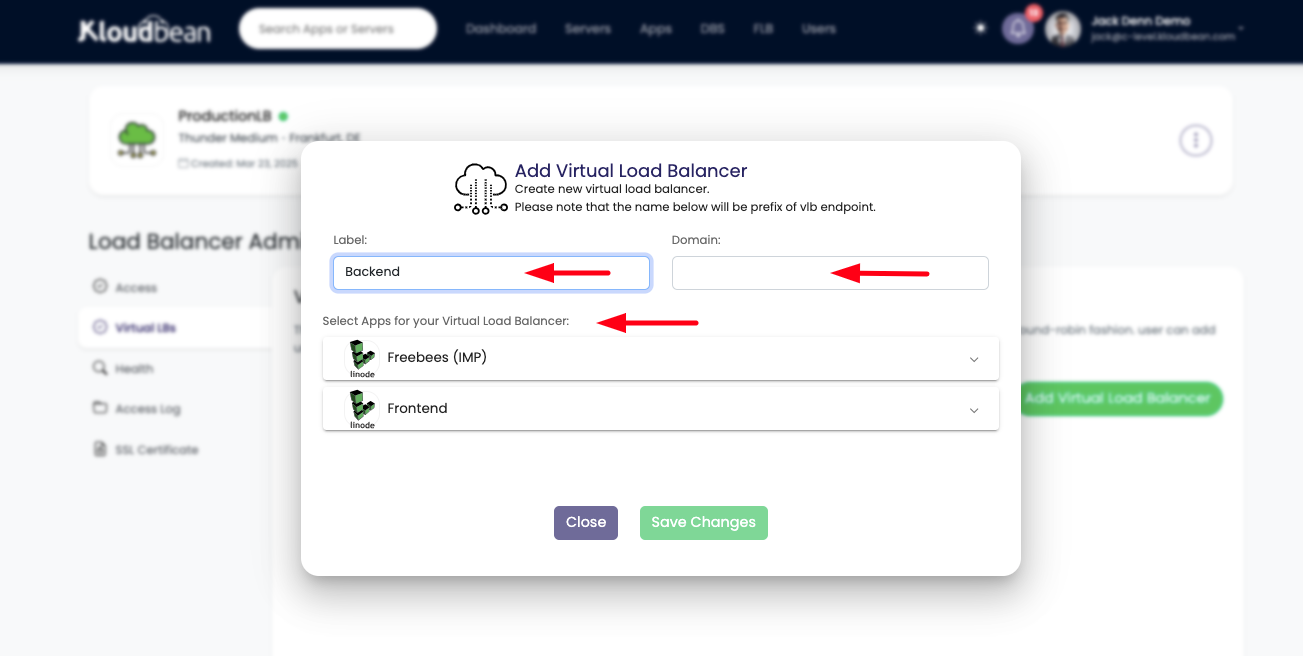
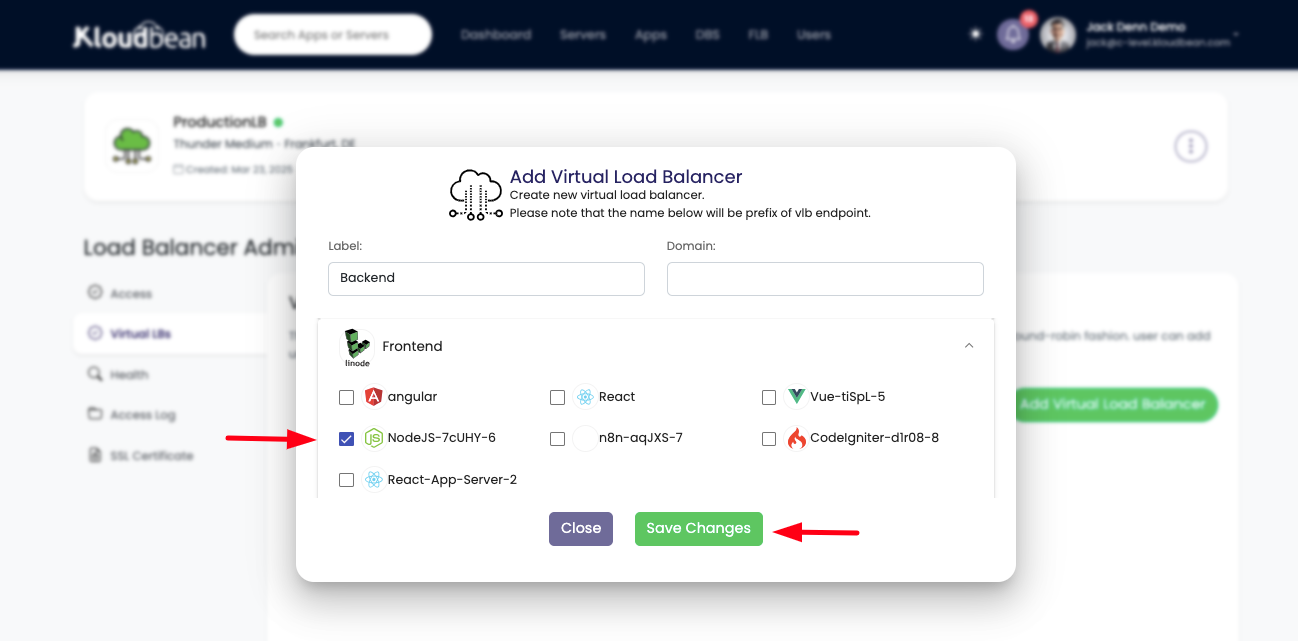
Once we added these fields and selected the applications where we want to load balance the traffic.
In this demo I'm going to add my NodeJS apps in Backend vLB application pool.
Let's go and Save Changes to create this vLB.
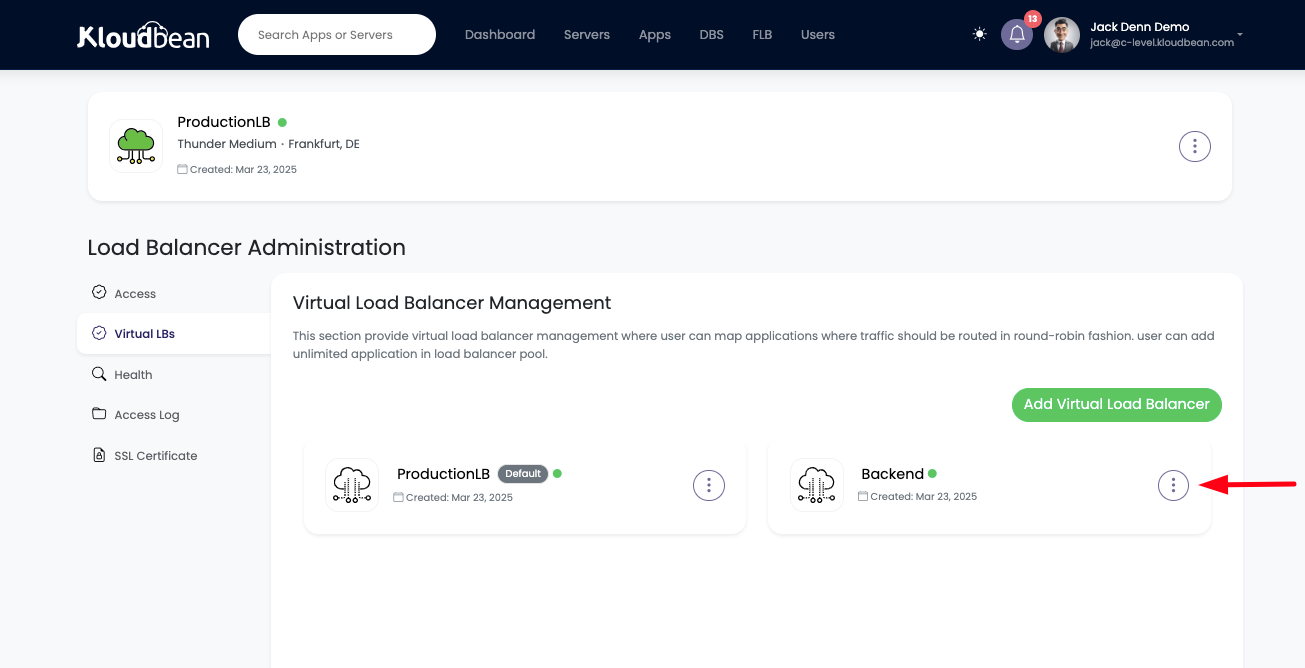
Once virtual load balancer is created, we can see it listed in Virtual LB's tab.
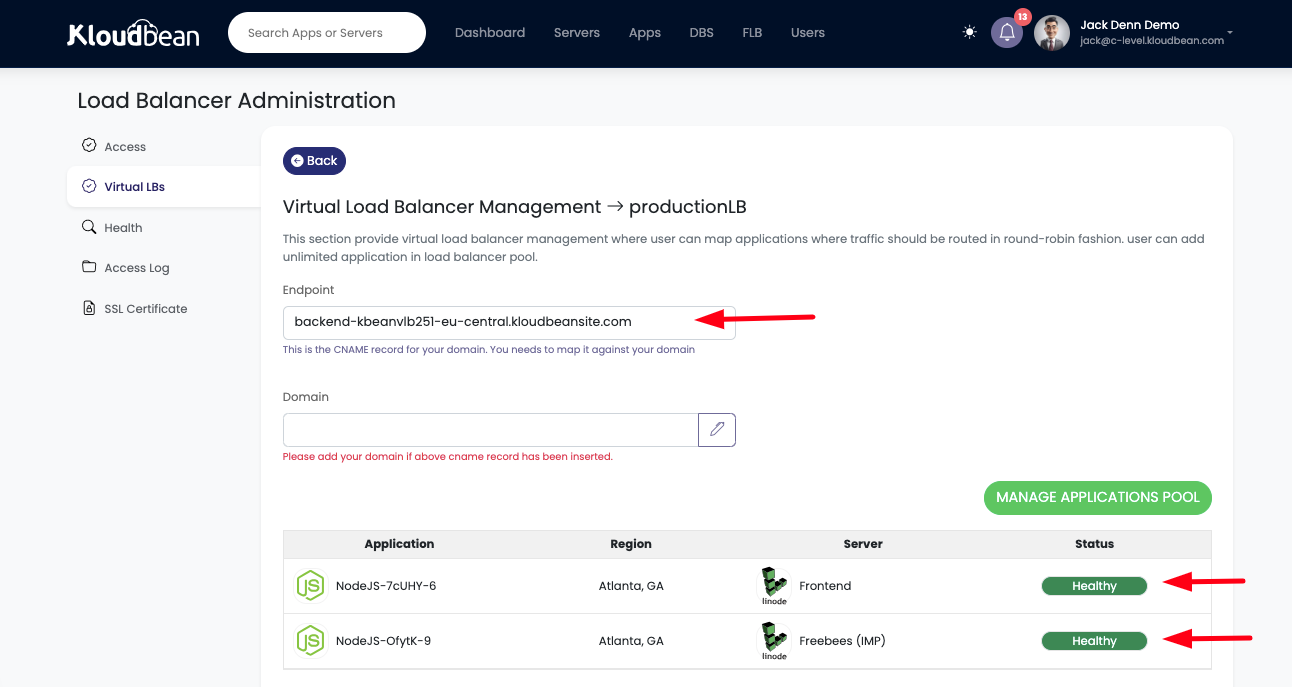
Click on this newly created vLB named Backend. It will take us to vLB access and configuration section.
Step 3: Check Applications Status.
When we are inside this vLB, there is endpoint url as well as applications that are added in the vLB application pool.
We can see applications status is healthy.
Step 4: Access vLB endpoint URL.
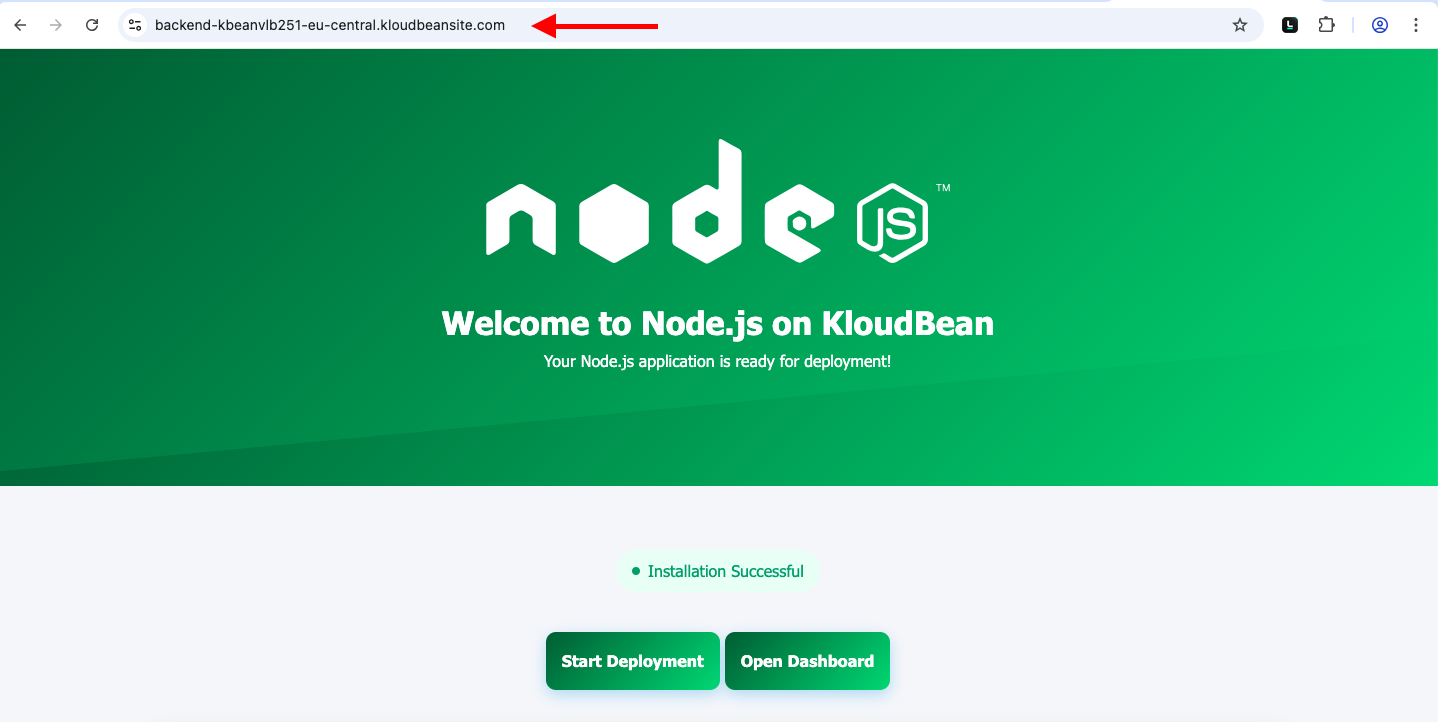
Let's copy the Endpoint URL and access it from web browser.
Our backend application is working perfectly through virtual load balancer. If we keep on refreshing the URL, we will see request is being served from both replicas.
That’s all for launching and configuring the Virtual Load Balancer (vLB) to efficiently manage traffic using Kloudbean's powerful and user-friendly Flexible Load Balancer product.
Conclusion
Adding multiple virtual load balancers to a single load balancer in Kloudbean offers a flexible, cost-effective way to manage traffic across multiple applications. Whether you're running a frontend, middleware, or backend service, this solution simplifies your infrastructure and ensures high availability for all your services.
If you need any help, our support team is always available to assist you.