Why You Should Use Kloudbean for Redis Database:
Kloudbean offers an effortless way to launch and manage a Redis database, providing a simple, user-friendly interface and minimal setup time. Our Redis databases are optimized to deliver outstanding performance, ensuring quick and reliable caching, real-time data processing, and efficient data storage for your applications.
Kloudbean also offers powerful scaling and failover solutions, making it easy to adjust your Redis environment as your needs grow. Whether you’re looking for improved caching, session management, or pub/sub messaging, Kloudbean’s Redis hosting is designed to meet the needs of high-performance applications.
Now, let’s go ahead and see a demo of how we can launch a Redis database in real-time on Kloudbean.
Step 1: Accessing DBS section from dashboard.
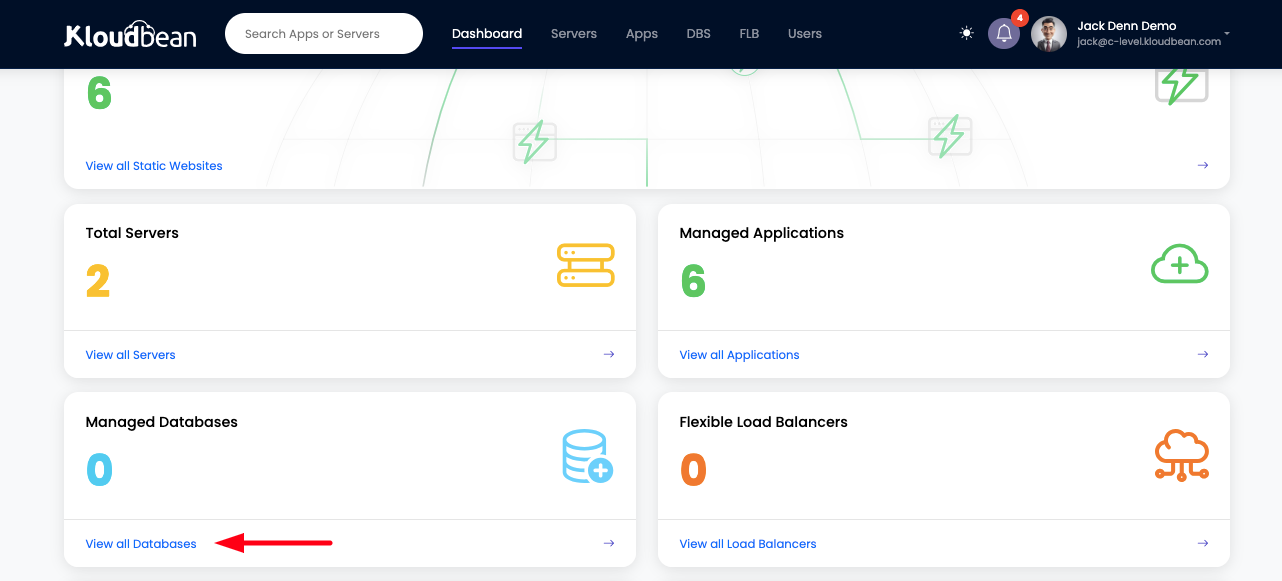
From the dashboard we can go to DBS (Database System) section by a simple click on Managed Database to view existing databases. Clicking on it should take us to databases section.
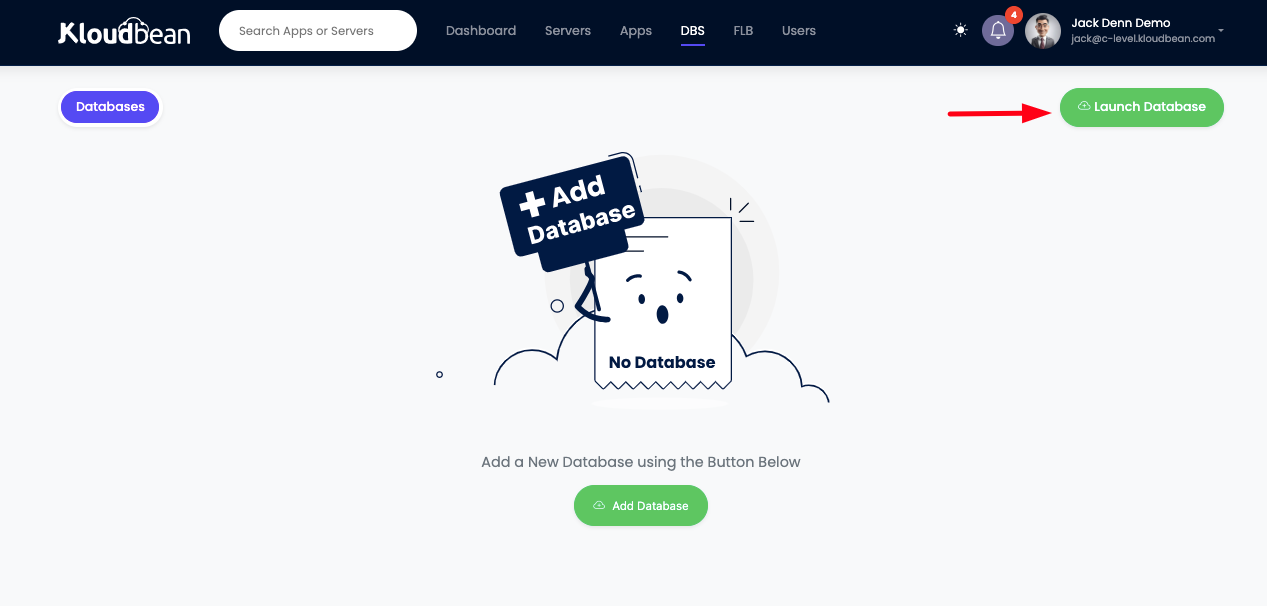
In database section, we currently do not have any database. In order to launch a new database, Click on Launch Database button.
With this a new database launch panel should open and asking for the selection of required database along with other database basic configurations.
Step 2: Launching new Redis database
In our case we are going to launch Redis database in this tutorial, so let's go ahead and select Redis from the database options.
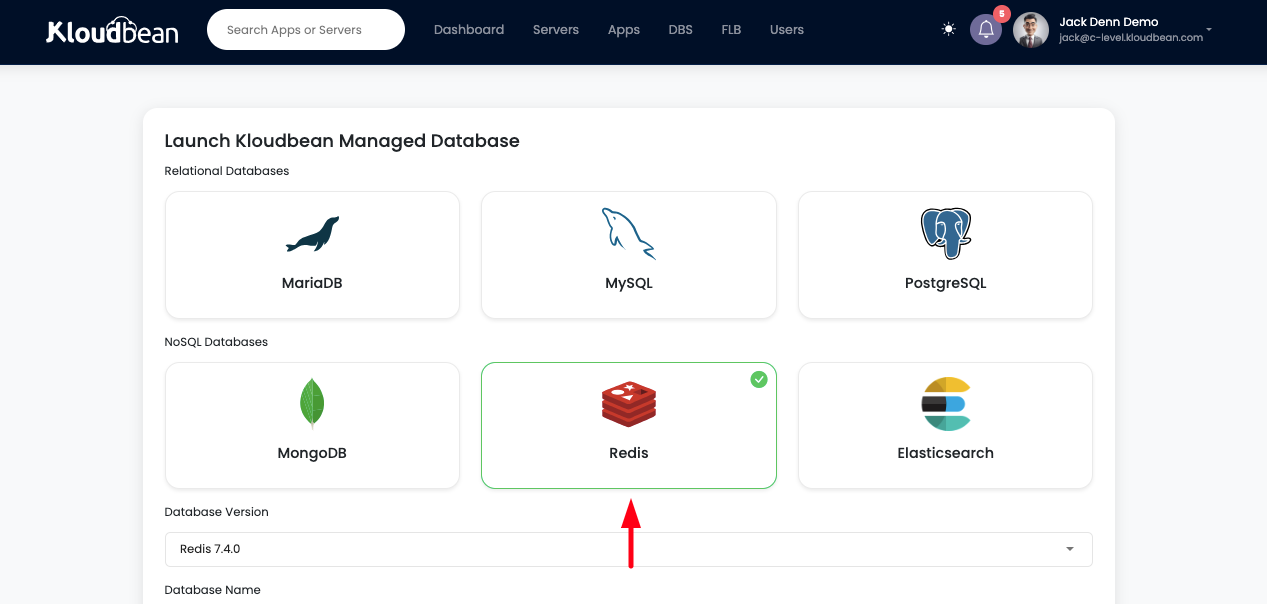
Once database is selected, we will see all the database version including most recent one is available in the dropdown of field Database Version. If we have a requirement of any specific database version, we can select that particular version or we can select most latest one.
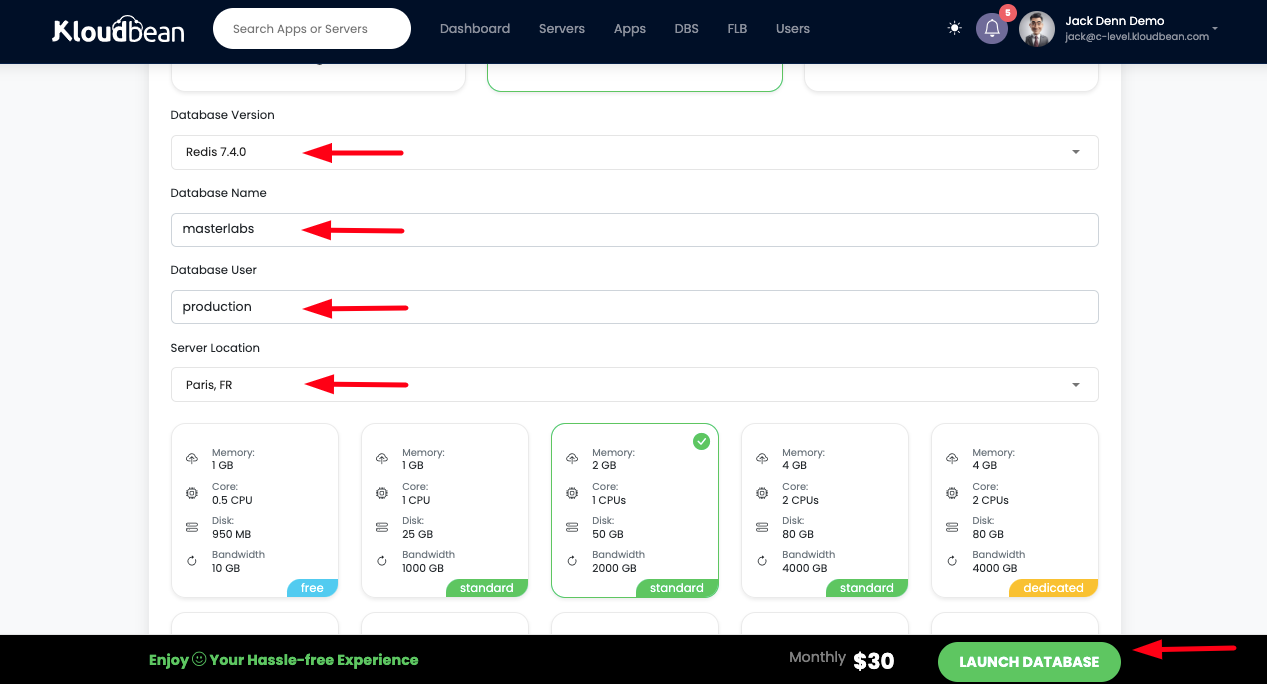
Along with database version, we have to add or select following important detail as well.
Database Name: This is going to be name of our database and the database that will be created as default in our Redis server.
Database User: This is going to be the administrator user of the database, which is going to have maximum privileges.
Server Location: This is the physical location of the database server, try to select the location that is closest to the application server.
Server Size: Depending on the workload and application size, choose server size which better fits the requirement. For best performance, try to choose Dedicated servers, as their hardware are not shared and provide maximum performance.
After selecting all these fields, Click on LAUNCH DATABASE button to proceed to payment and then database will be launched.
Launching new database takes approximately 4 to 5 minutes to fully create and ready to use. Once data creation is complete, we can access database detail by clicking on the database that is just created, in this tutorial we created Masterlabs database.
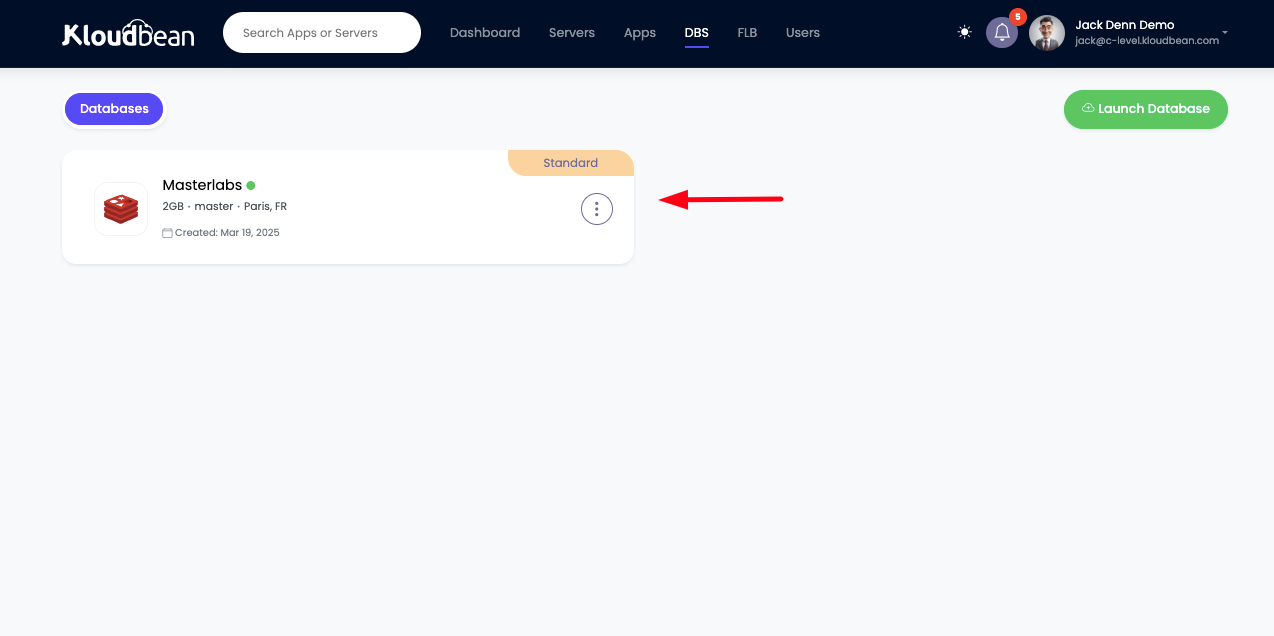
Once we click on database, it will take us to database detail section, where we will find following useful information, that is must required in order to access database or connect database with the application.
Host: This is database host name, a unique url for the database, to access it over the internet. Instead of host we can optionally use IP Address as well.
Master User: This user has administrator privileges over the database.
Password: This is the password for master user to authenticate redis database.
Public Access: This field represent our current settings for the database, as of now our database is not accessible from anywhere, until to manage or update it's access from Firewall section. currently public access is completely disabled.
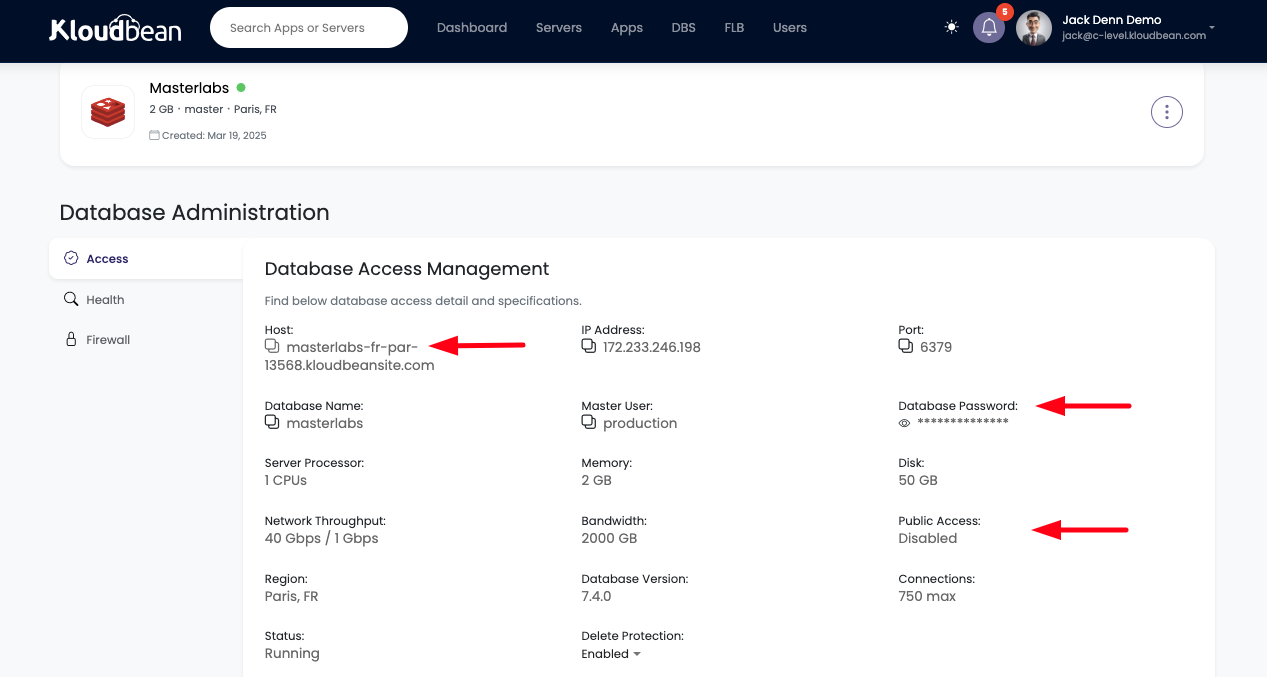
As database has been created, we can now try to access this using redis-cli.
Step 3: Accessing database using Redis CLI.
In order to access Redis, we have pre-installed redis-cli on application server, from where we suppose to access redis.
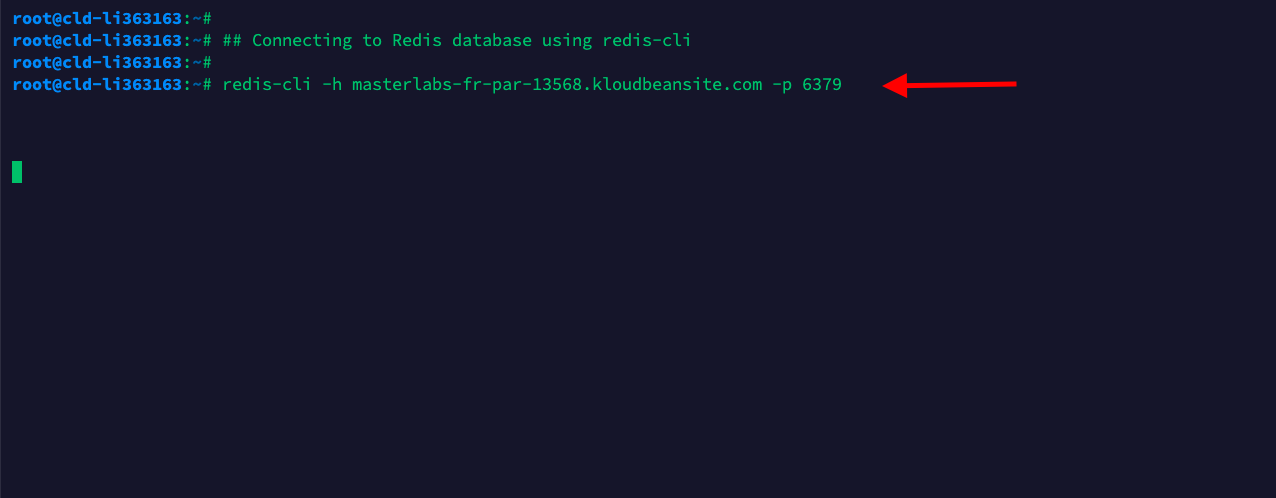
Use following command to access database:
### Accessing Redis database using redis-cli
# redis-cli -h <Host> -p 6379

redis-cli -h masterlabs-fr-par-13568.kloudbeansite.com -p 6379
At this point when we are trying to connect to database, we are not receiving any response, this is because currently database access is completely disabled and we are not able to connect.
ERROR: CONNECTION TIMEOUT
This connection timeout is legitimate, as Kloudbean by-default keep database access disabled in order to ensure database security. However user has option to allow access.
Step 4: Allowing database access (Whitelist IP Address)
If we want to access database from our local machine, we have to enable public, however enabling public access is not recommended at all, but in some cases we can enable public access and disable it immediately after making changes through public access from local machine.
To enable public access. Go to Firewall tab and select the following option;
"Allow database public access" and hit Submit button.
This should turn on database public access. but this is not recommended as allowing public access can open database for incoming traffic and intruders can try to gain your database access, hence in this step we are going to see how to allow access only from particular IP addresses by whitelisting it.
Use the mention command to get remote server's public IP address, from where we suppose to access database.
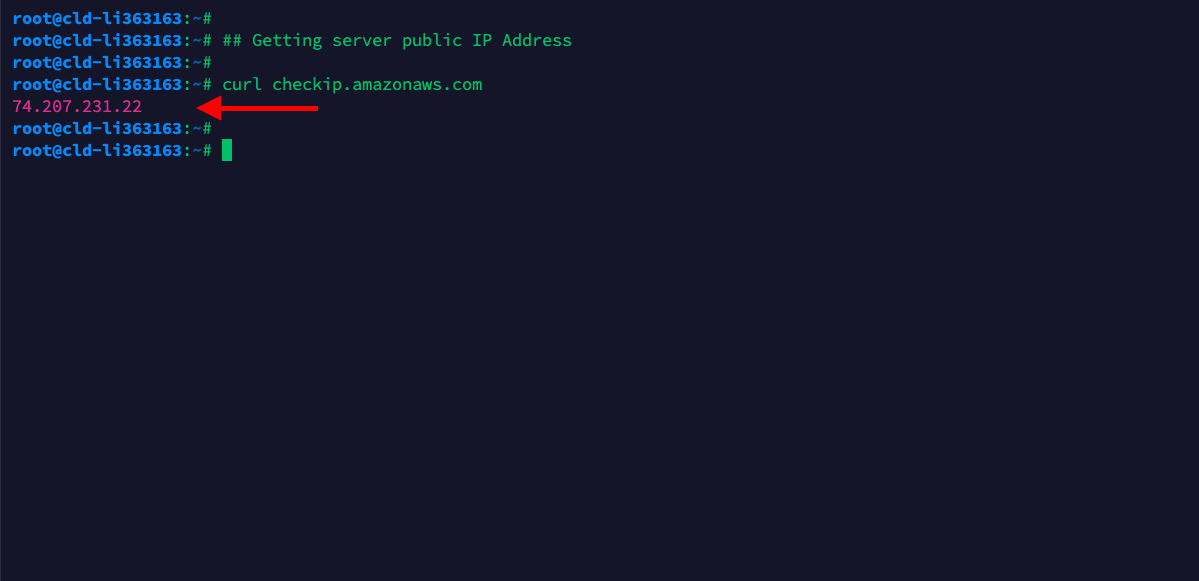
Go to Firewall section and this time choose option ;
"Only allow following IP address to access database".
Add the IP address. We can add multiple IP Addresses as per demand. Once added, click on Submit button to whitelist these IP addresses.
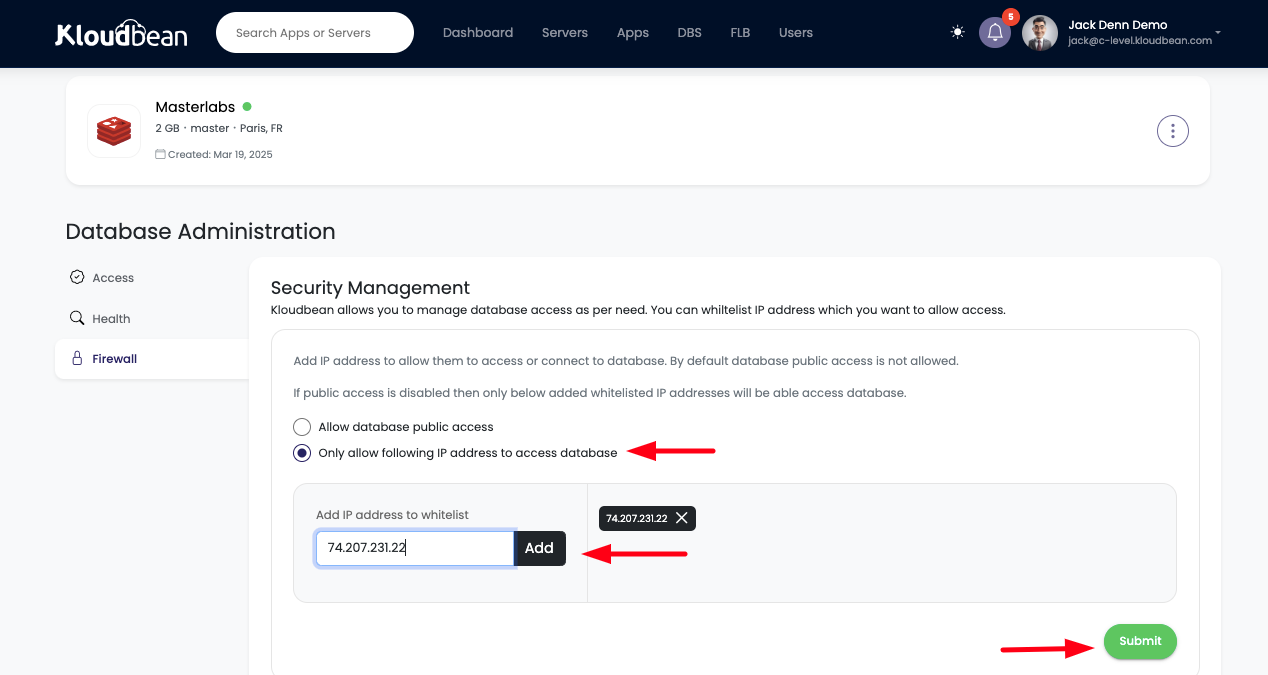
Step 5: Accessing database after whitelisting IP Address.
Now that server IP address has been whitelisted, we should be good to access database.
Hurrah!! We are successfully connected now.
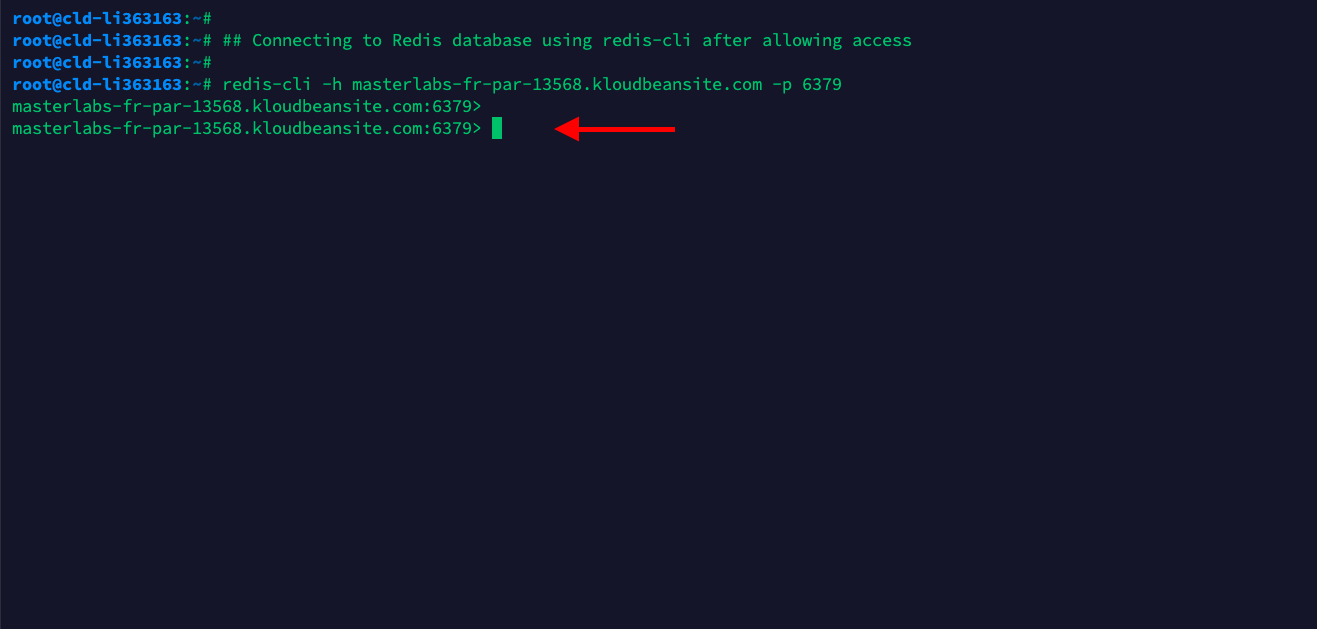
Step 6: Authentication (Optional)
Now that we are connected to database, we can authenticate using the password given by Kloudbean on Access tab.
Copy Password from Kloudbean console and write following command
## AUTH <password>

AUTH 7vzVotCxRd1pgb43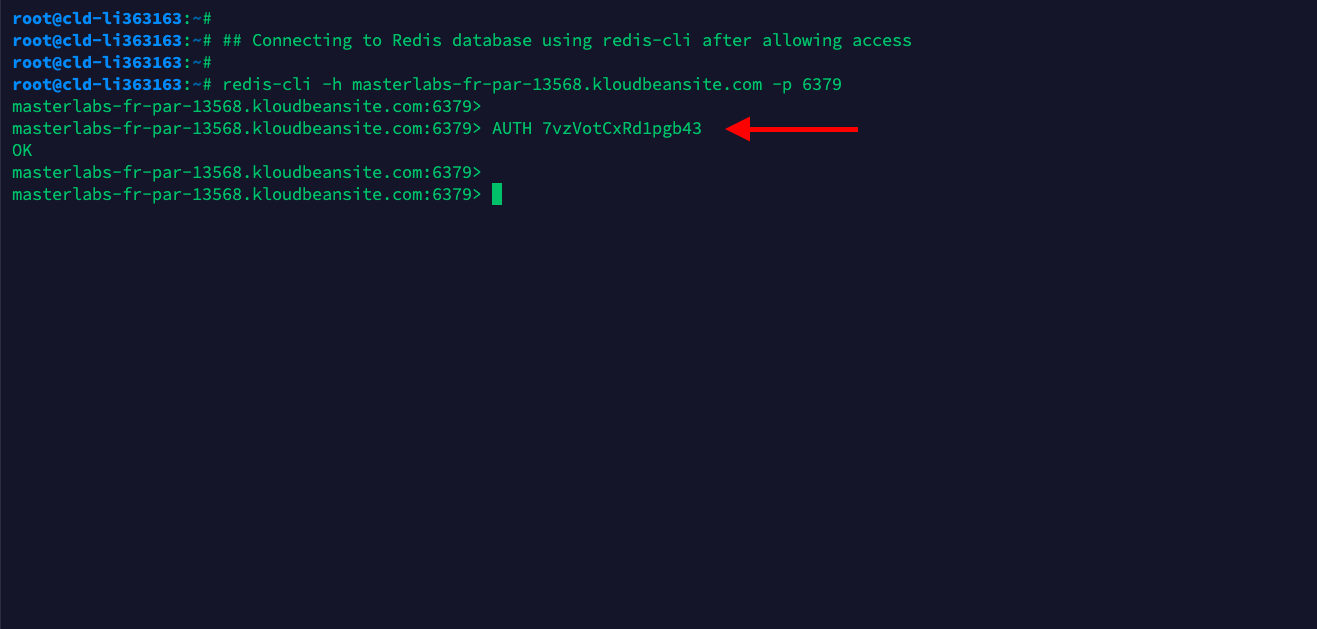
If authentication is successful, we will receive OK response.
Step 7: Executing queries (Optional)
As authentication is completed. Let's go ahead and try some redis queries.
SET mykey "HELLO, Kloudbean!"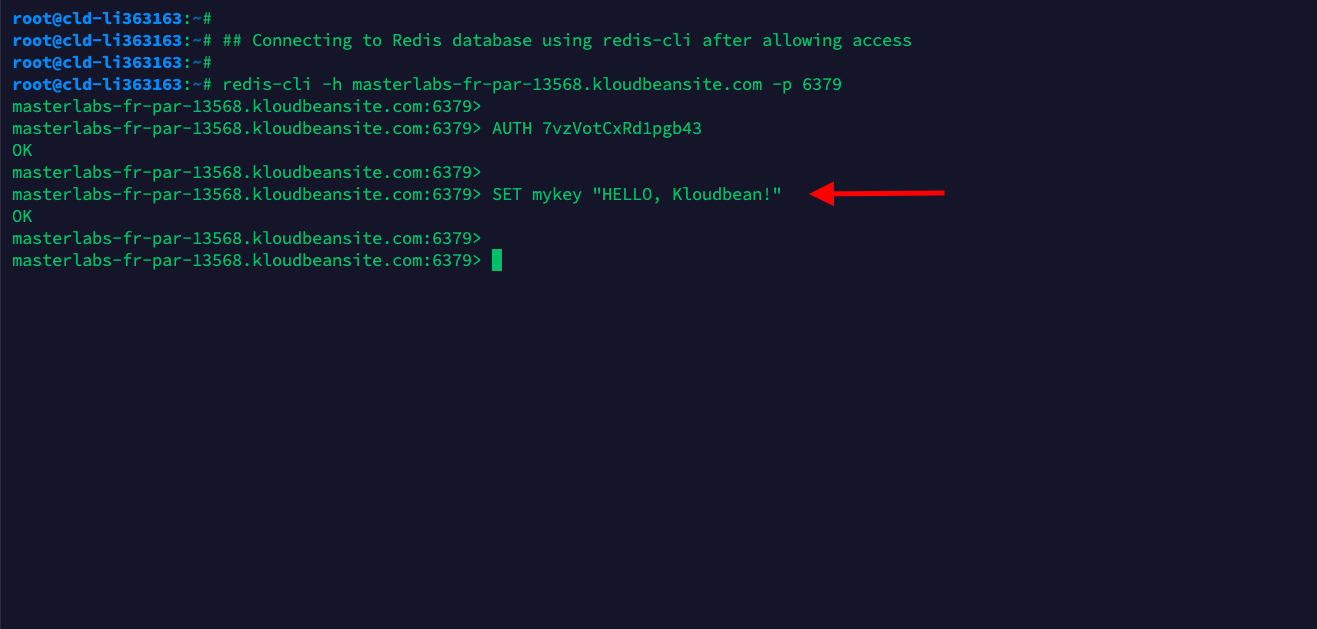
Key has been set, now let's try to get it's value by executing following command.
GET mykey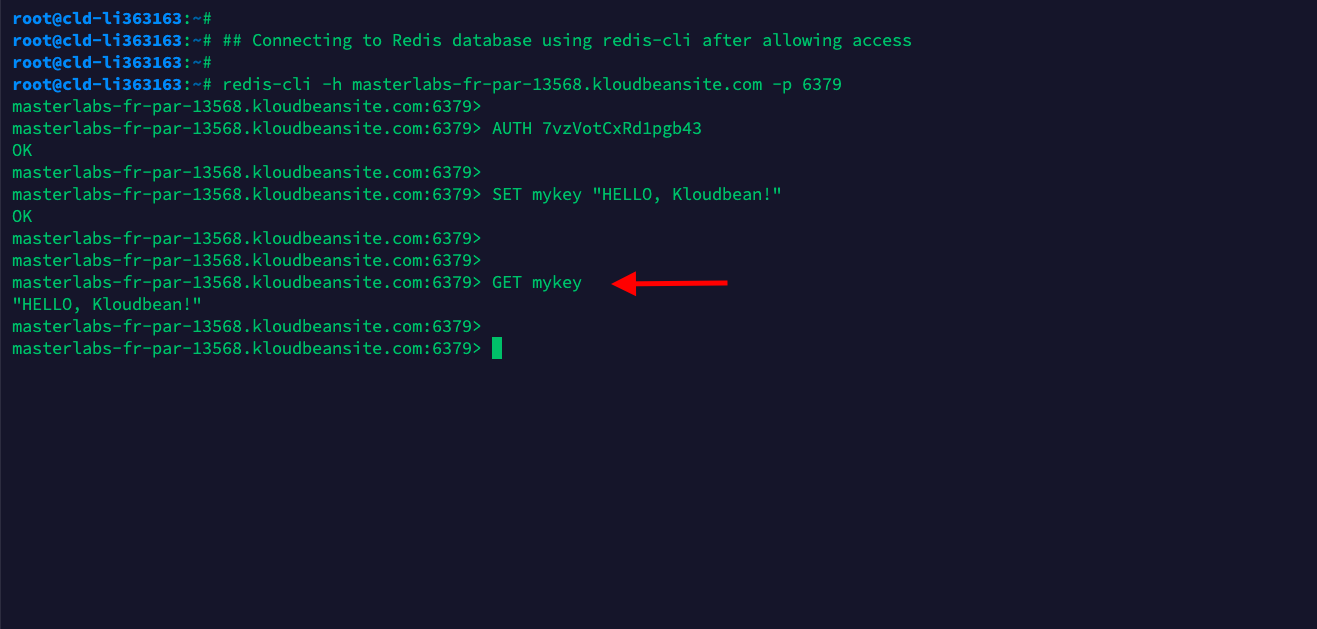
We can see the key value, that means our redis database is working correctly.
That's all for launching and accessing Redis database using Kloudbean Managed and highly optimized database solution.
Conclusion
Kloudbean makes launching and managing Redis databases fast, easy, and secure, eliminating the complexities of database administration. With just a few clicks, your Redis database is ready to provide optimized performance, reliable caching, and real-time data processing for your applications. Whether you're scaling or ensuring high availability, Kloudbean's powerful features make it the ideal choice for your Redis hosting needs.
If you encounter any issues while setting up or managing your Redis database on Kloudbean, our expert support team is available 24/7 to assist you.