Managing Your Server Settings
When you use Kloudbean, you won't have direct access to the root of your server. However, you can still manage and adjust various server settings using the Kloudbean Platform.
How to Manage Your Server Settings:
- Log in to your Kloudbean Platform using your credentials.
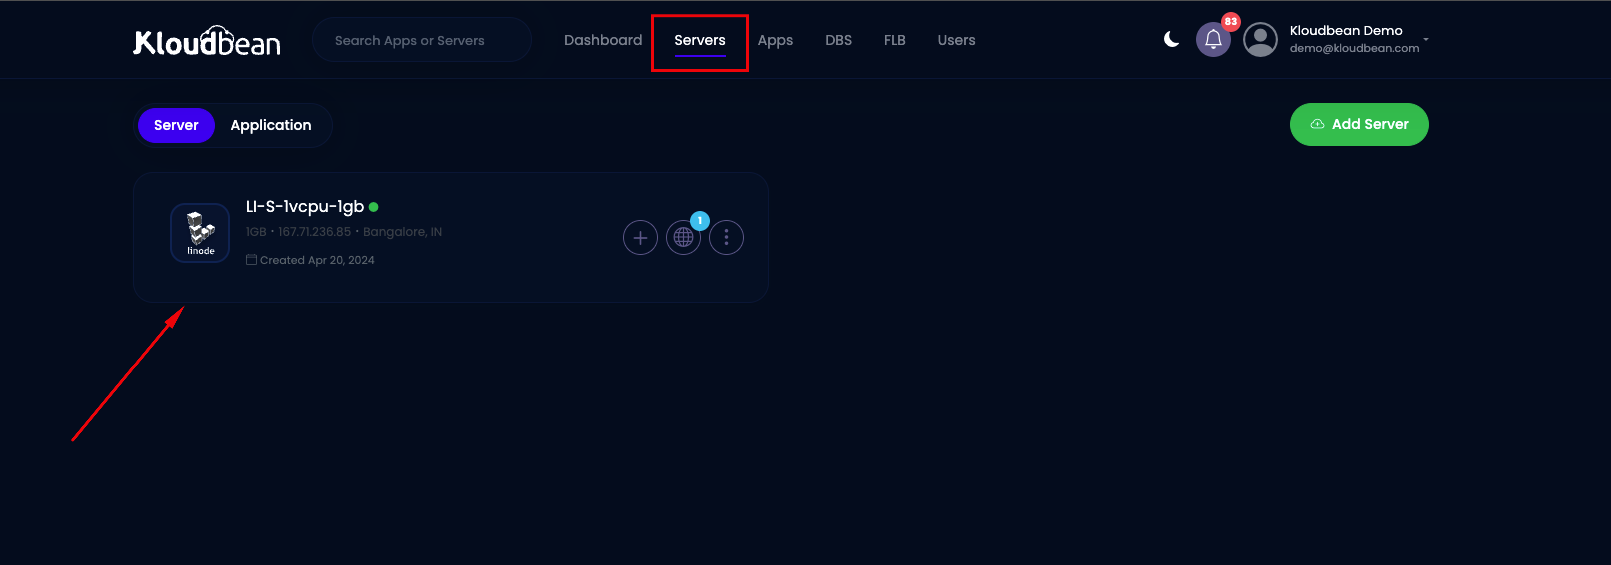
- From the top menu, go to Servers.
- Select your desired server.
Under Server Administration, choose Configuration.
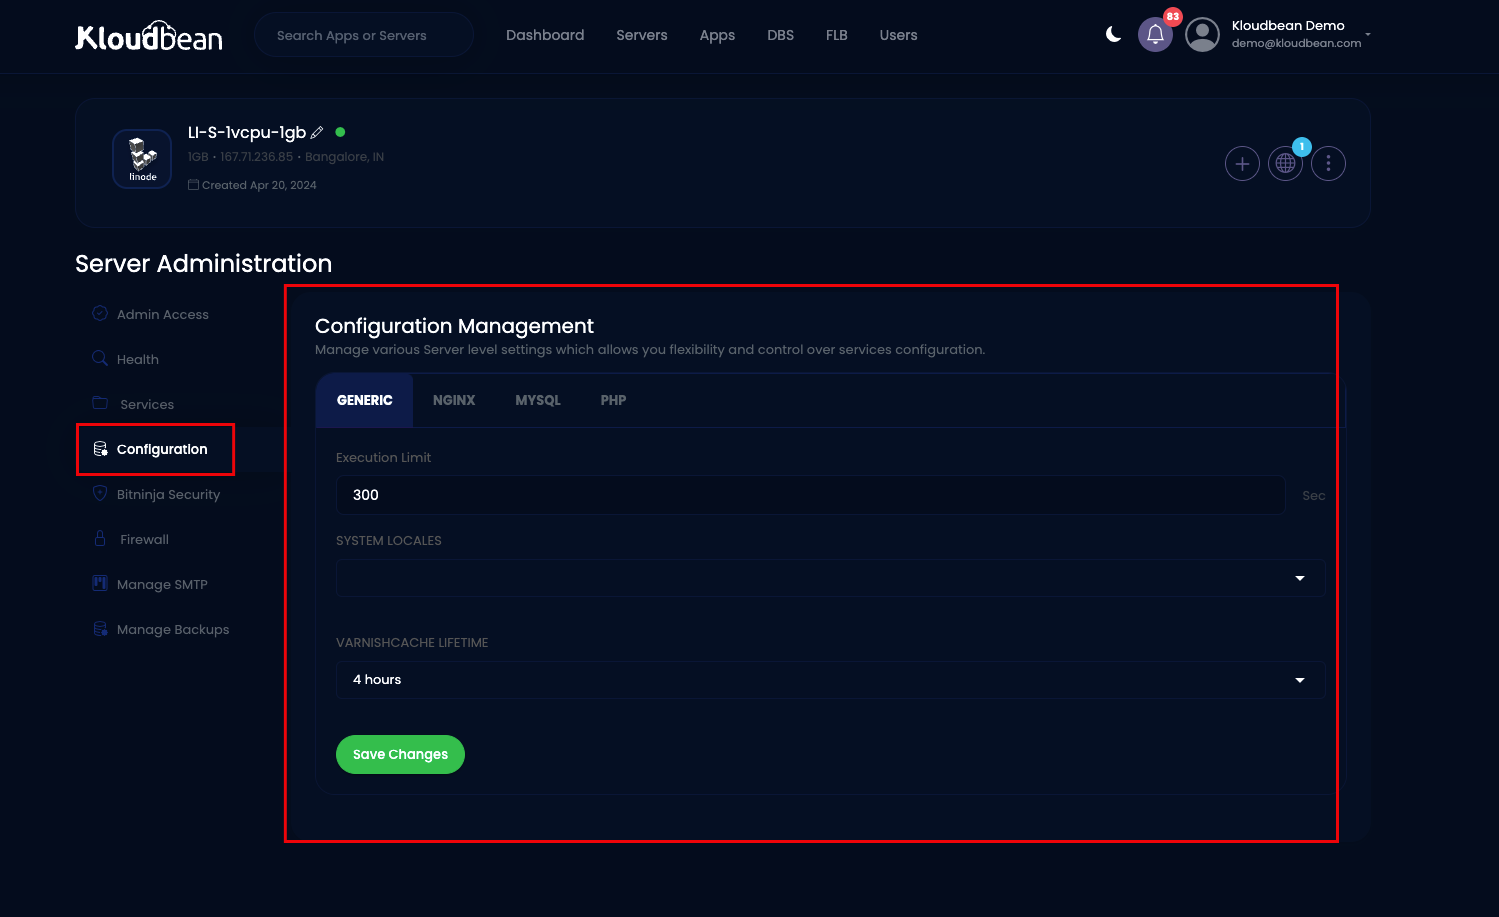
Generic Settings:
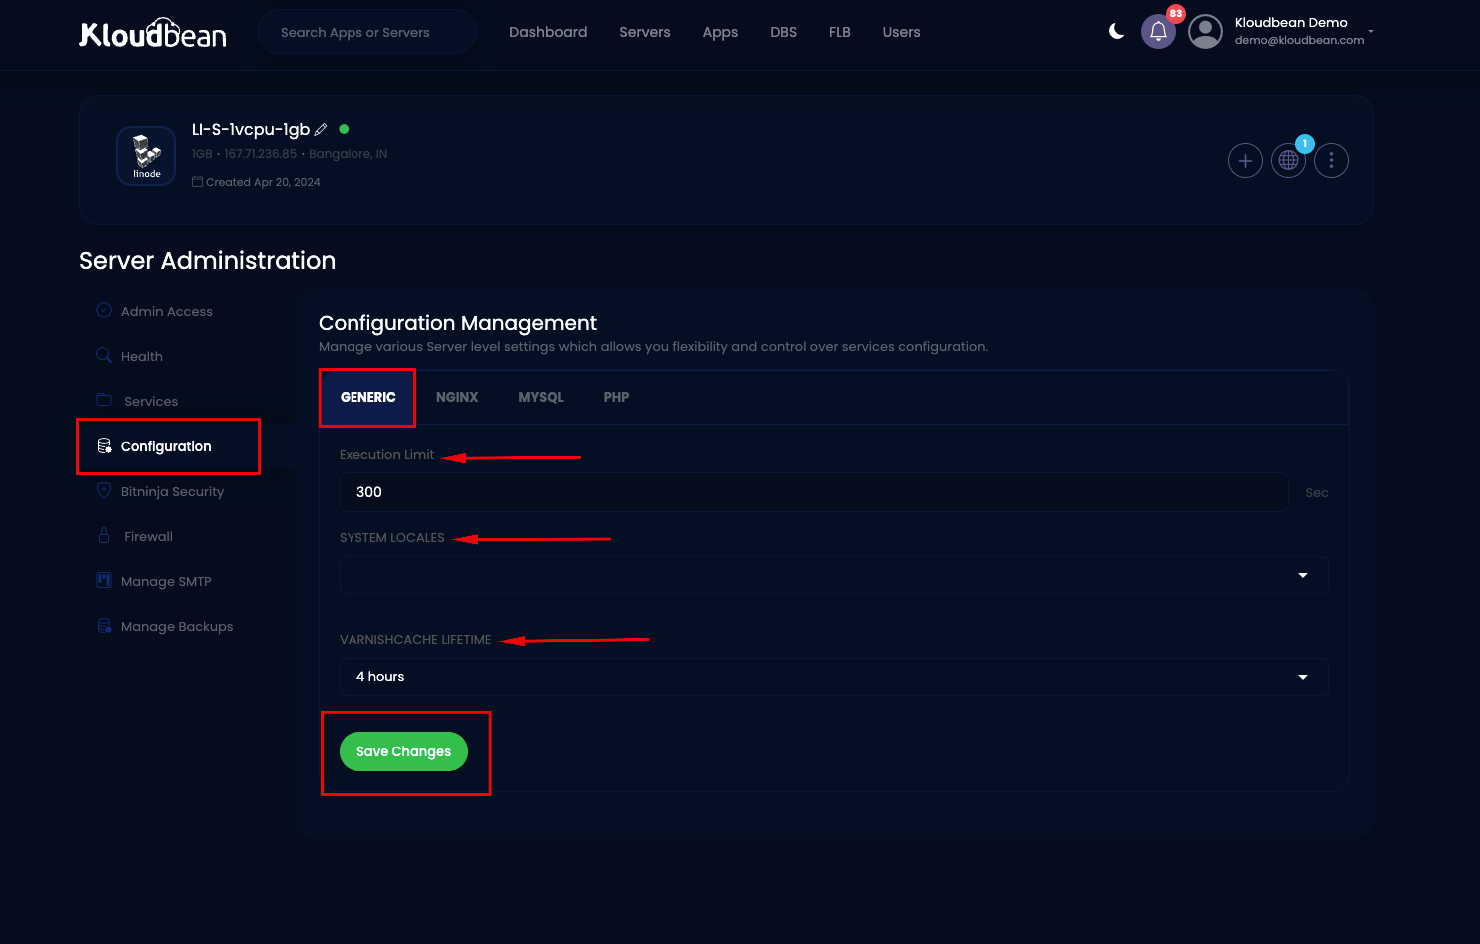
Under the Generic tab, you'll find essential settings:
- Execution Limit: This determines how long a request can run. The default is 300 seconds.
- System Locales: Allows you to add additional System Locales beyond the default.
- Varnish Cache Lifetime: Sets how long content is stored in Varnish cache.
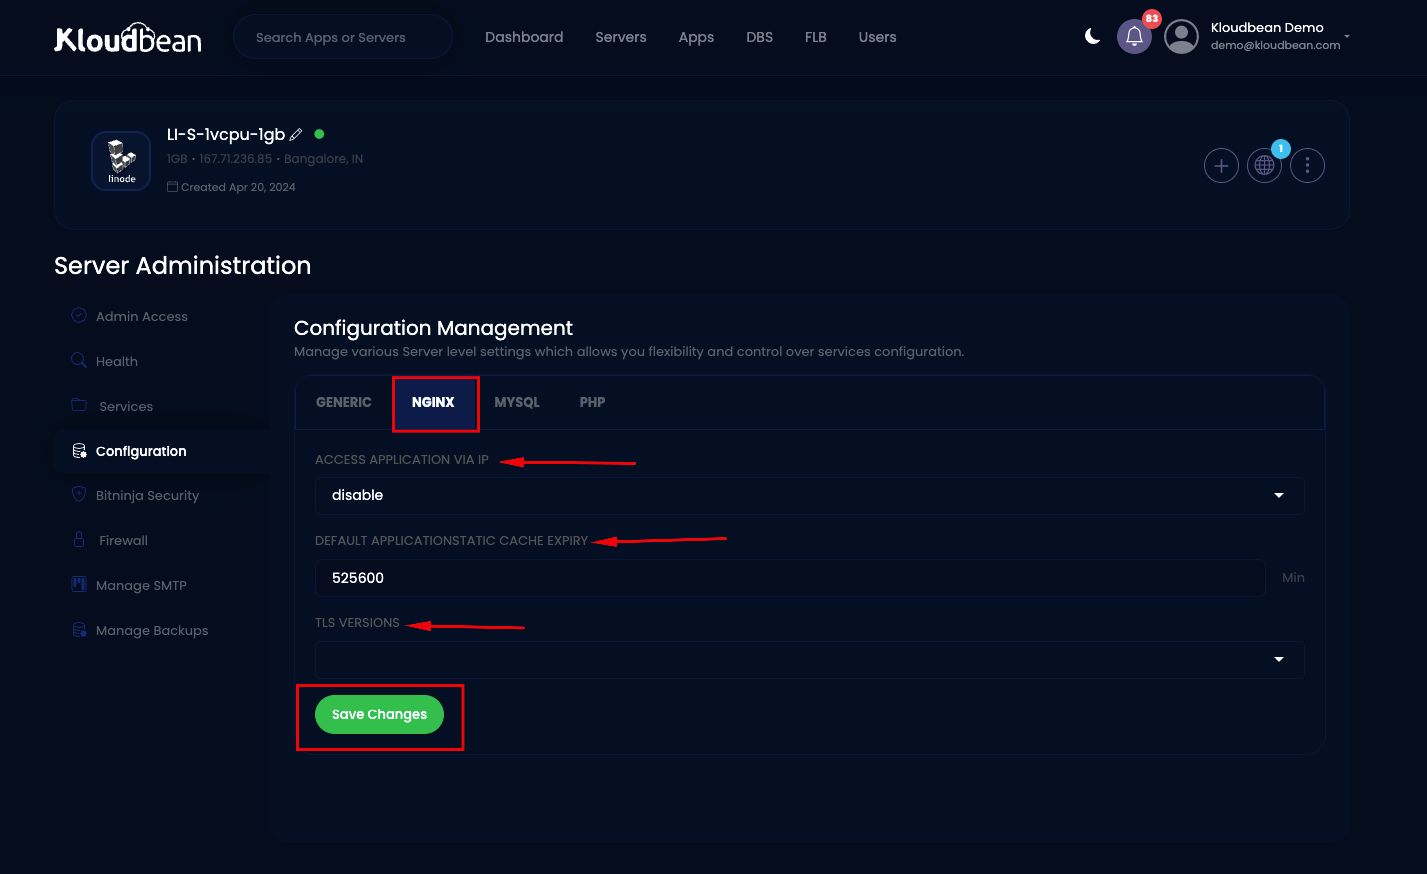
Nginx:
- Access Application via IP: Controls whether users can access your application directly via the server's IP address.
- Static Cache Expiry: Determines how long items are cached in memory.
- TLS Versions: TLS, short for Transport Layer Security, is a security protocol for safe communication between devices on a network. It ensures authentication, data integrity, and privacy. Typically, TLS 1.2 and 1.3 are active. You can adjust which versions are active based on your needs, but you can't turn off TLS 1.3.
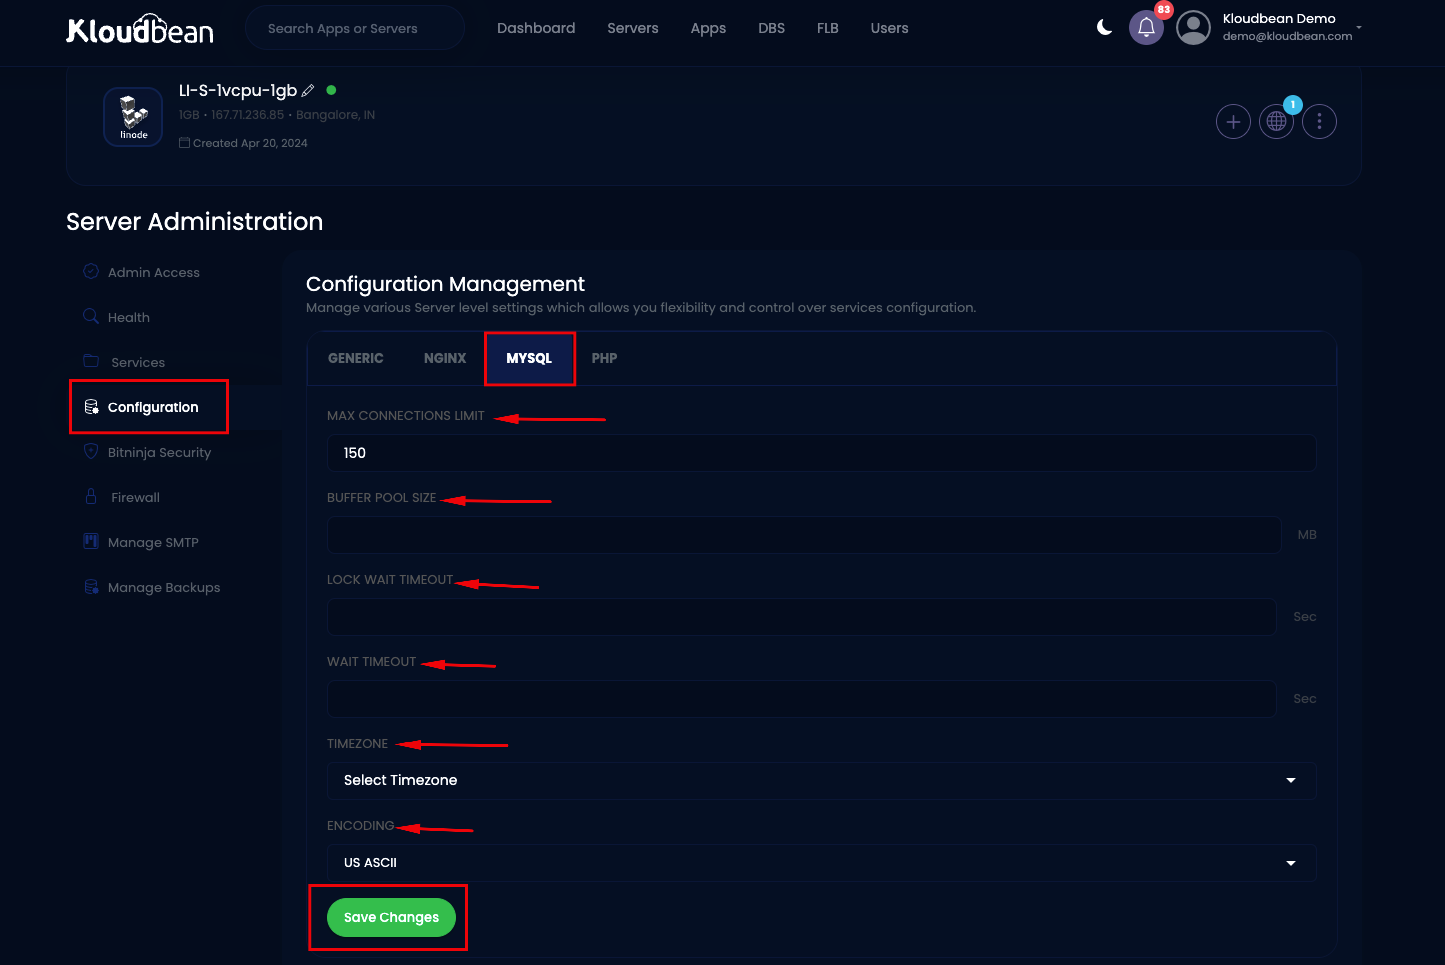
MySQL:
- Max Connections Limit: Sets the maximum number of connections MySQL can handle.
- Buffer Pool Size: Specify the memory allocation for caching tables, indexes, and other data.
- Lock Wait Timeout: Set the duration a transaction will wait for a resource before abandoning it.
- Wait Timeout: Set the time before MySQL kills an idle connection.
- Timezone: Choose the timezone setting for MySQL.
- Encoding: Pick the character encoding for MySQL. It's usually set to US ASCII by default.
PHP:
- PHP Time Zone: Set the default time zone used by PHP scripts. It ensures accurate time-related functions.
- Upload Size: Sets the maximum size allowed for file uploads. By default, it's 100MB.
- Memory Limit: This controls how much memory a PHP request can use. The default limit is 256MB.
- Display Error: Controls whether PHP displays errors directly on web pages. It's useful for debugging but should be turned off in production environments for security reasons.
- Error Reporting: Specifies the level of error reporting PHP should perform. It helps developers identify and troubleshoot issues in their code by providing detailed error messages.
- Max Input Variables: This sets the maximum number of input variables allowed.
- Max Input Time: Determines the maximum time for processing input data.
- Opcache Memory: Choose the amount of memory allocated for OPCache, which enhances PHP performance. The default is 64MB. Recommended values are:
- For a 1GB RAM server: less than 256MB
- For a 2GB RAM server: less than 512MB
- For a 4GB RAM server and above: less than 1024MB
- Short Open Tag: Determines whether PHP allows the short form (<? ?>) of its open tag. By default, it's off.
- xDebug: toggle xDebug on or off. It enhances PHP application debugging. By default, it's disabled.
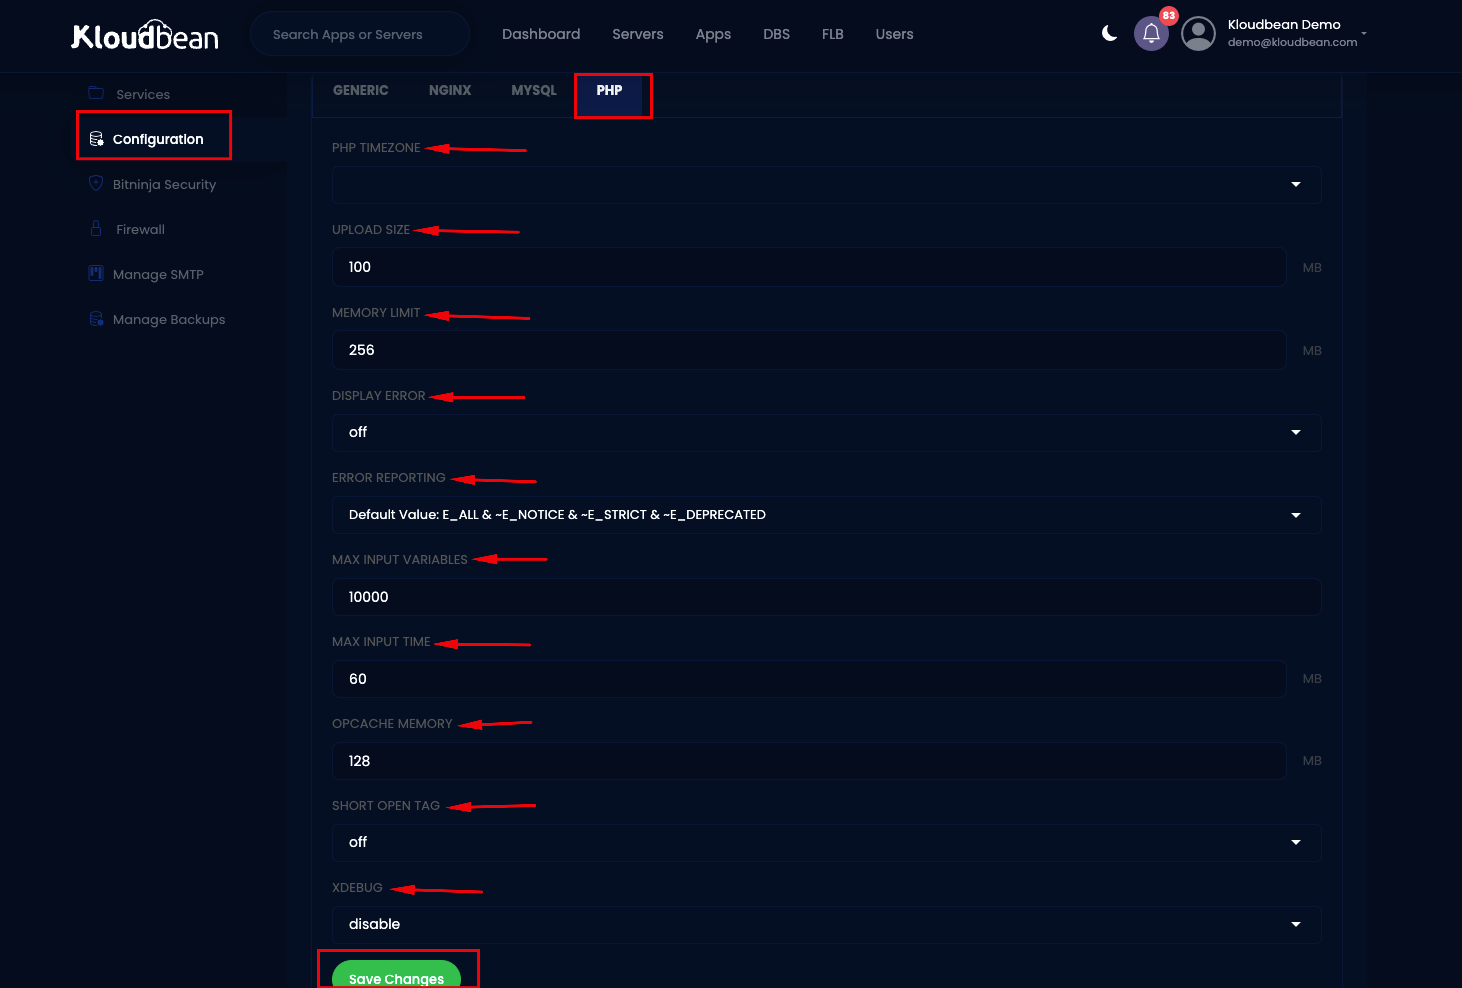
You can adjust these settings to suit your needs and then save your changes.
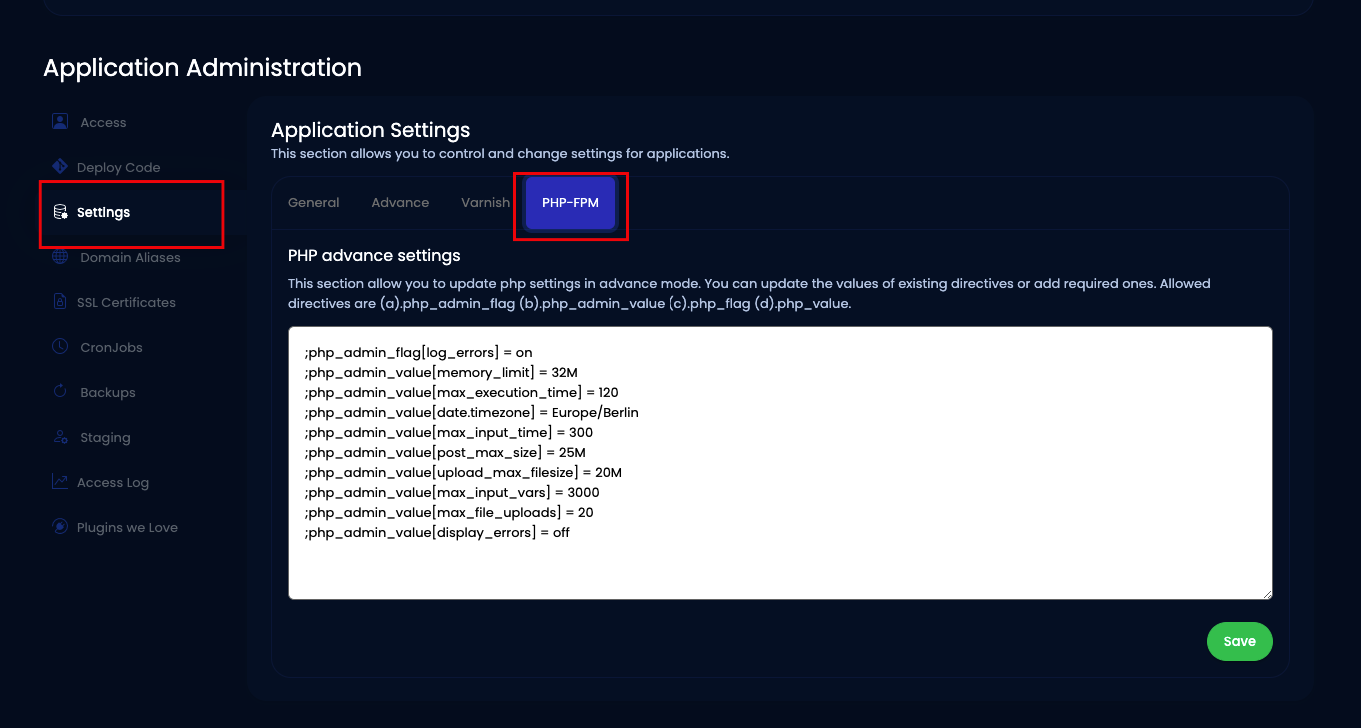
Important Note: If you need to set PHP settings for specific applications, you should use the PHP settings editor for advanced PHP-FPM Settings
Remember to click Save Changes after adjusting any settings to ensure they take effect.