Step #1
- Login to the Kloudbean Platform with your credentials and then navigate to the DBS tab from the top menu bar
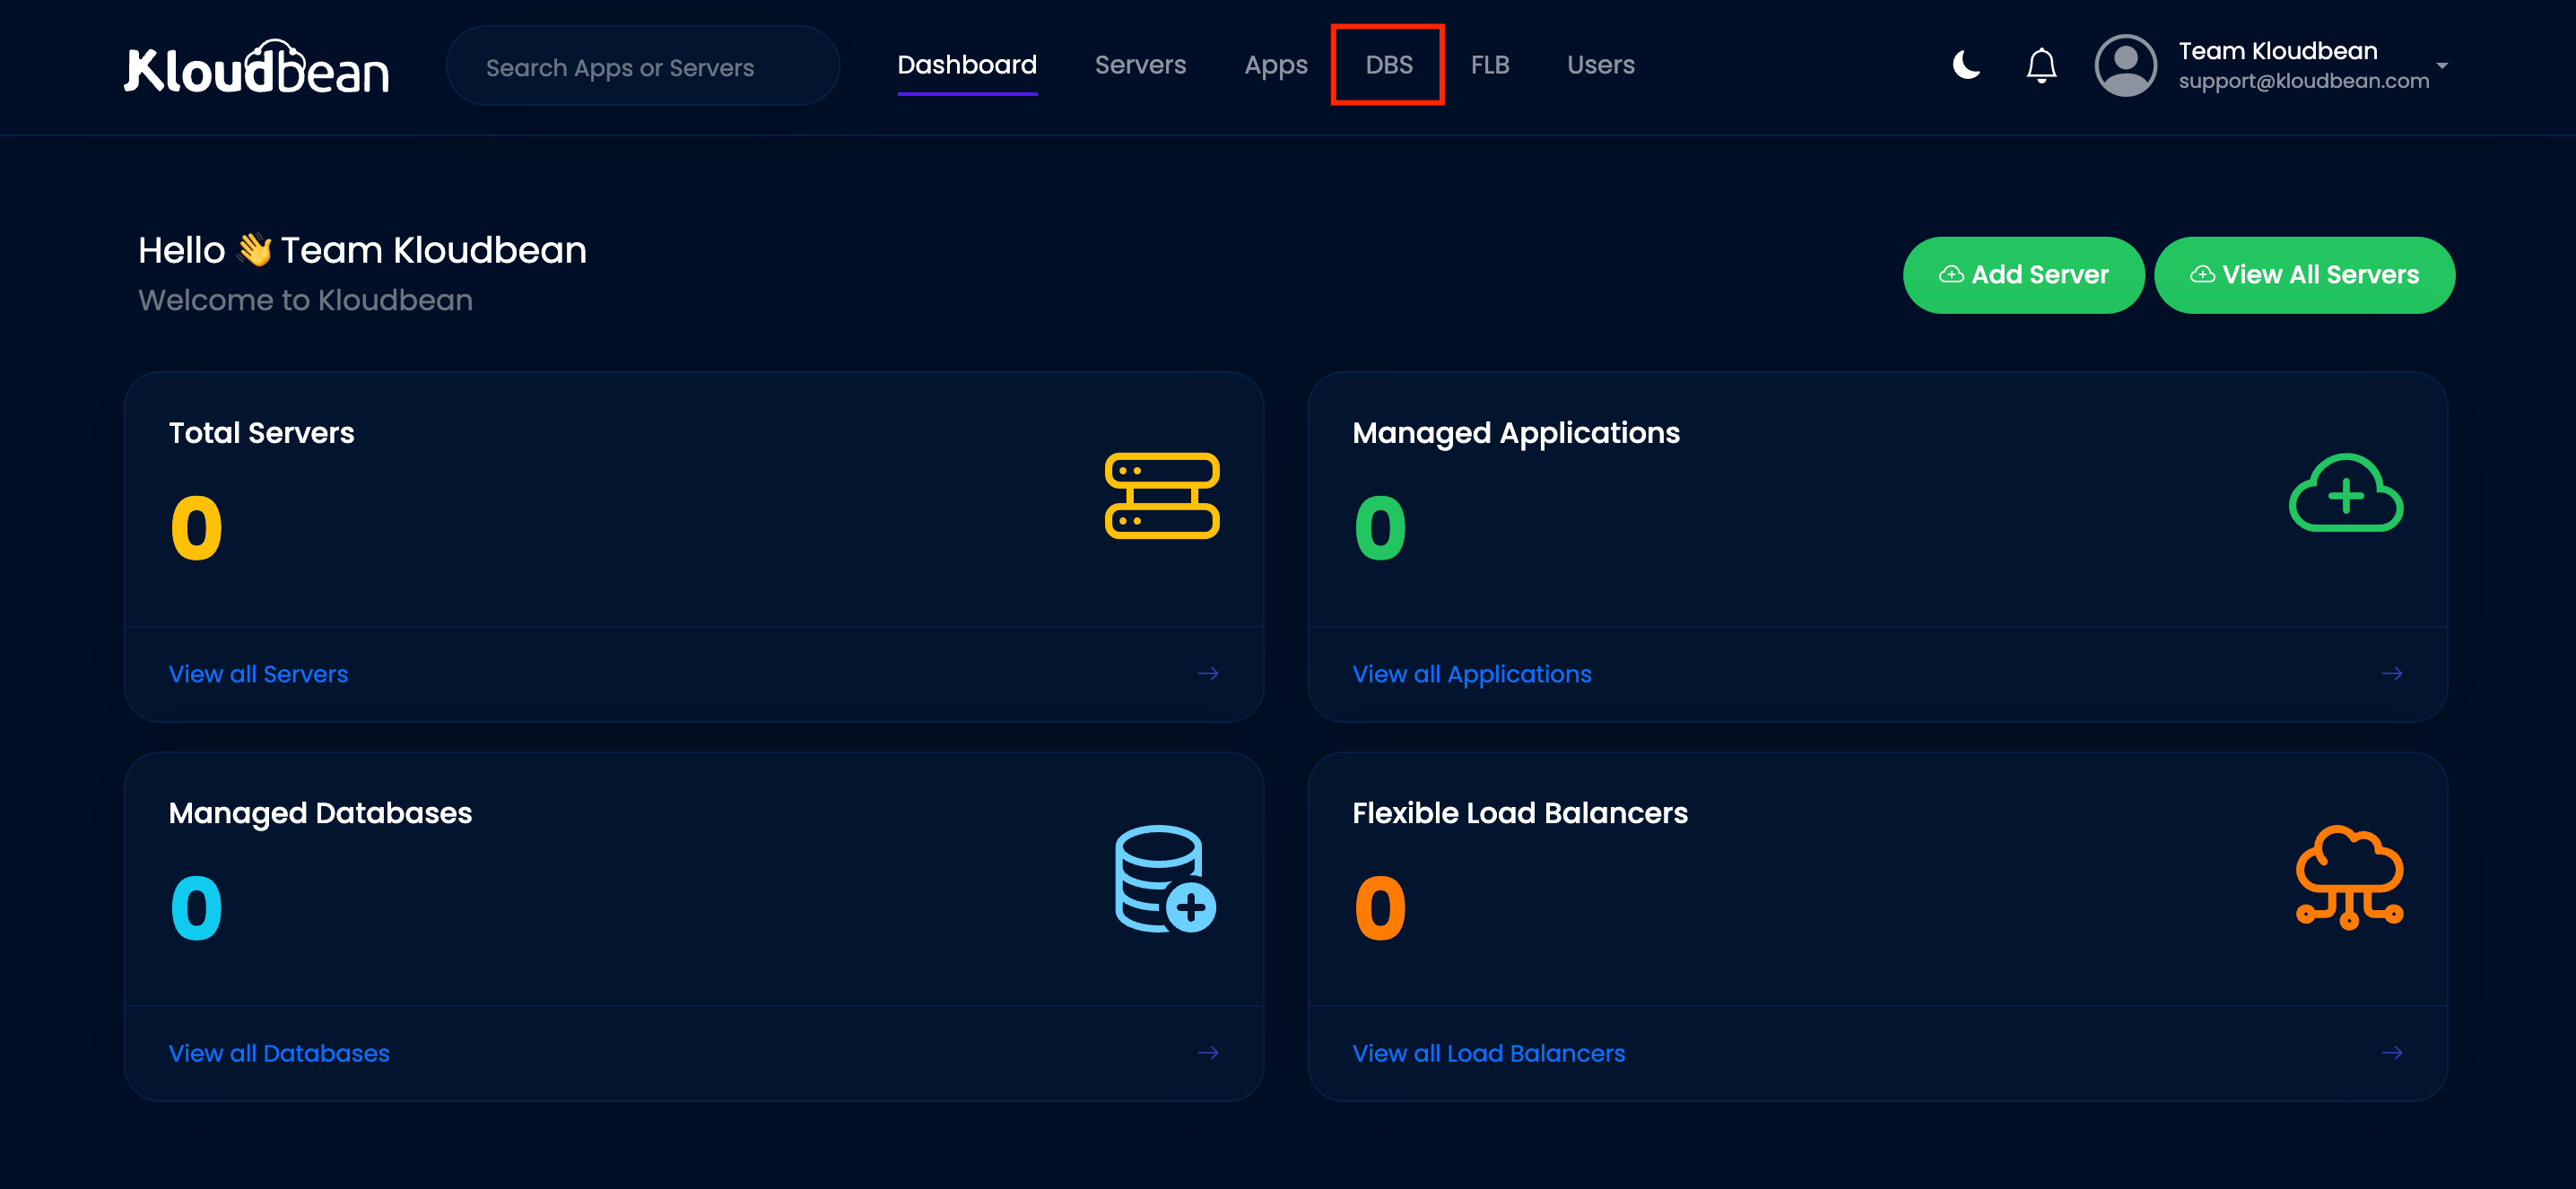
Step #2
After logging in, you will land on the Dashboard. From there, navigate to the DBS tabs by clicking the menu on the top navigation bar.
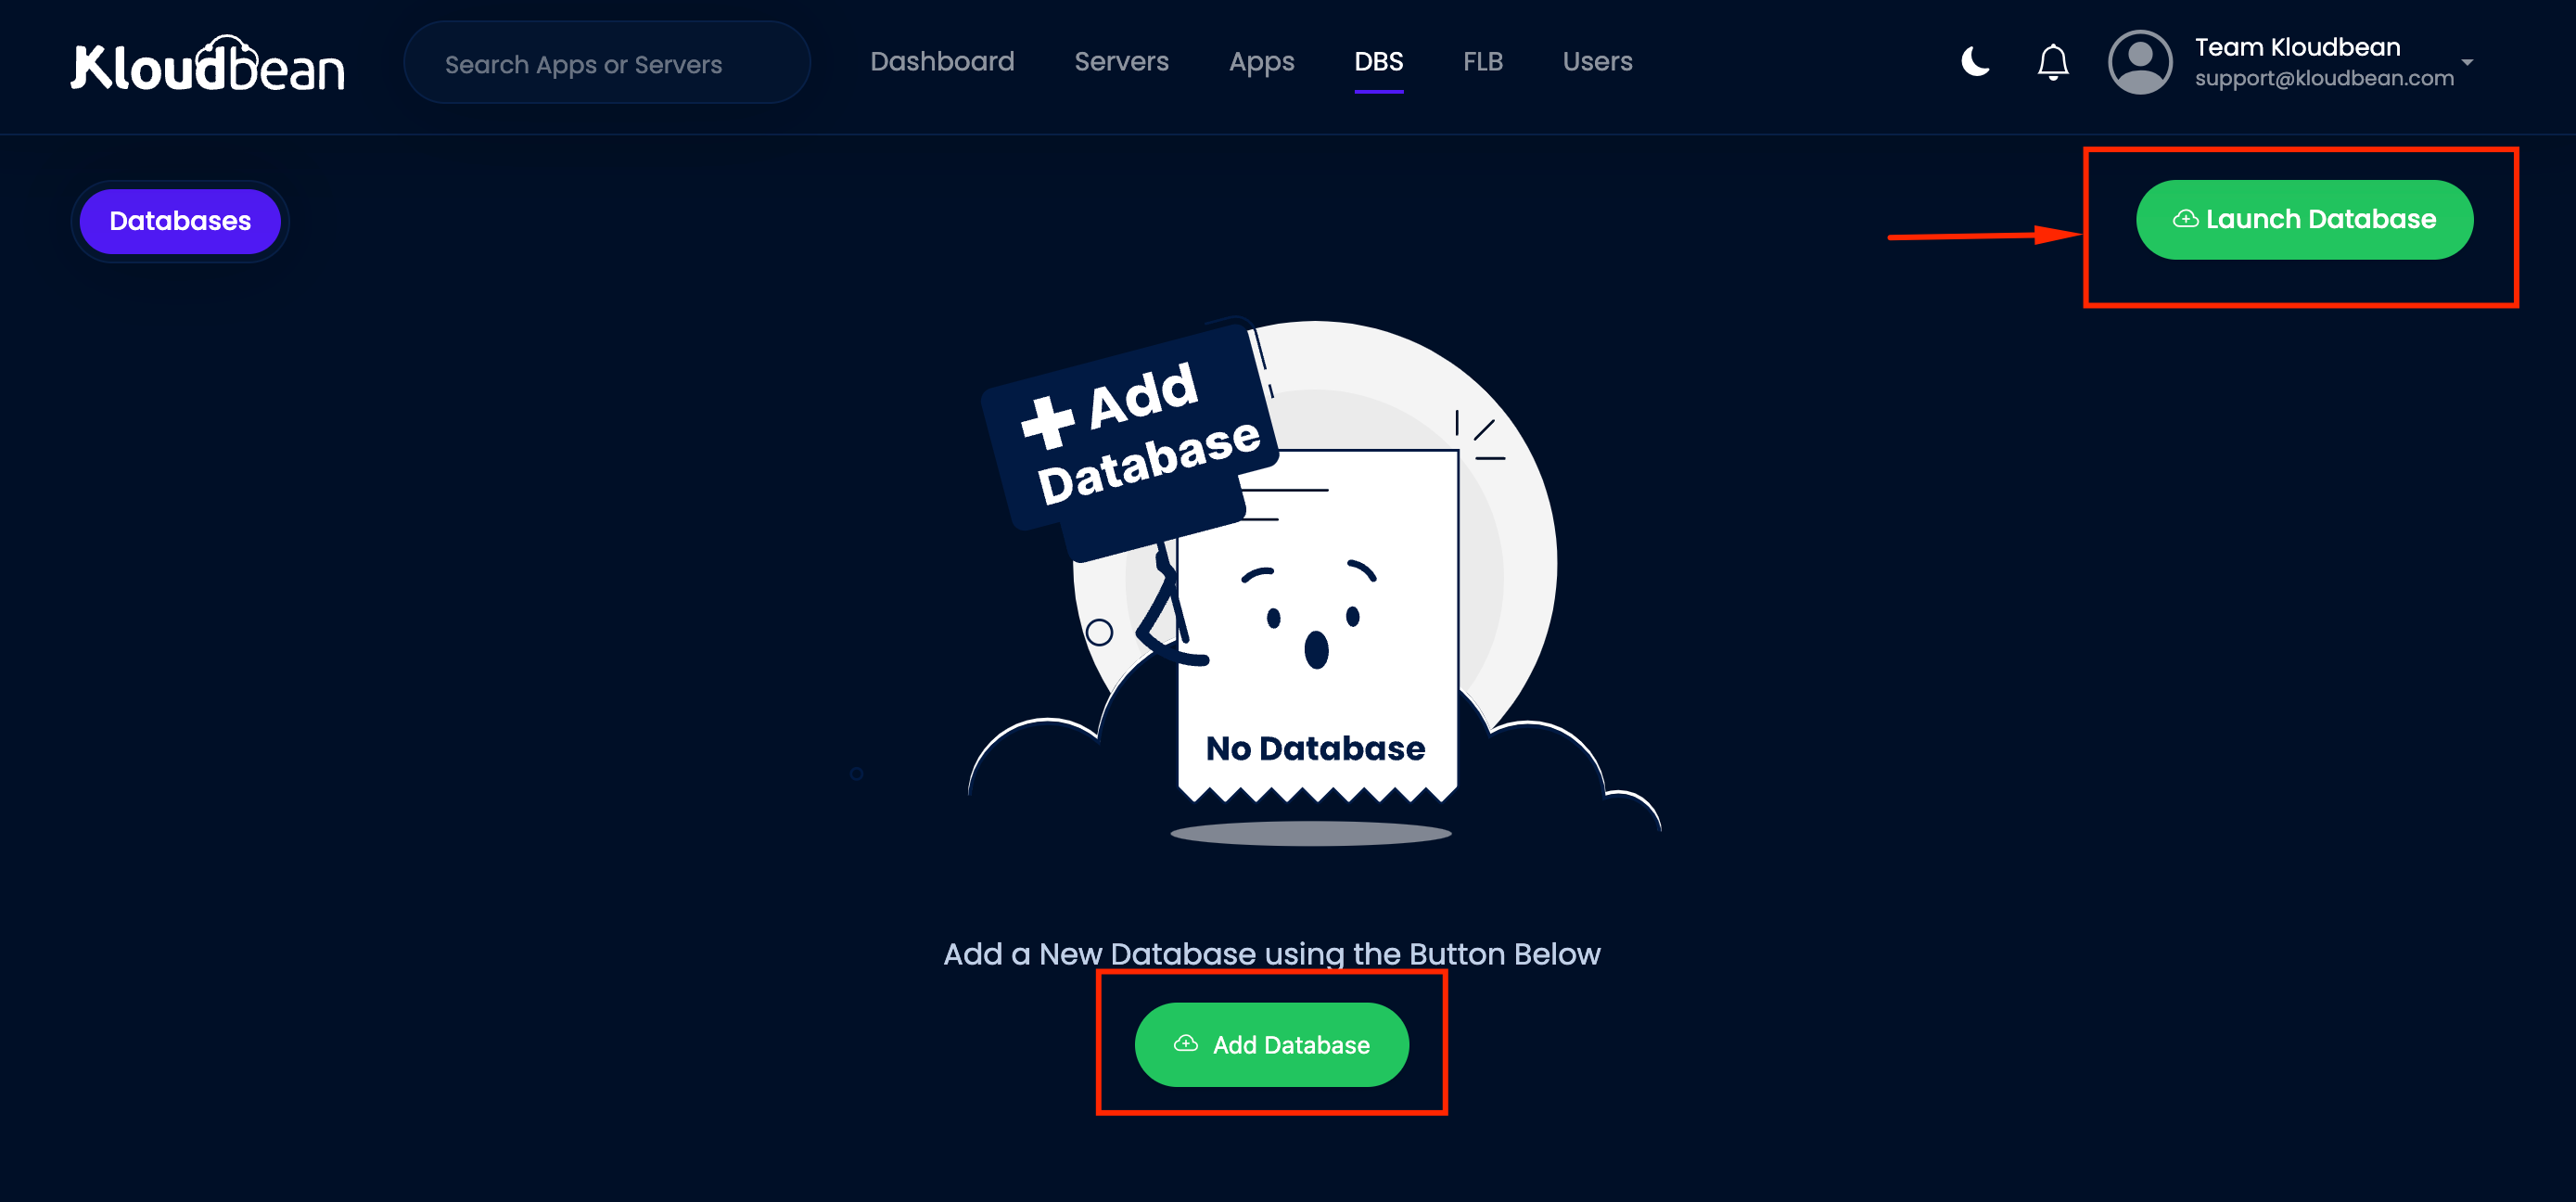
Step #3
After landing on the DBS tab, if you do not have any databases in your account or are new to Kloudbean, you will see an option to add a database, as shown in the screenshot below.
Navigating and Setting Up MySQL Database in Kloudbean
Accessing the Managed DBS Dashboard
After clicking on the DBS tab, you will be directed to the Managed DBS Dashboard.
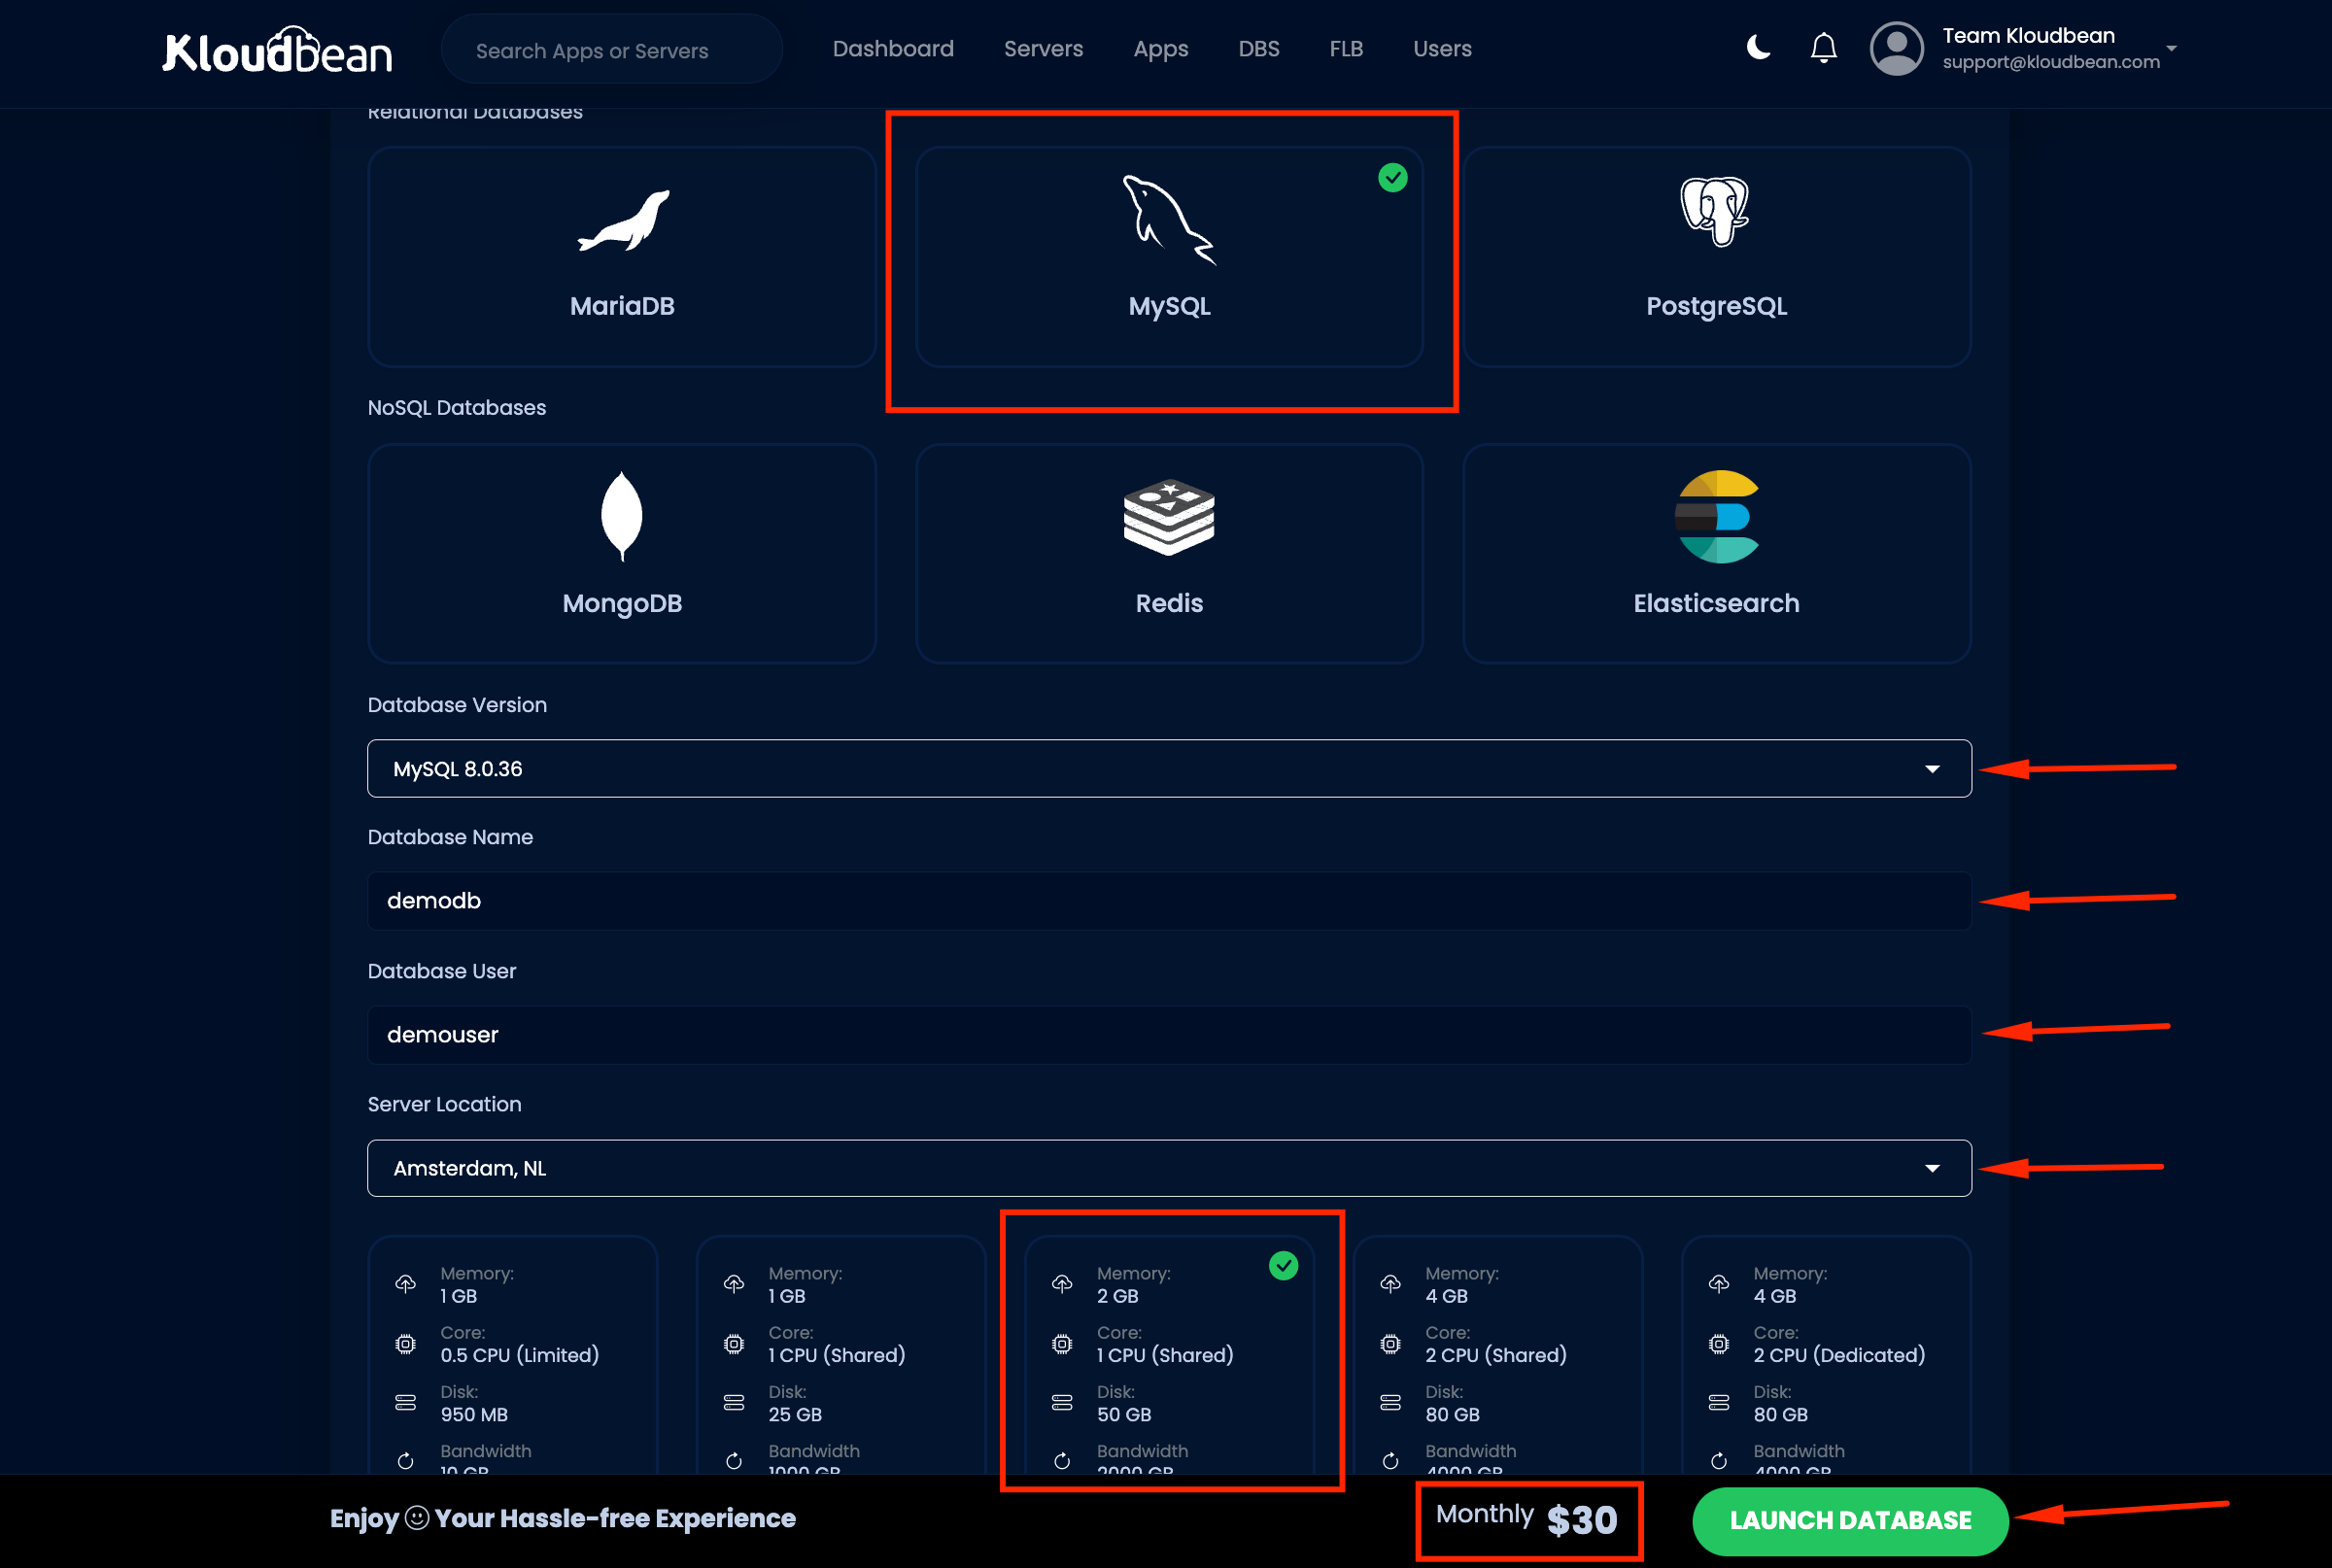
- Choose MySQL from the available options.
- Select the MySQL database version that fits your requirements.
- Kloudbean supports MySQL versions from 5.5.38 to the latest 8.0.36.
MySQL Version Description:
MySQL 5.5.38: A stable version with essential features and functionalities.
MySQL 8.0.36: The latest version with enhanced performance, security, and additional features.
Importance of DB Engine Version:The database engine version is crucial because it affects compatibility with applications, performance, and security. Newer versions often provide improved features, bug fixes, and better security protocols.
Setting Up Your Database
3. Enter a name for your database name according to your preference.
4. Enter a name for your database User name according to your preference.
5. Choosing Data Center Location
Note:Select the data center location that offers the best latency for your needs.
6. Selecting Database Size
Choose the size of your database based on your requirements.
Note: Kloudbean supports database sizes ranging from a minimum of 1 GB to a maximum of 128 GB of RAM.
Launching the Database
After selecting the database size, click on "Launch Now" to create your database.
Completing the Setup and Making a Payment
Launching the Database
After selecting the desired database size, click on "Launch Now."
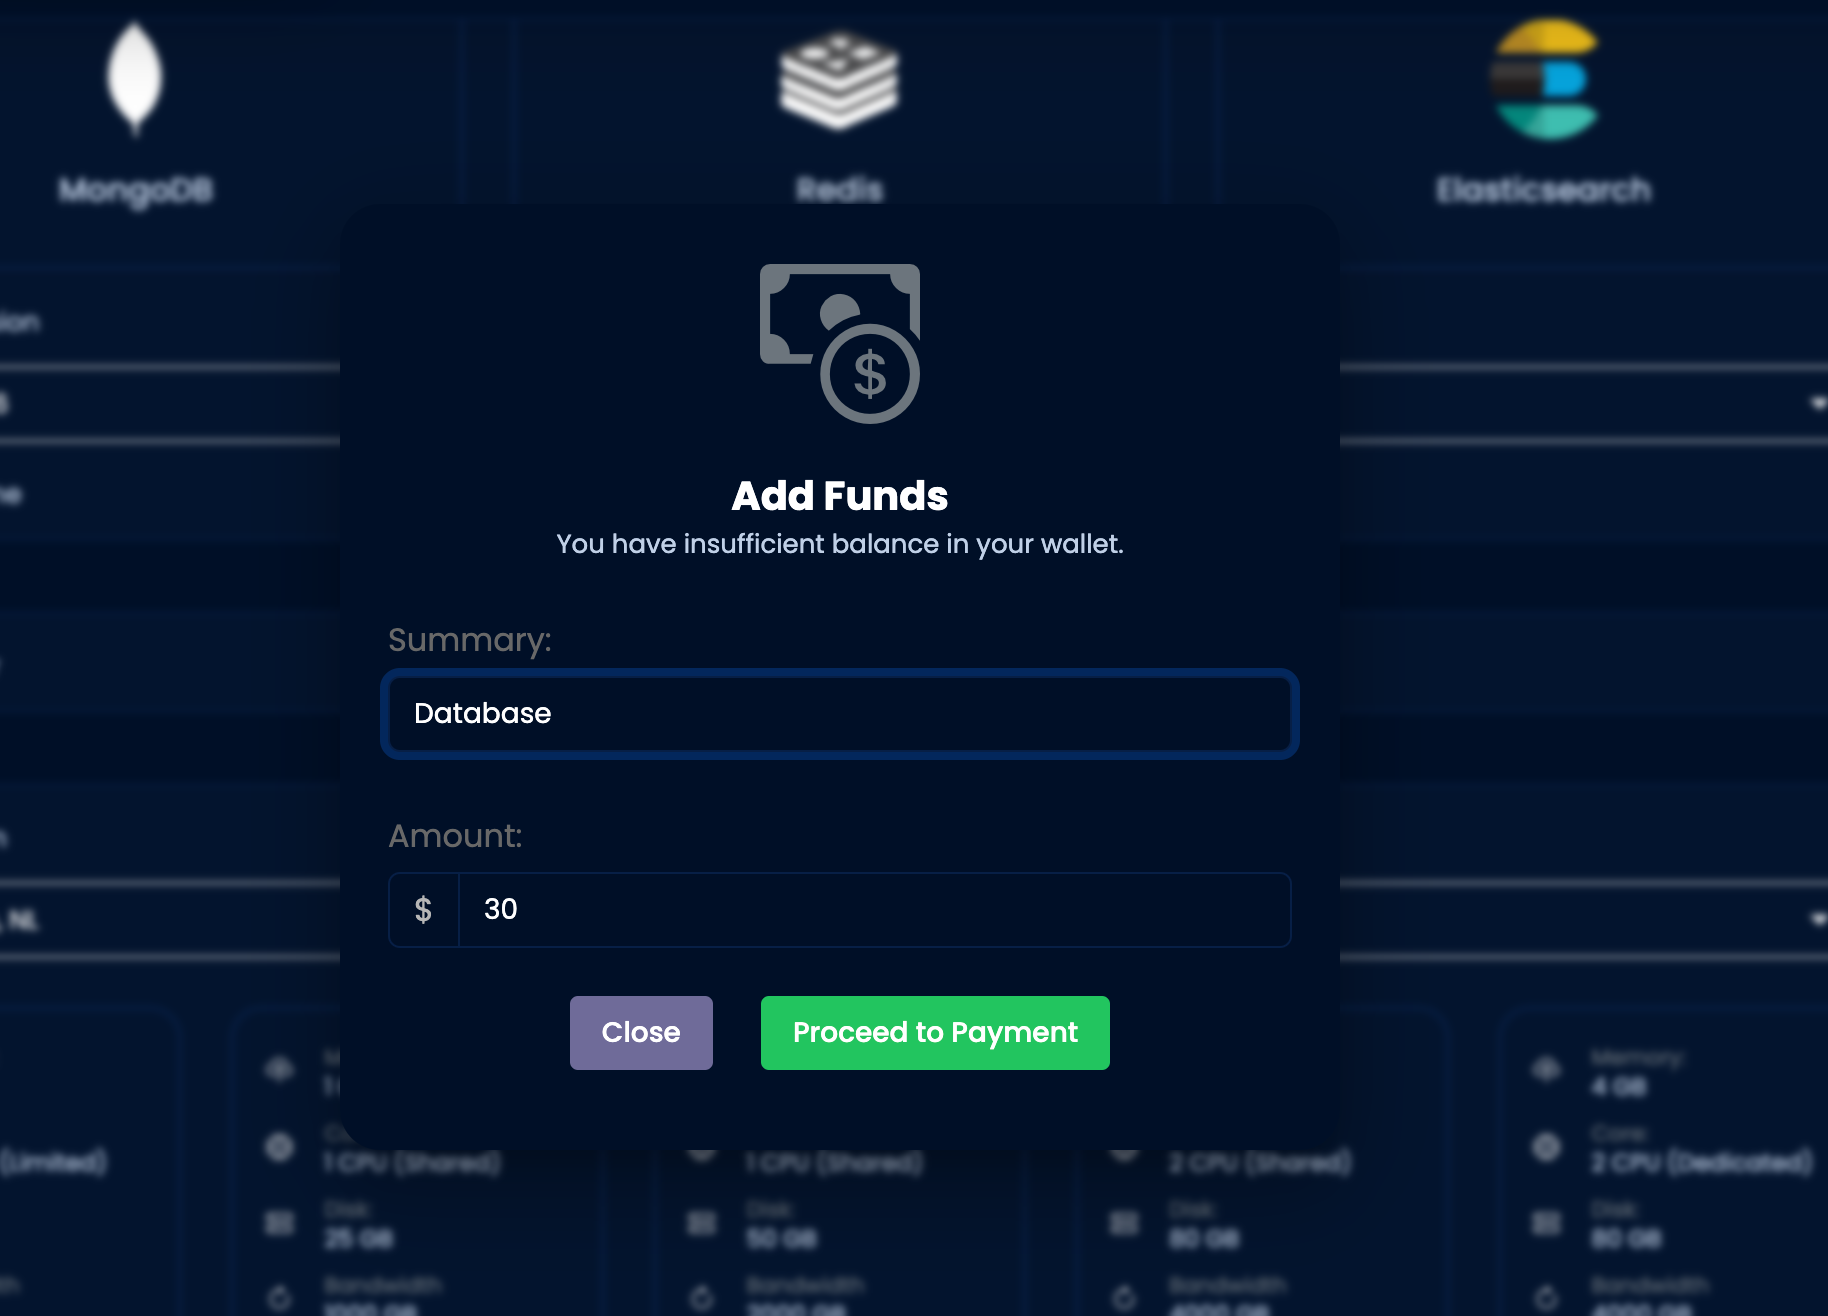
Payment Process
A pop-up window will appear for Add Funds to your wallet.
Click on "Proceed to Payment," which will redirect you to the Stripe checkout page to complete the transaction.
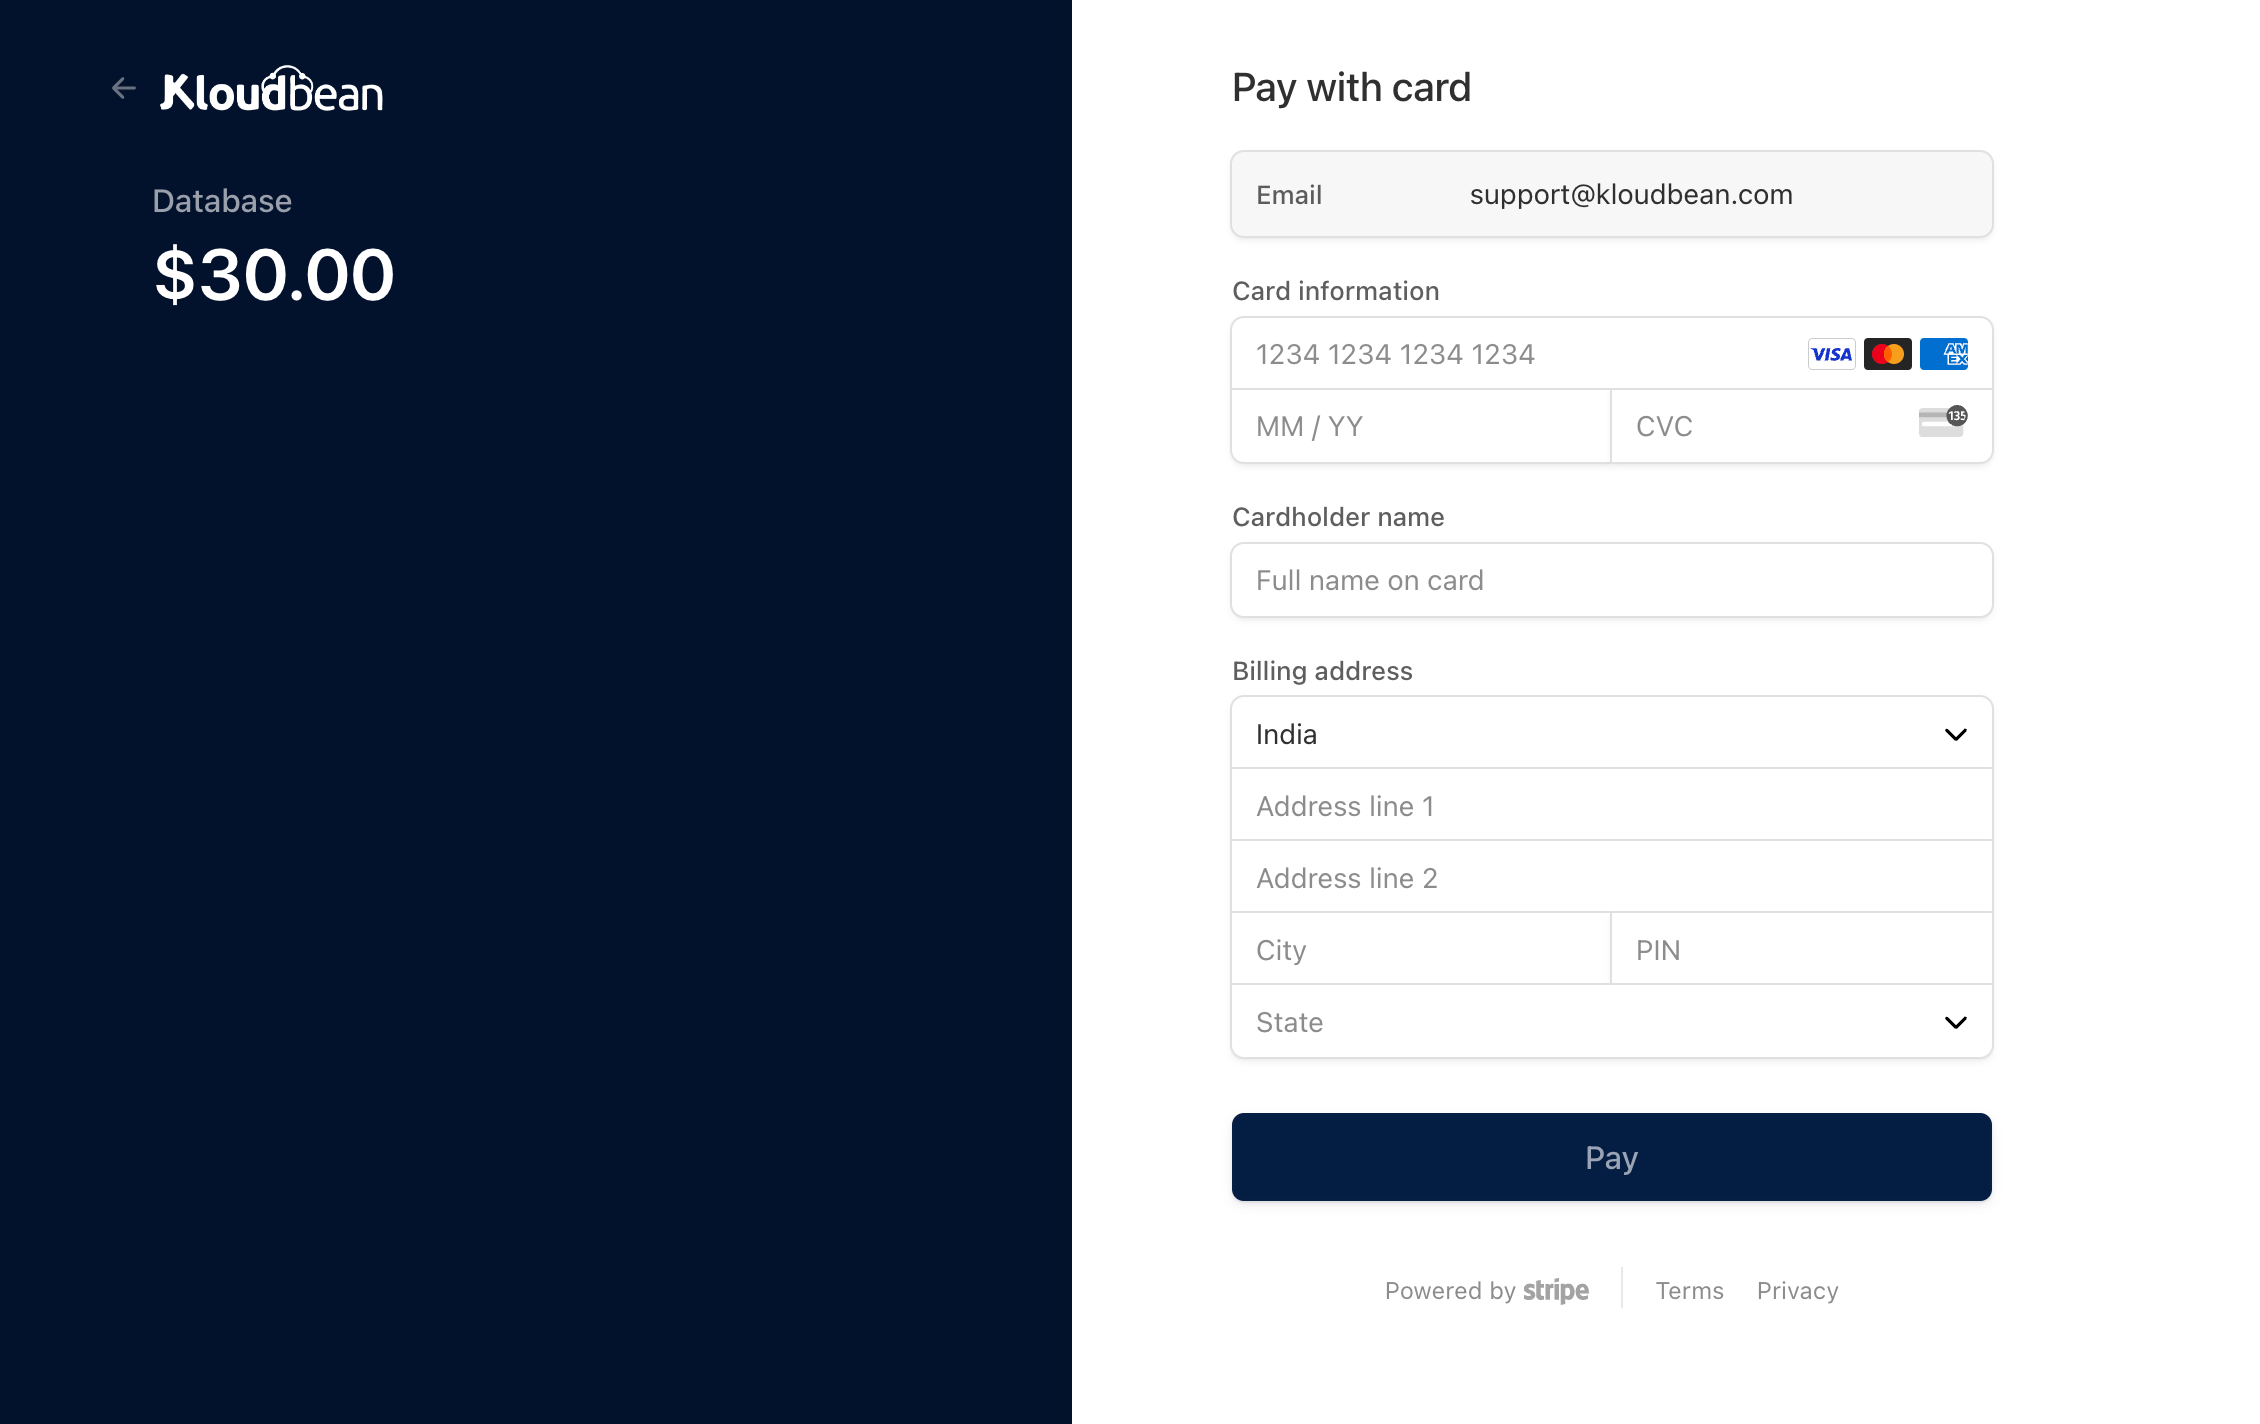
Finalizing the Payment
Checkout Process
Once you are on the checkout page, enter all the required information accurately.
Complete the payment process.
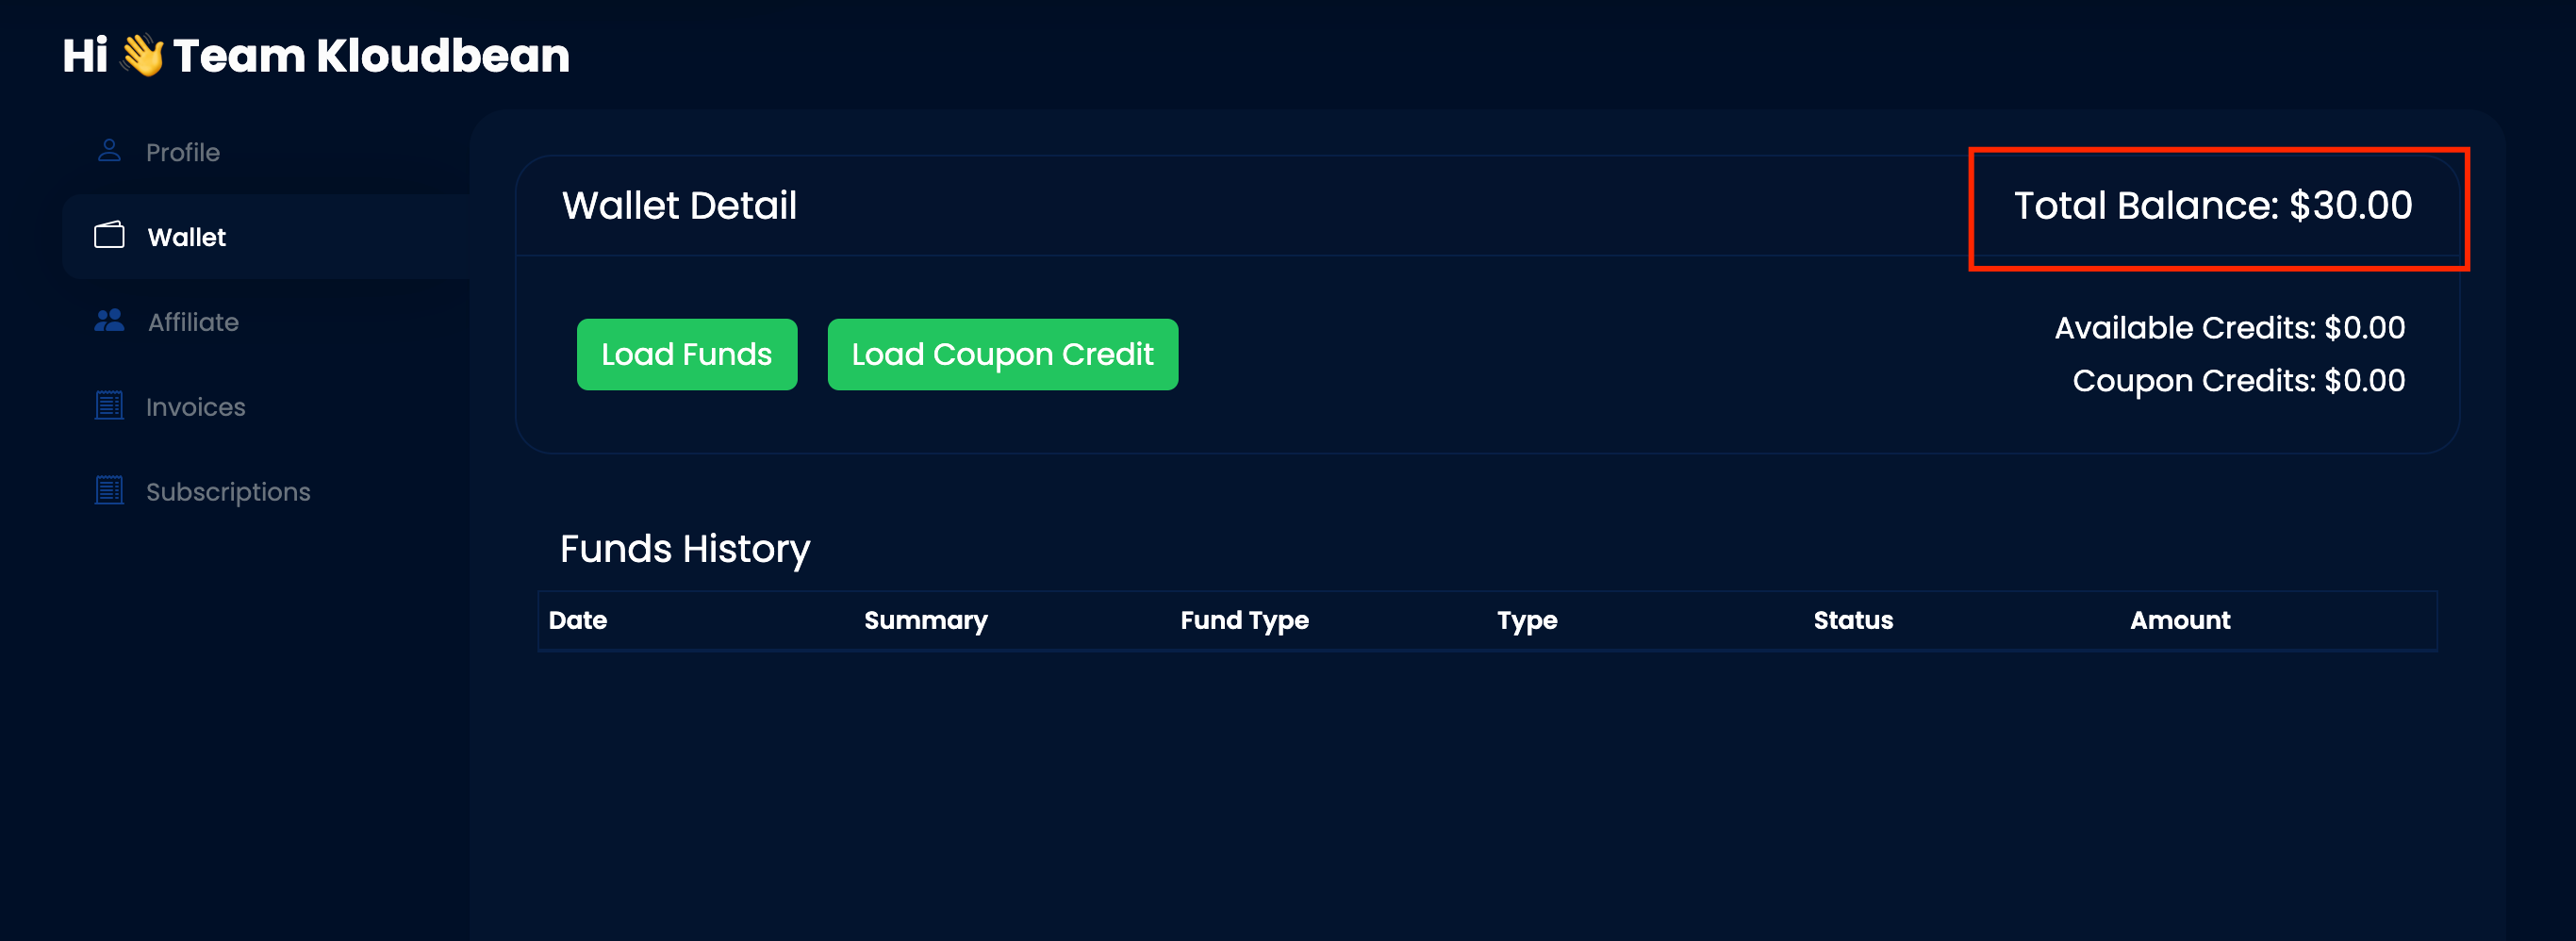
Post-Payment
After the payment is successful, the amount will be credited to your wallet.
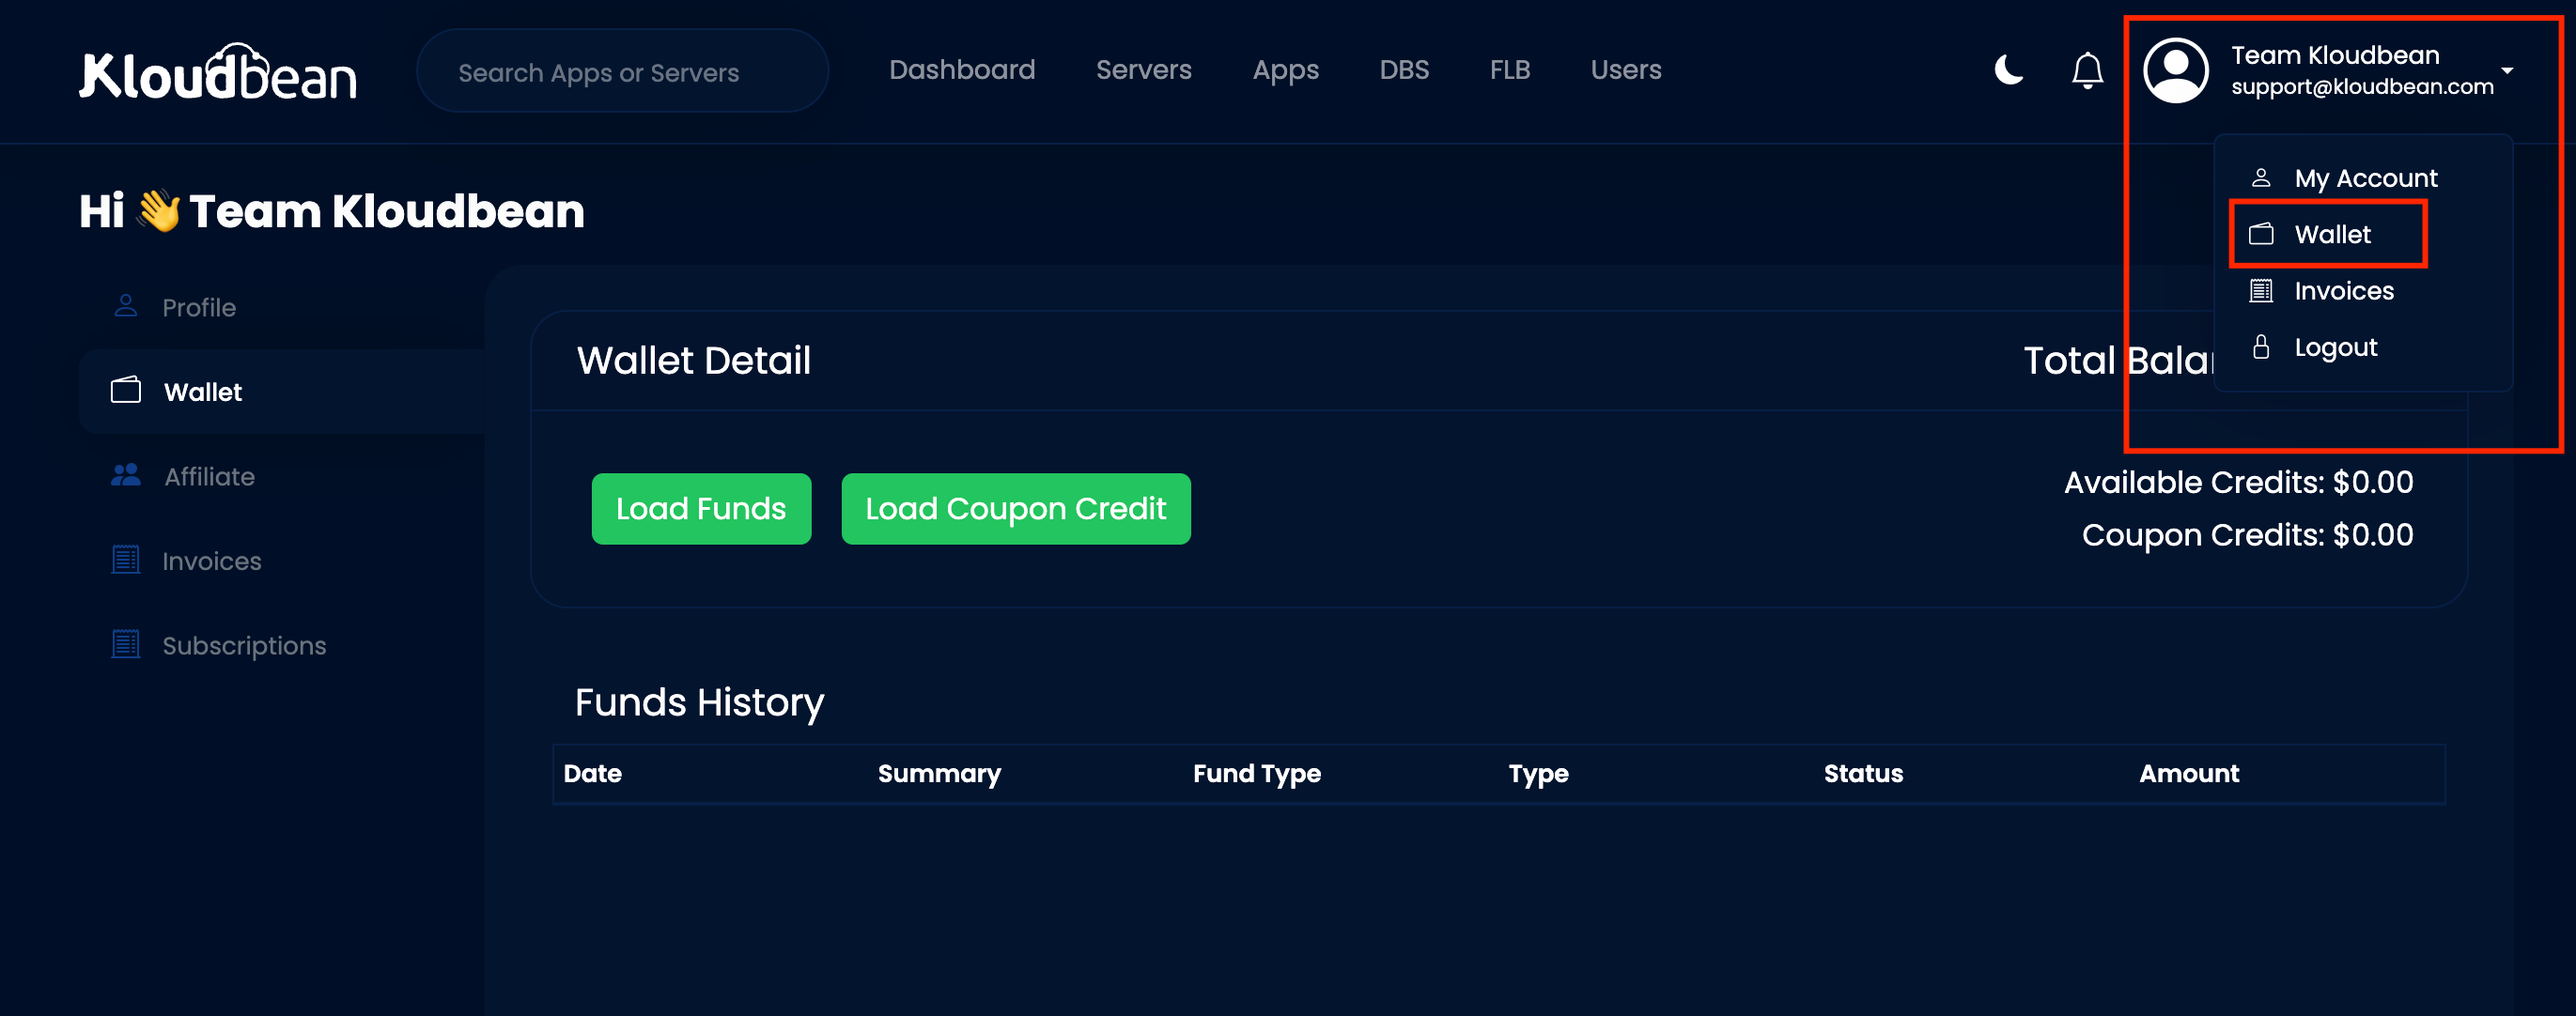
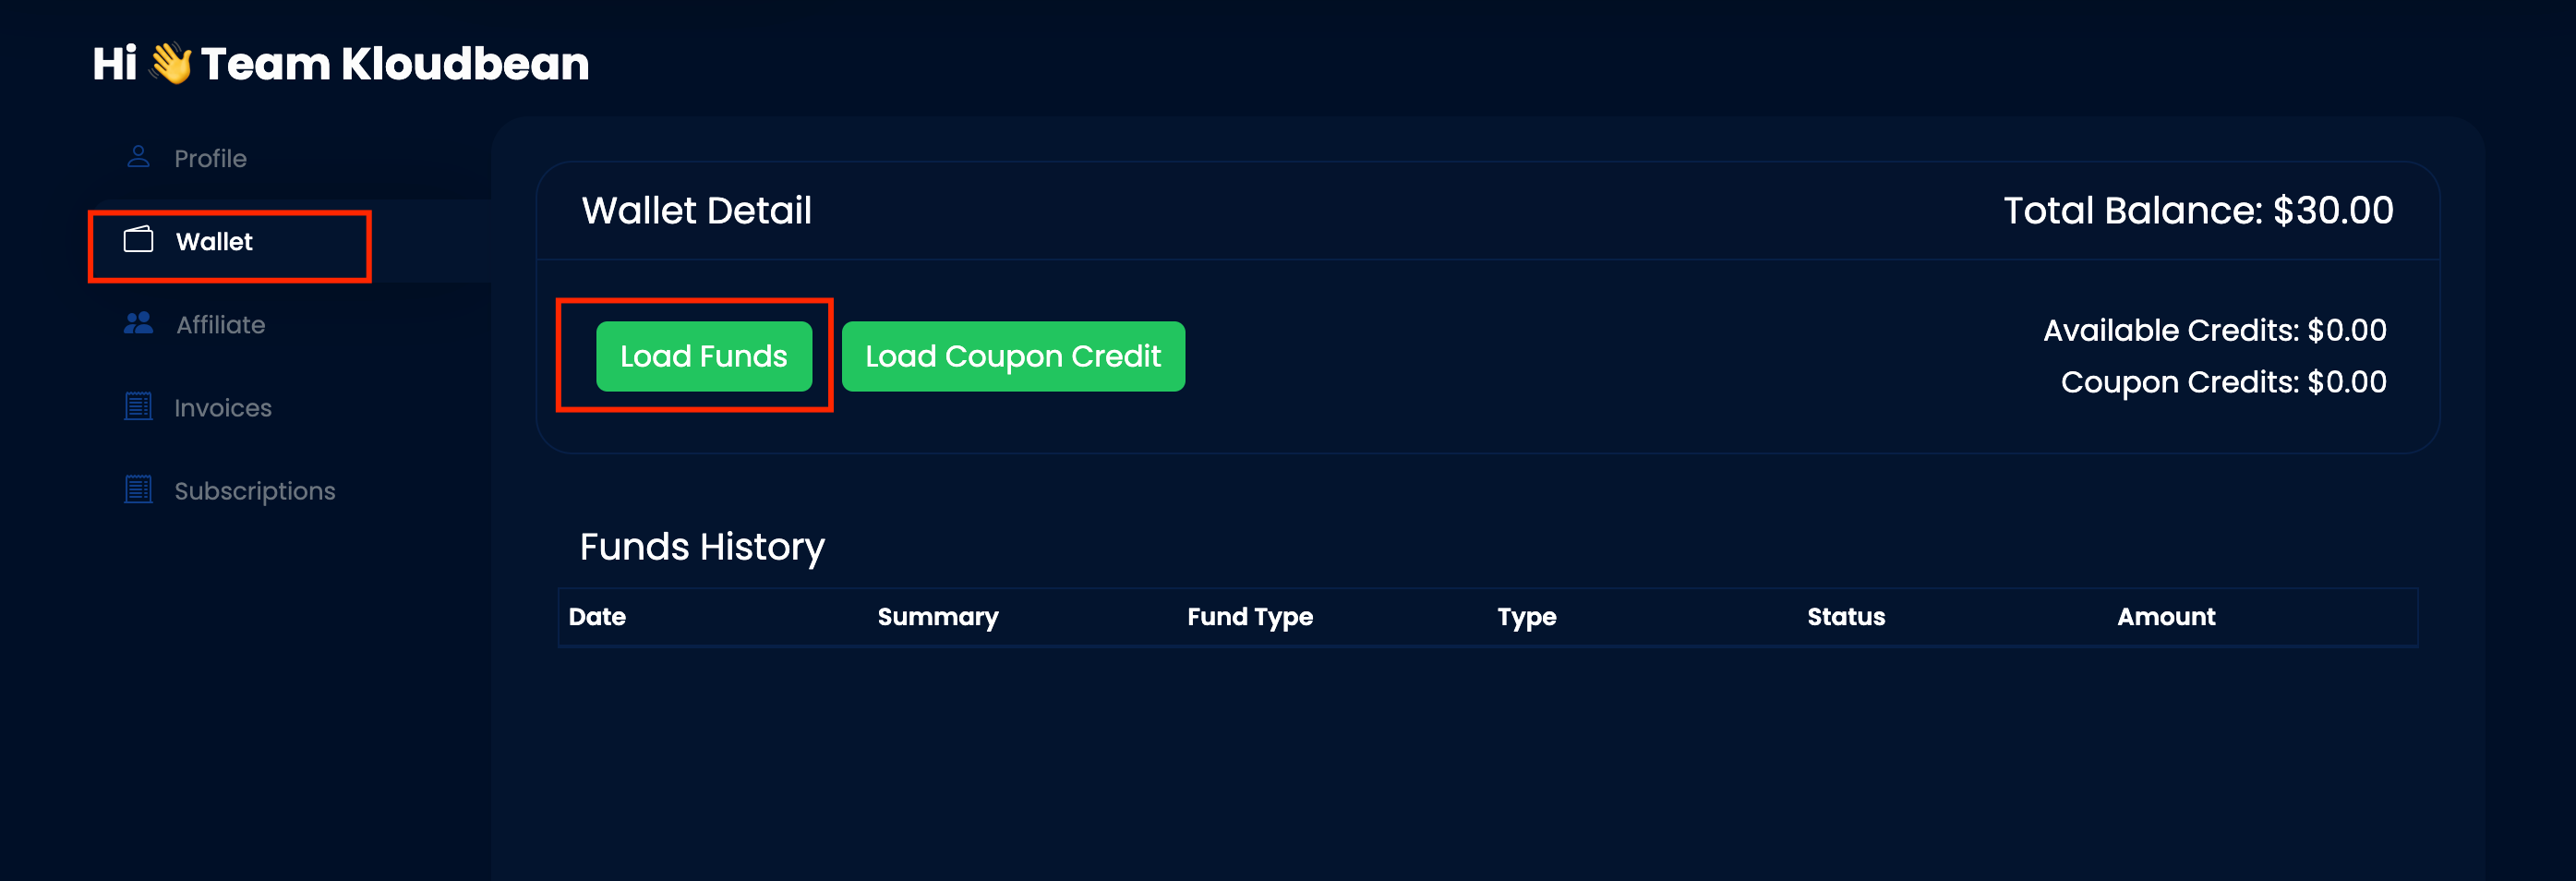
Accessing Your Wallet
Accessing the Wallet
Click on your user profile located in the top right corner of the screen.
Select "Wallet" from the dropdown menu to access your wallet.
Adding Funds and Using Services
Adding Funds to Wallet
- From the Wallet page, you can directly add funds.
- Click on "Load Funds" to add money to your wallet.
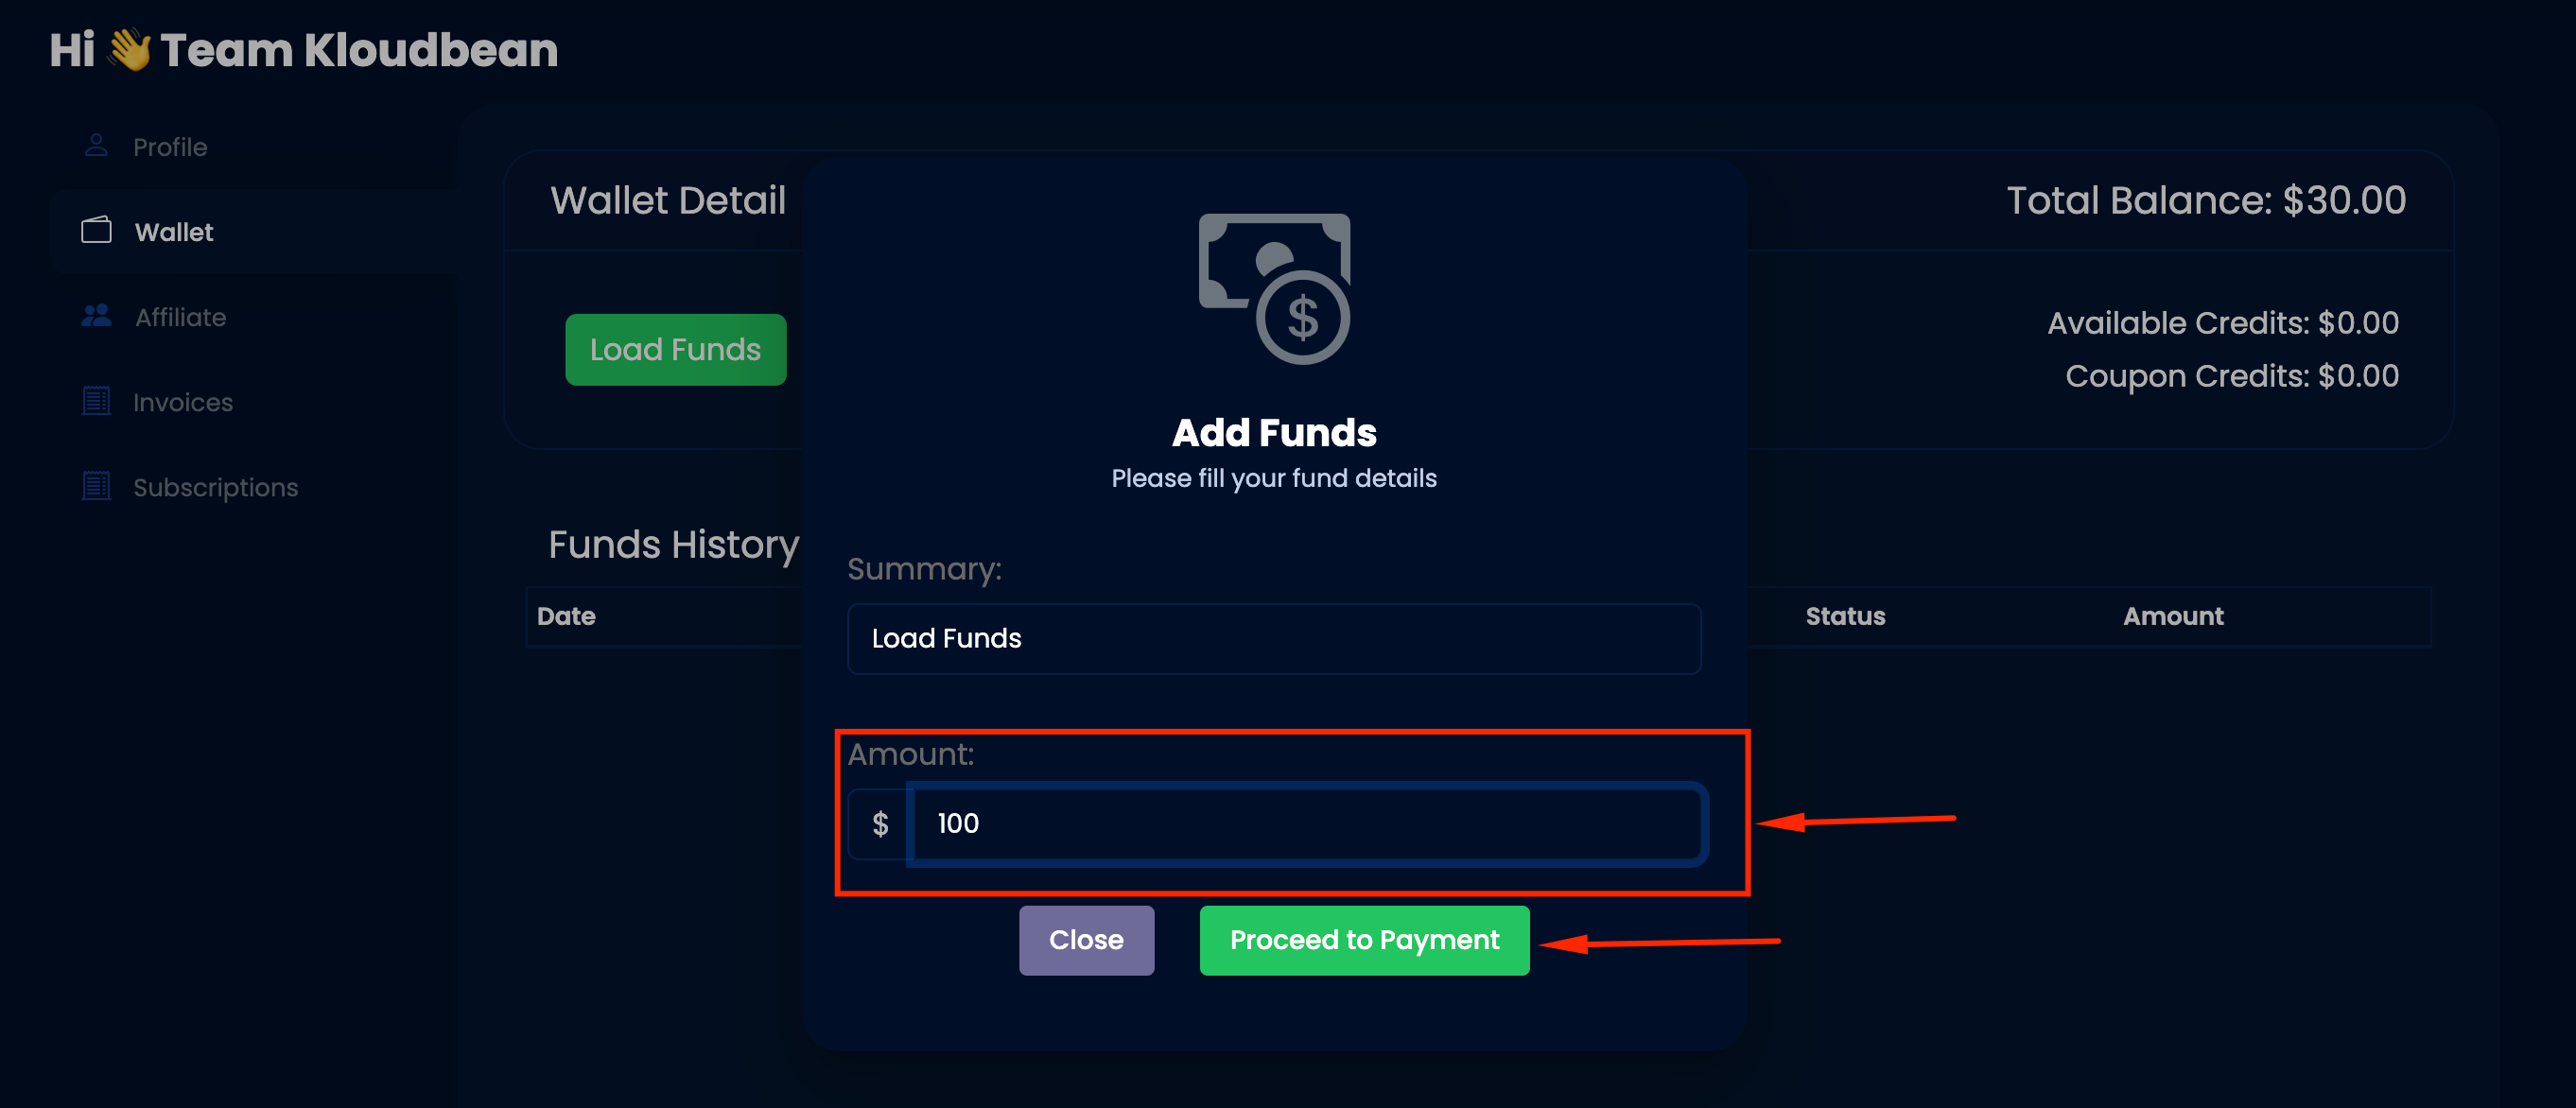
Loading Funds into Your Wallet
Loading Funds Process
- Enter the amount you wish to load into your wallet.
- Click on "Proceed to Payment," which will redirect you to the checkout page.
- Enter valid card details and complete the payment.
Successful Wallet Load
- Once the payment is processed, your wallet funds will be successfully loaded.
Utilizing Wallet Funds
Once funds are added, you can use them to add databases or any other services from the console.