Adding a custom domain to your static site on KloudBean is a quick and straightforward process. With just a few simple steps, you can link your custom domain to your site and make it accessible under your preferred web address. KloudBean’s user-friendly interface guides you through configuring your domain settings, ensuring a seamless connection between your domain and hosted content. Enjoy a professional touch with your own custom domain in no time!
Let's now see a demo of how to do this in action!
Step 1: Add your custom domain
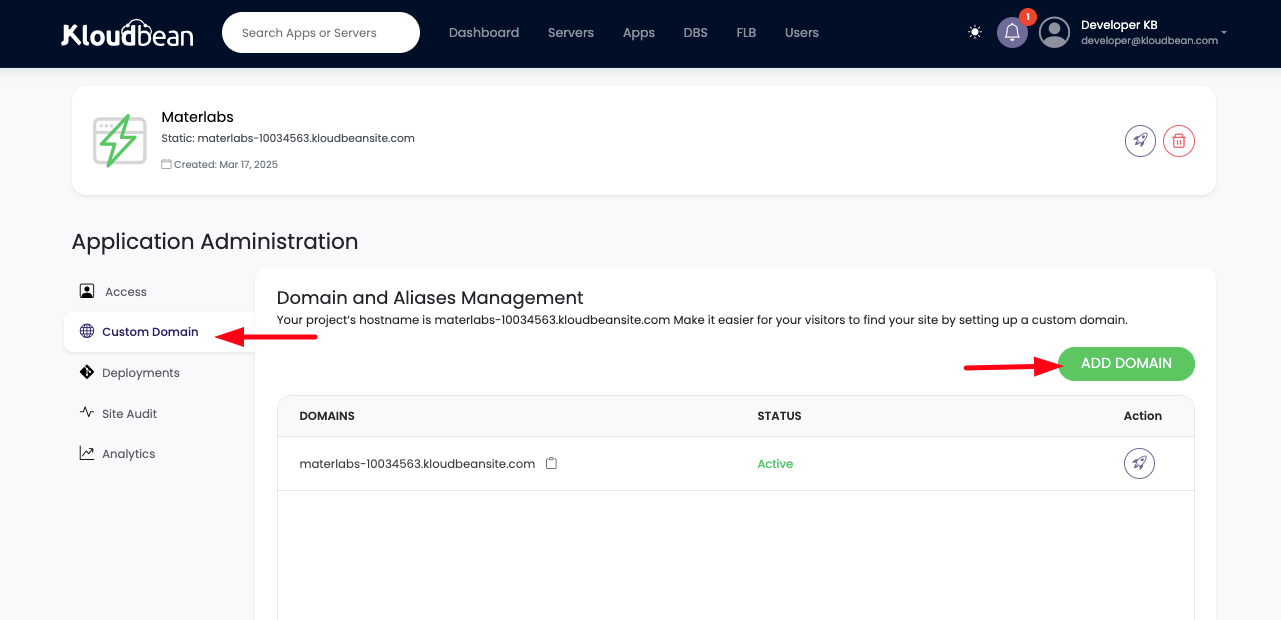
In order to add new custom domain, Go to Custom Domain tab in Application Administration. From here we can see a button for adding new domain. Click on ADD DOMAIN button.
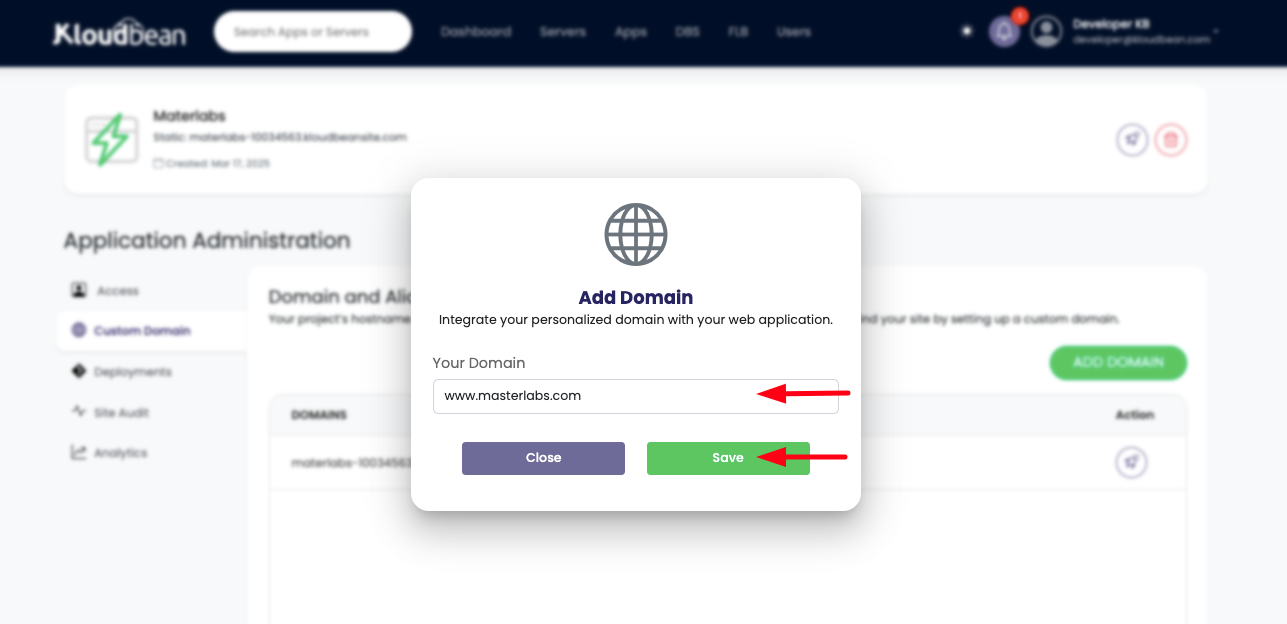
This will open a prompt, asking for the domain. In this example we are going to our domain with subdomain www.
Once domain is added, Click on Save button to add this domain.
Step 2: View CNAME record
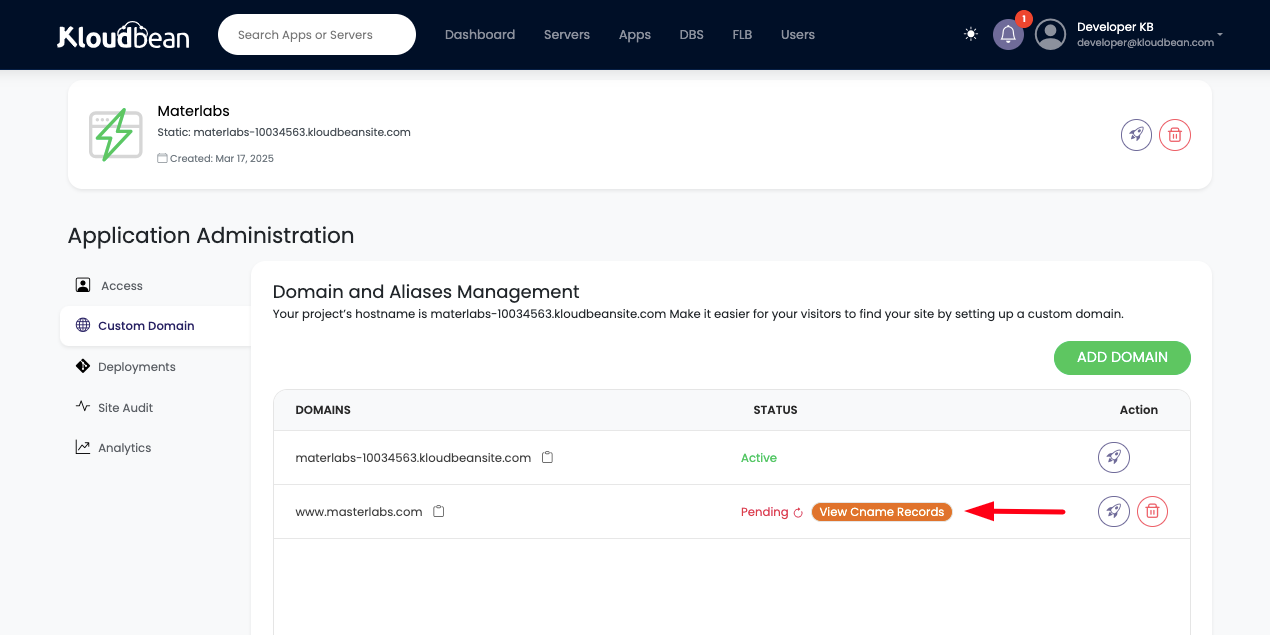
Once domain is added. We can see CNAME record value by clicking on View CNAME Record. This will show CNAME record value, that we are going to map in out DNS provider.
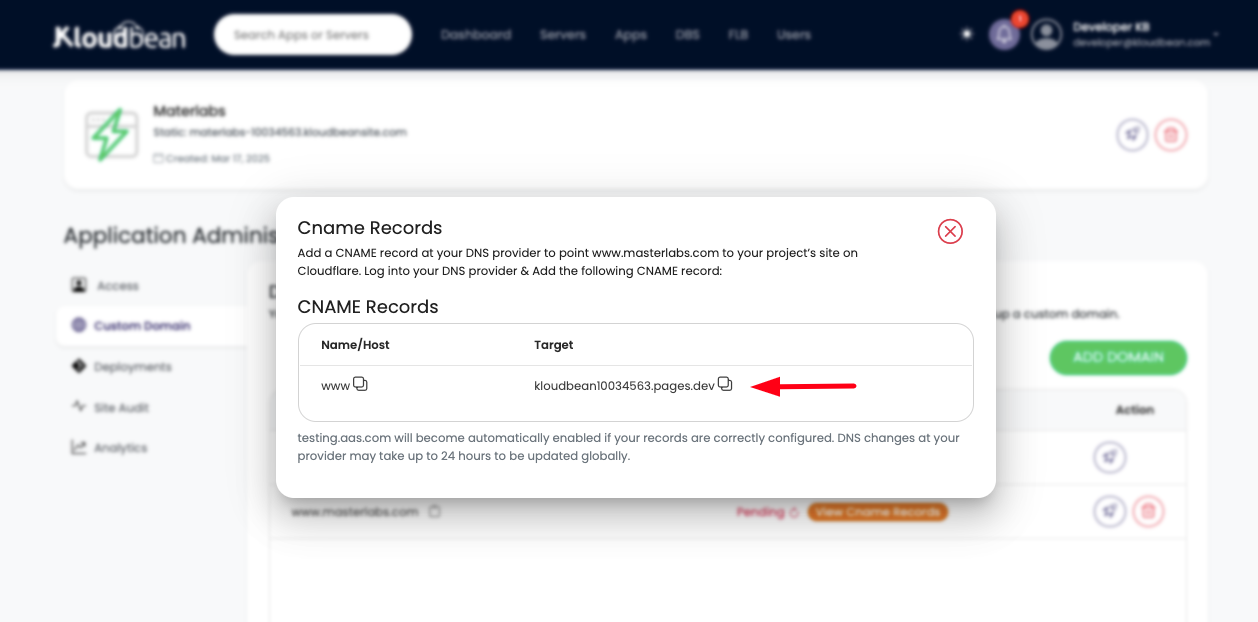
From this prompt, Copy Host and Target.
Step 3: Add www CNAME record on Cloudflare
In order to add CNAME record on Cloudflare, Click on Add record in your domain's DNS tab. Once clicked, it will ask to fill following fields.
Type: It should be CNAME
Name: It should be your subdomain, which is www in this example.
Target: Here past the value that you have from Kloudbean console, as shown above.
Hit Save button.
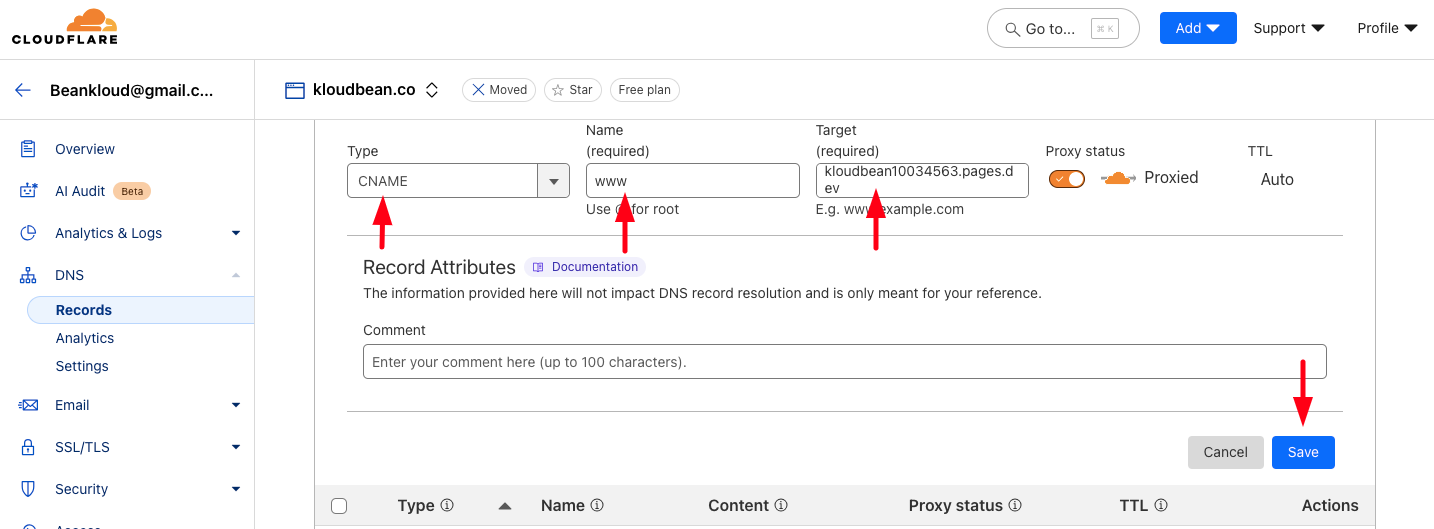
Once you save, after sometime you should be able to access your site with your custom domain on subdomain www.
Optional Step 4: Add www CNAME record on GoDaddy
If your DNS provider is GoDaddy, then follow these to map your domain's CNAME record on GoDaddy.
In Domain DNS section, click on Add new record and add the fields similar to Cloudflare.
Type: It should be CNAME
Name: It should be your subdomain, which is www in this example.
Value: Here past the value that you have from Kloudbean console, as shown above.
Hit Save button.
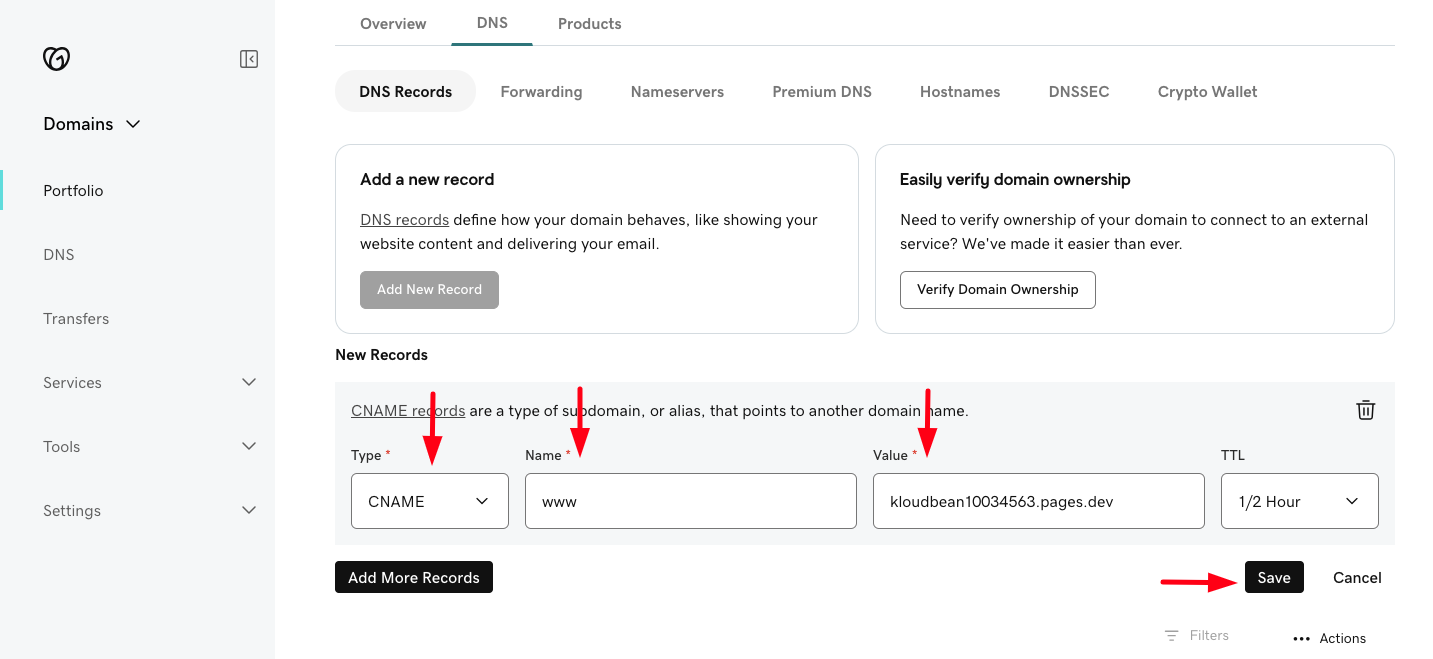
This should add your see CNAME record and site should be accessible with www subdomain of your domain.
Optional Step 5: Add a root (@) domain
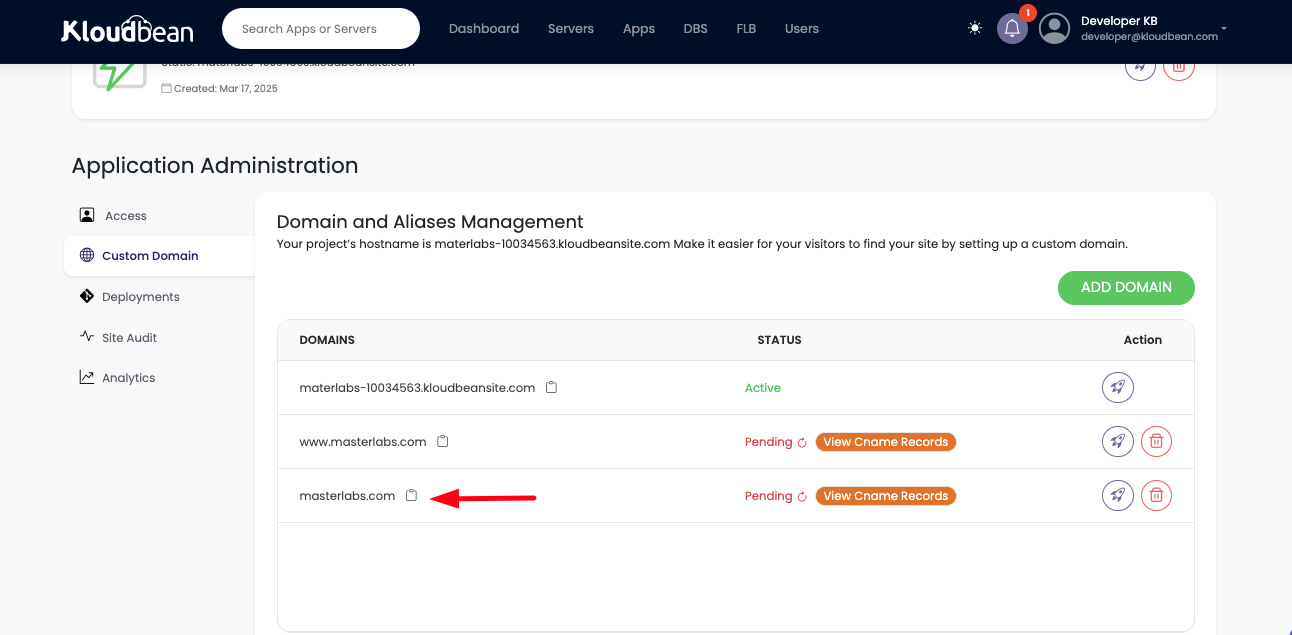
Adding a root domain is straightforward process if your DNS provider is Cloudflare. However in case of other DNS provider, they do not allow to map root domain with a CNAME record. but we can resolve this problem and a work around, that we are going to demonstrate here.
After adding a root domain, if we view CNAME record on kloudbean console, it will ask to map record with name @.
Let's copy Target from here.
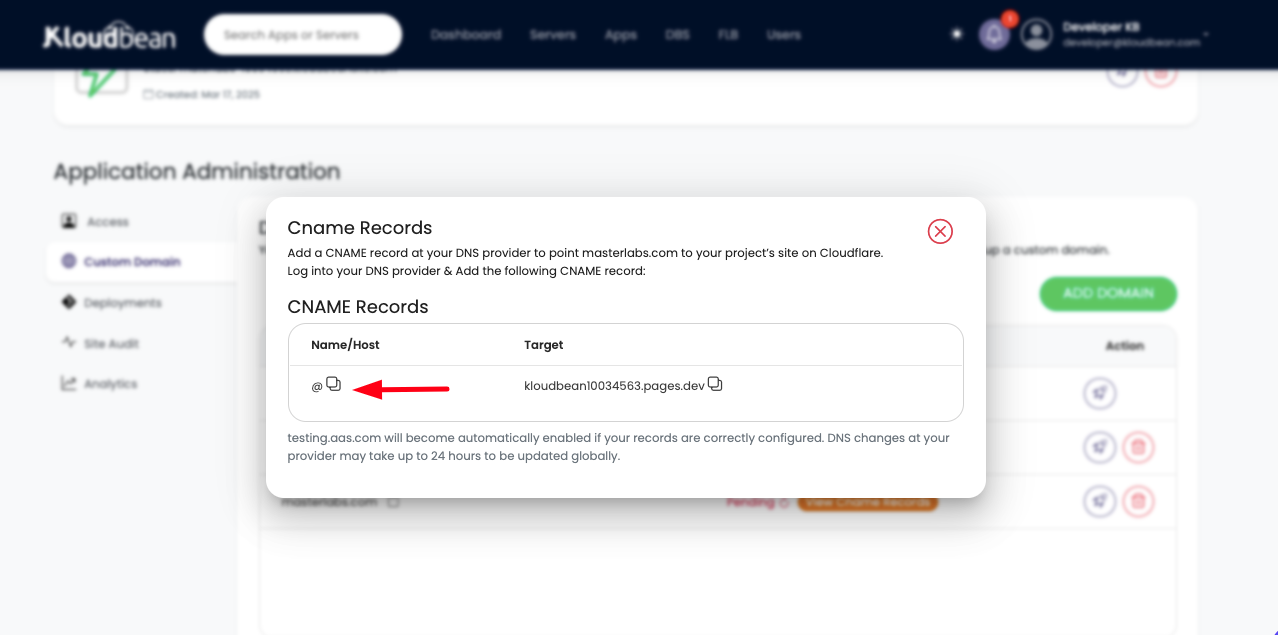
Optional Step 6: Add CNAME record for root (@) domain on Cloudflare
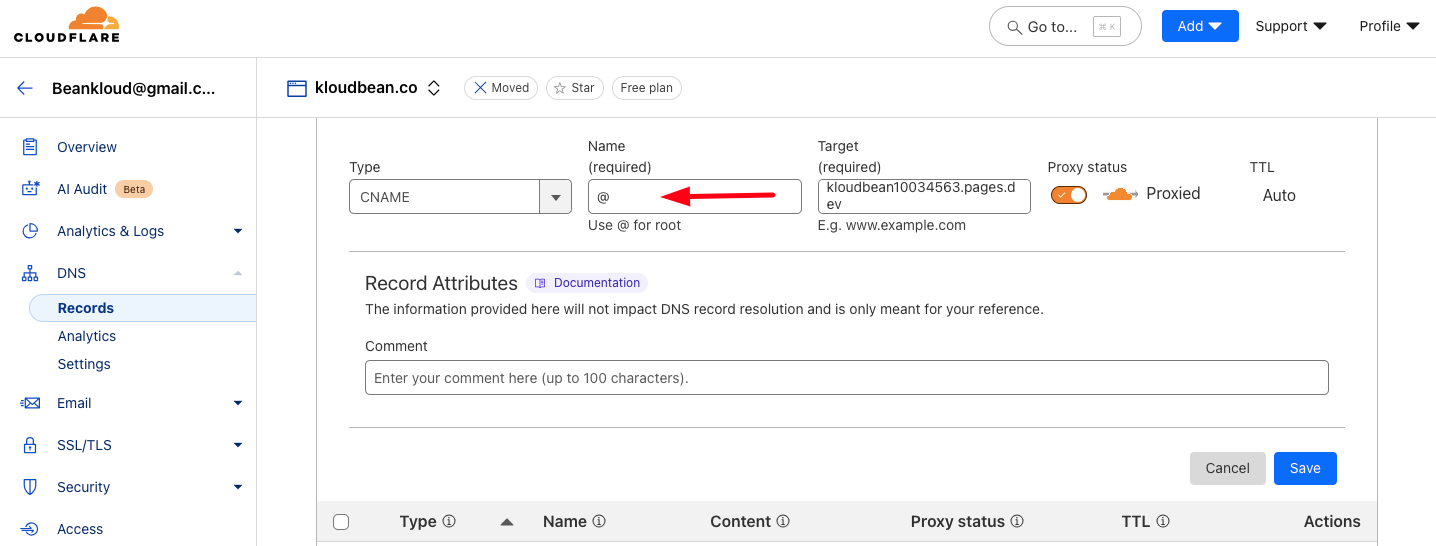
Go to Cloudflare DNS and add new record.
Here add same Type and Target, however in Name field add @.
Hit save and root domain should start working for this site.
Optional Step 7: Add CNAME record for root (@) domain on GoDaddy
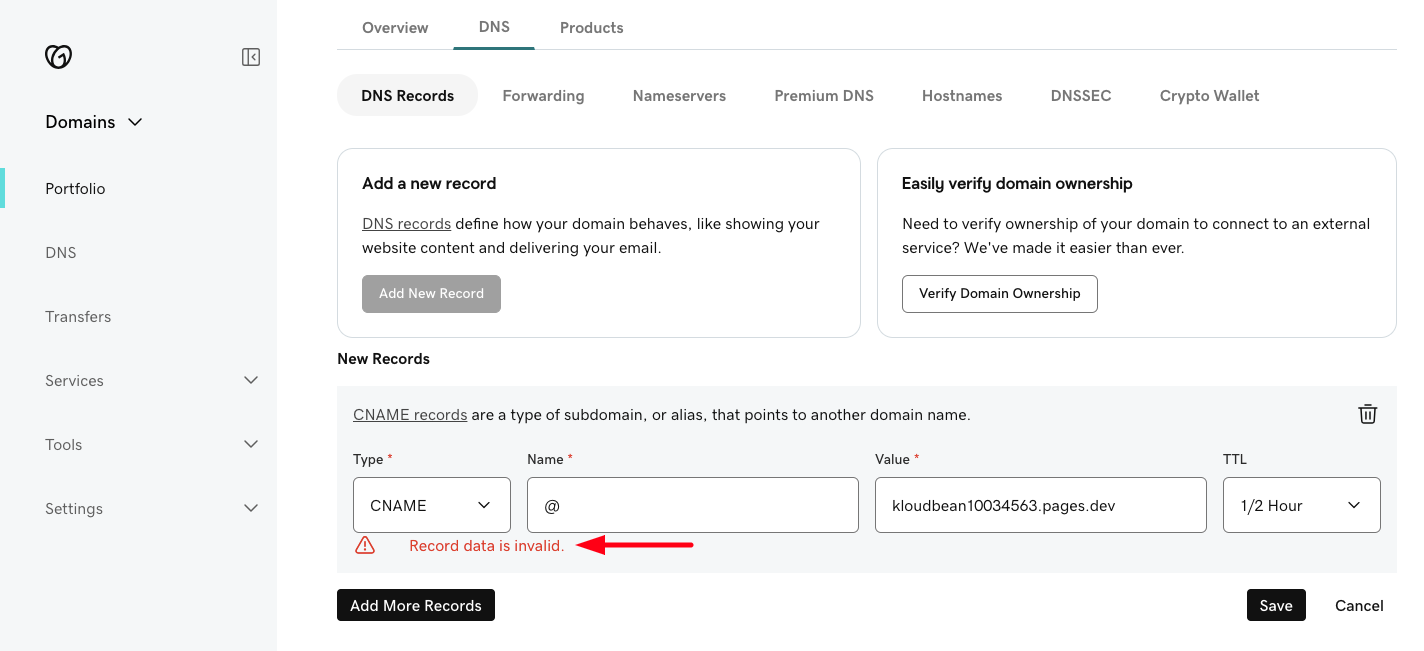
If we want to map root domain with CNAME record, that is not possible on GoDaddy and many other DNS providers, as this is a by default restriction that domain's root record should be A record or AAAA record. If we try to add, it will end-up in error saying Record data is invalid!
So as a work around, we are going to www subdomain and map it to our CNAME record. If we have already this CNAME record with www then we don't have to revise this step, just add this record once.
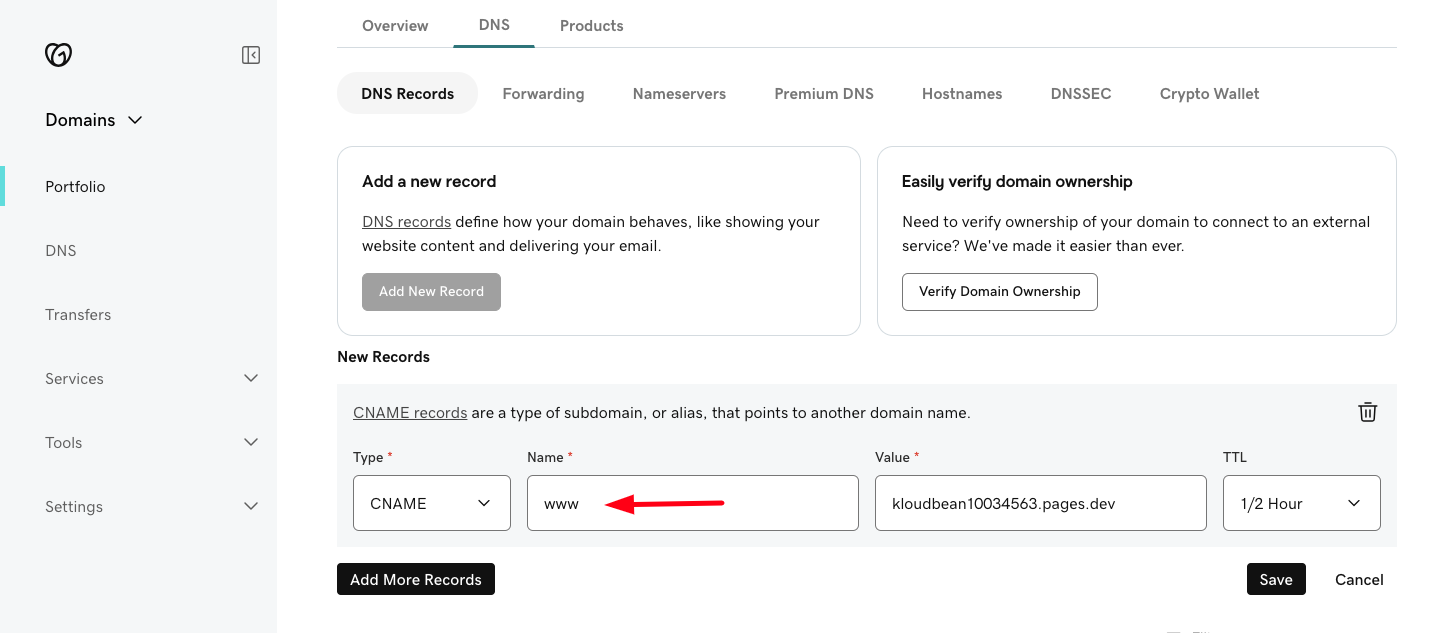
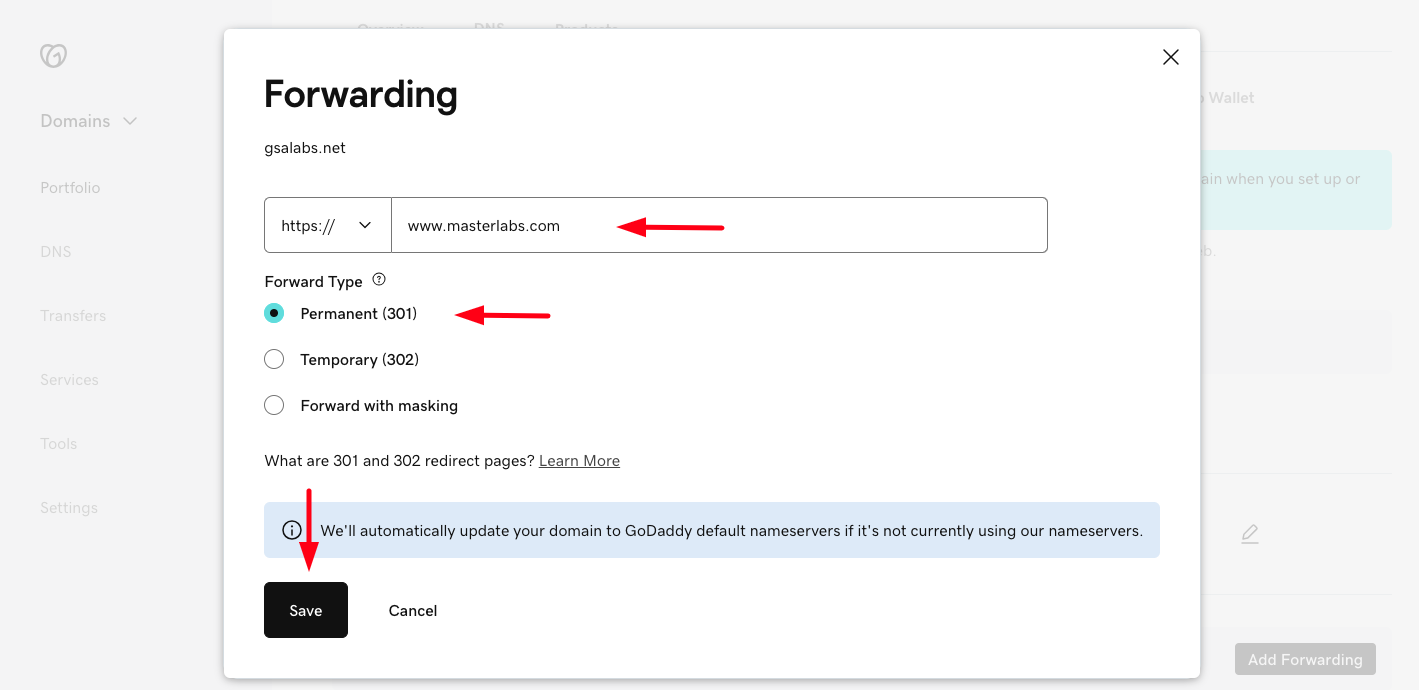
Once www subdomain is mapped with the CNAME target value provided by Kloudbean. Then we are going to forward root domain to www subdomain, so that if some access our site using root domain, it should be redirected to www subdomain.
In this example my root domain masterlabs.com will be redirected to www.masterlabs.com
https://masterlabs.com ==> https://www.masterlabs.com
After this, root domain should also be working and accessible.
Conclusion
Adding a custom domain to your static site on KloudBean is quick, easy, and ensures your site looks professional with a personalized web address. With just a few steps, you can have your custom domain up and running, making it easier for visitors to find your site. Start customizing your domain with KloudBean today and give your static site a unique, branded presence online!
If you need assistance during the setup process, our support team is available 24/7 to help you get everything configured smoothly.