Imagine Kloudbean as your digital superhero, always ready to protect and rescue your important application data. With Kloudbean, you can keep your files and databases safe from harm.
Here's how it works:
You can create lots of backups whenever you want. Whether it's your photos, documents, or complex databases, Kloudbean's got your back. And guess what? You can choose to do backups on a schedule, like every day or every week, or just whenever you need it. So, your data stays safe, no matter what.
But wait, there's more! Kloudbean goes the extra mile by protecting your whole server. It's like putting a force field around all the applications on your server. You can set up backups to happen automatically or trigger them instantly, covering everything in one go.
Simply put, Kloudbean is like a reliable partner for your digital needs. It keeps your data secure, giving you peace of mind that everything is well-protected.
Follow steps to do backup
- Login to Kloudbean.
2. Click on View all Applications in the Dashboard screen.

3. Switch to Application.

4. Select Application

5. Access the Backup or Restore Management screen by clicking on Backup in the left side menu.
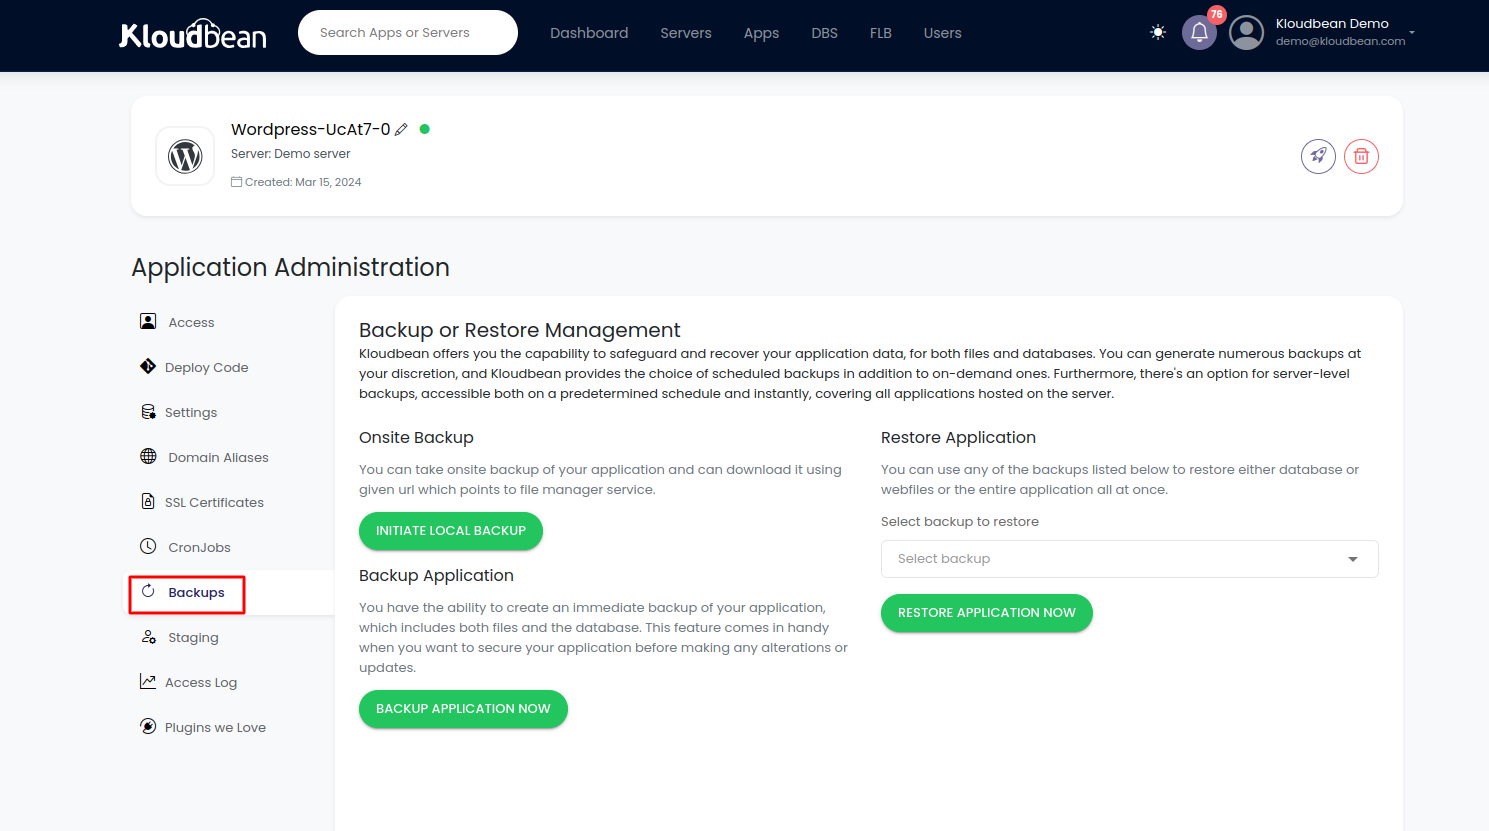
Different options for Backup
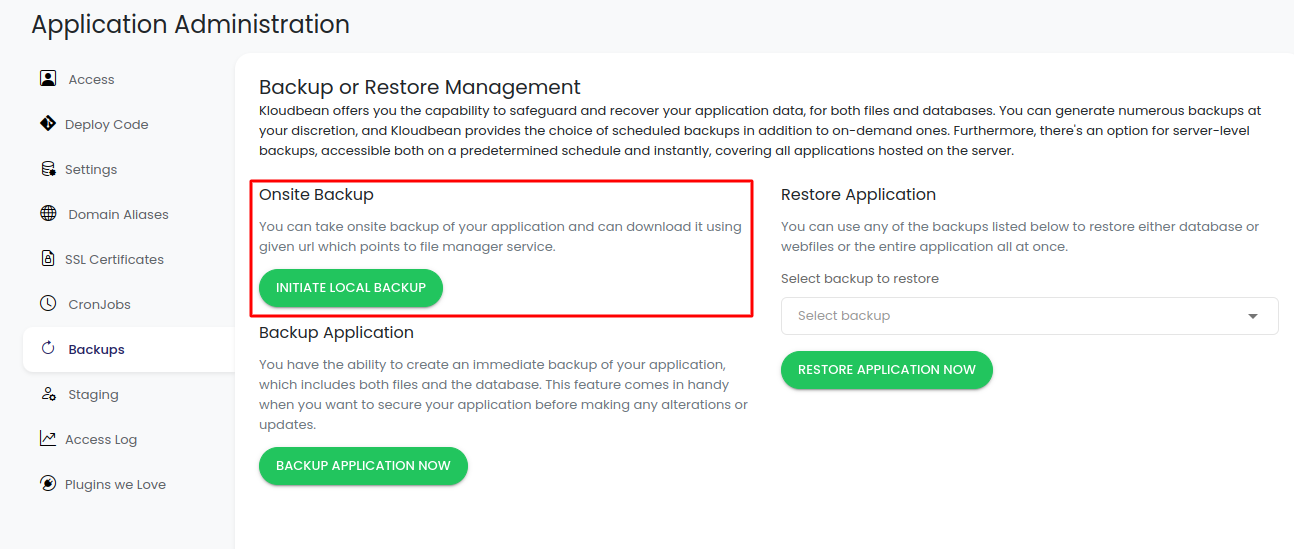
1. Onsite Backup
Kloudbean's onsite backup feature empowers you to safeguard your application data right where it belongs. Once backed up, simply use the provided URL to access and download your data via the file manager service, ensuring quick and easy retrieval whenever needed.
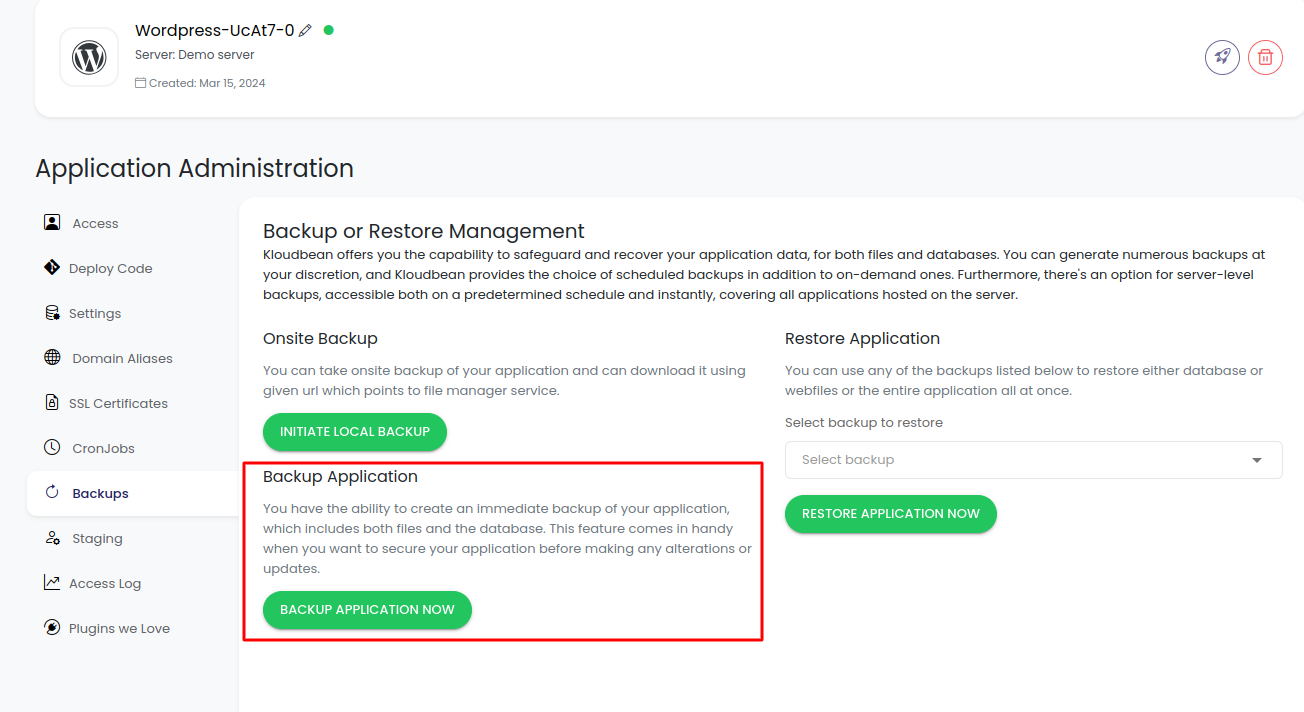
2. Backup Application
With Kloudbean, you hold the power to instantly create a backup of your application, encompassing both files and databases. This invaluable feature proves especially useful when you're gearing up to implement alterations or updates to your application, ensuring that your data remains safeguarded throughout the process.
Another feature besides backups
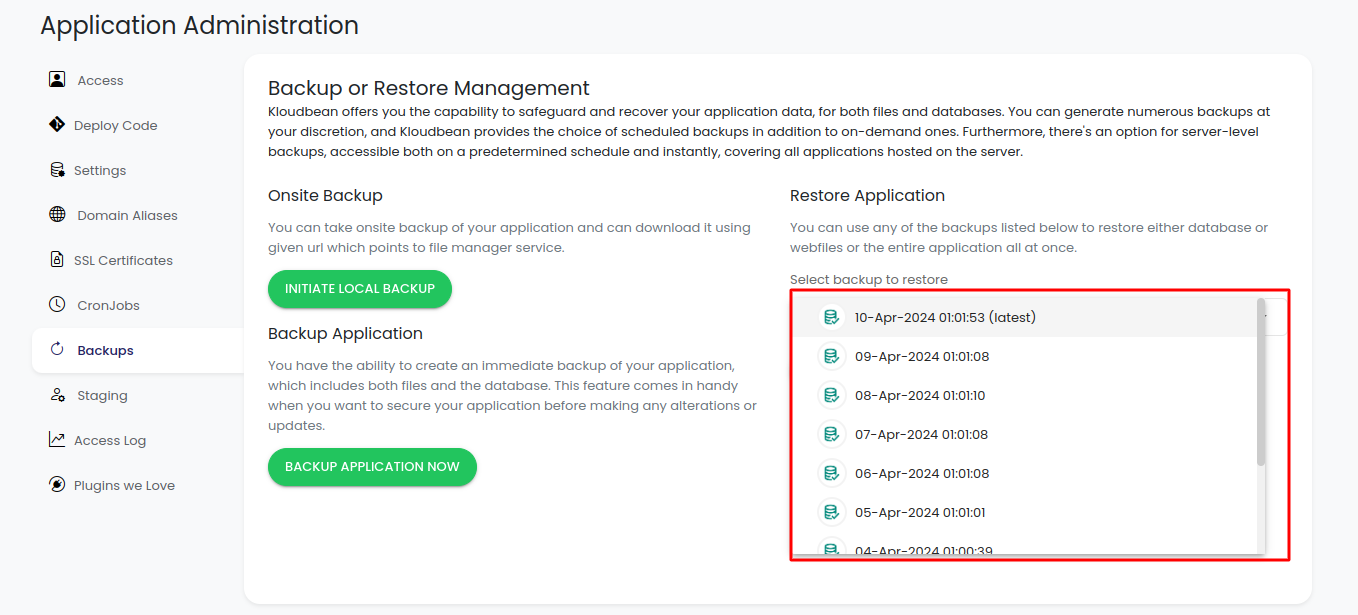
3. Restore Application
You have the flexibility to choose from a variety of backups listed below to restore either the database, webfiles, or the entire application in one go. Simply select your desired option from the dropdown menu, making the restoration process hassle-free and tailored to your specific needs.
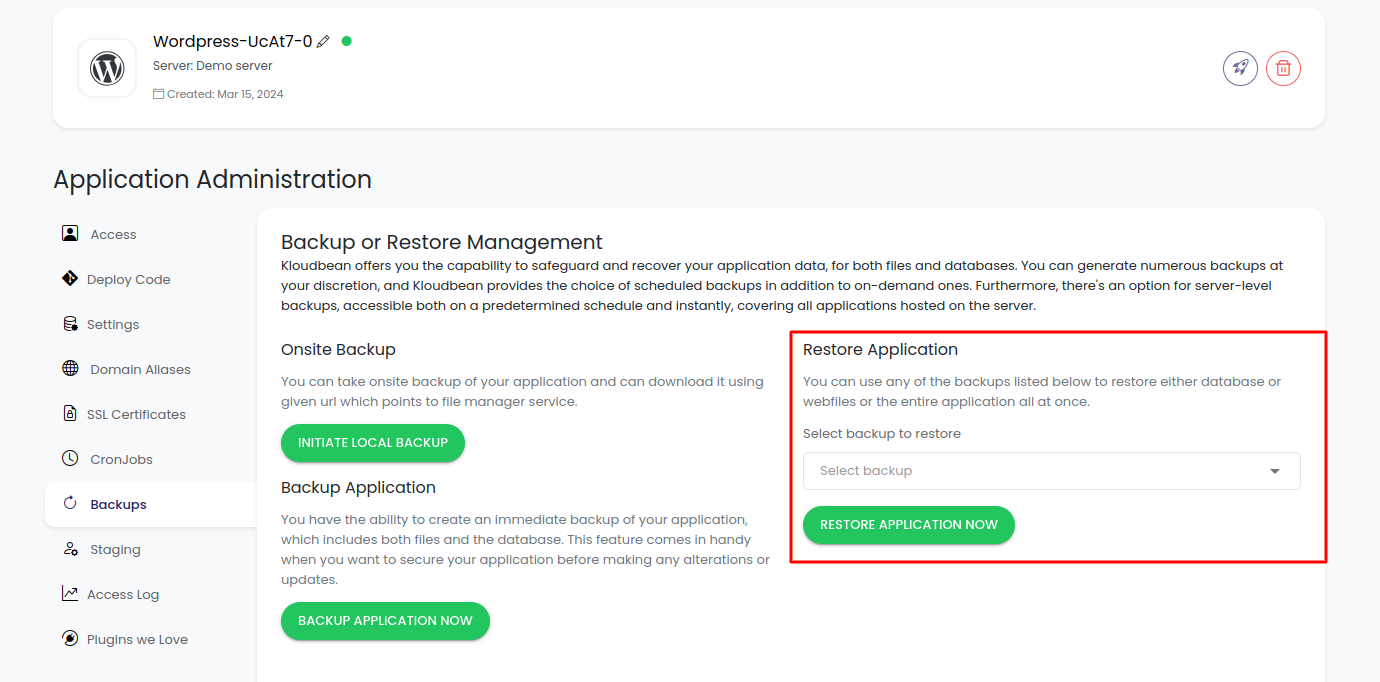
6. Select a backup from the dropdown to restore.
