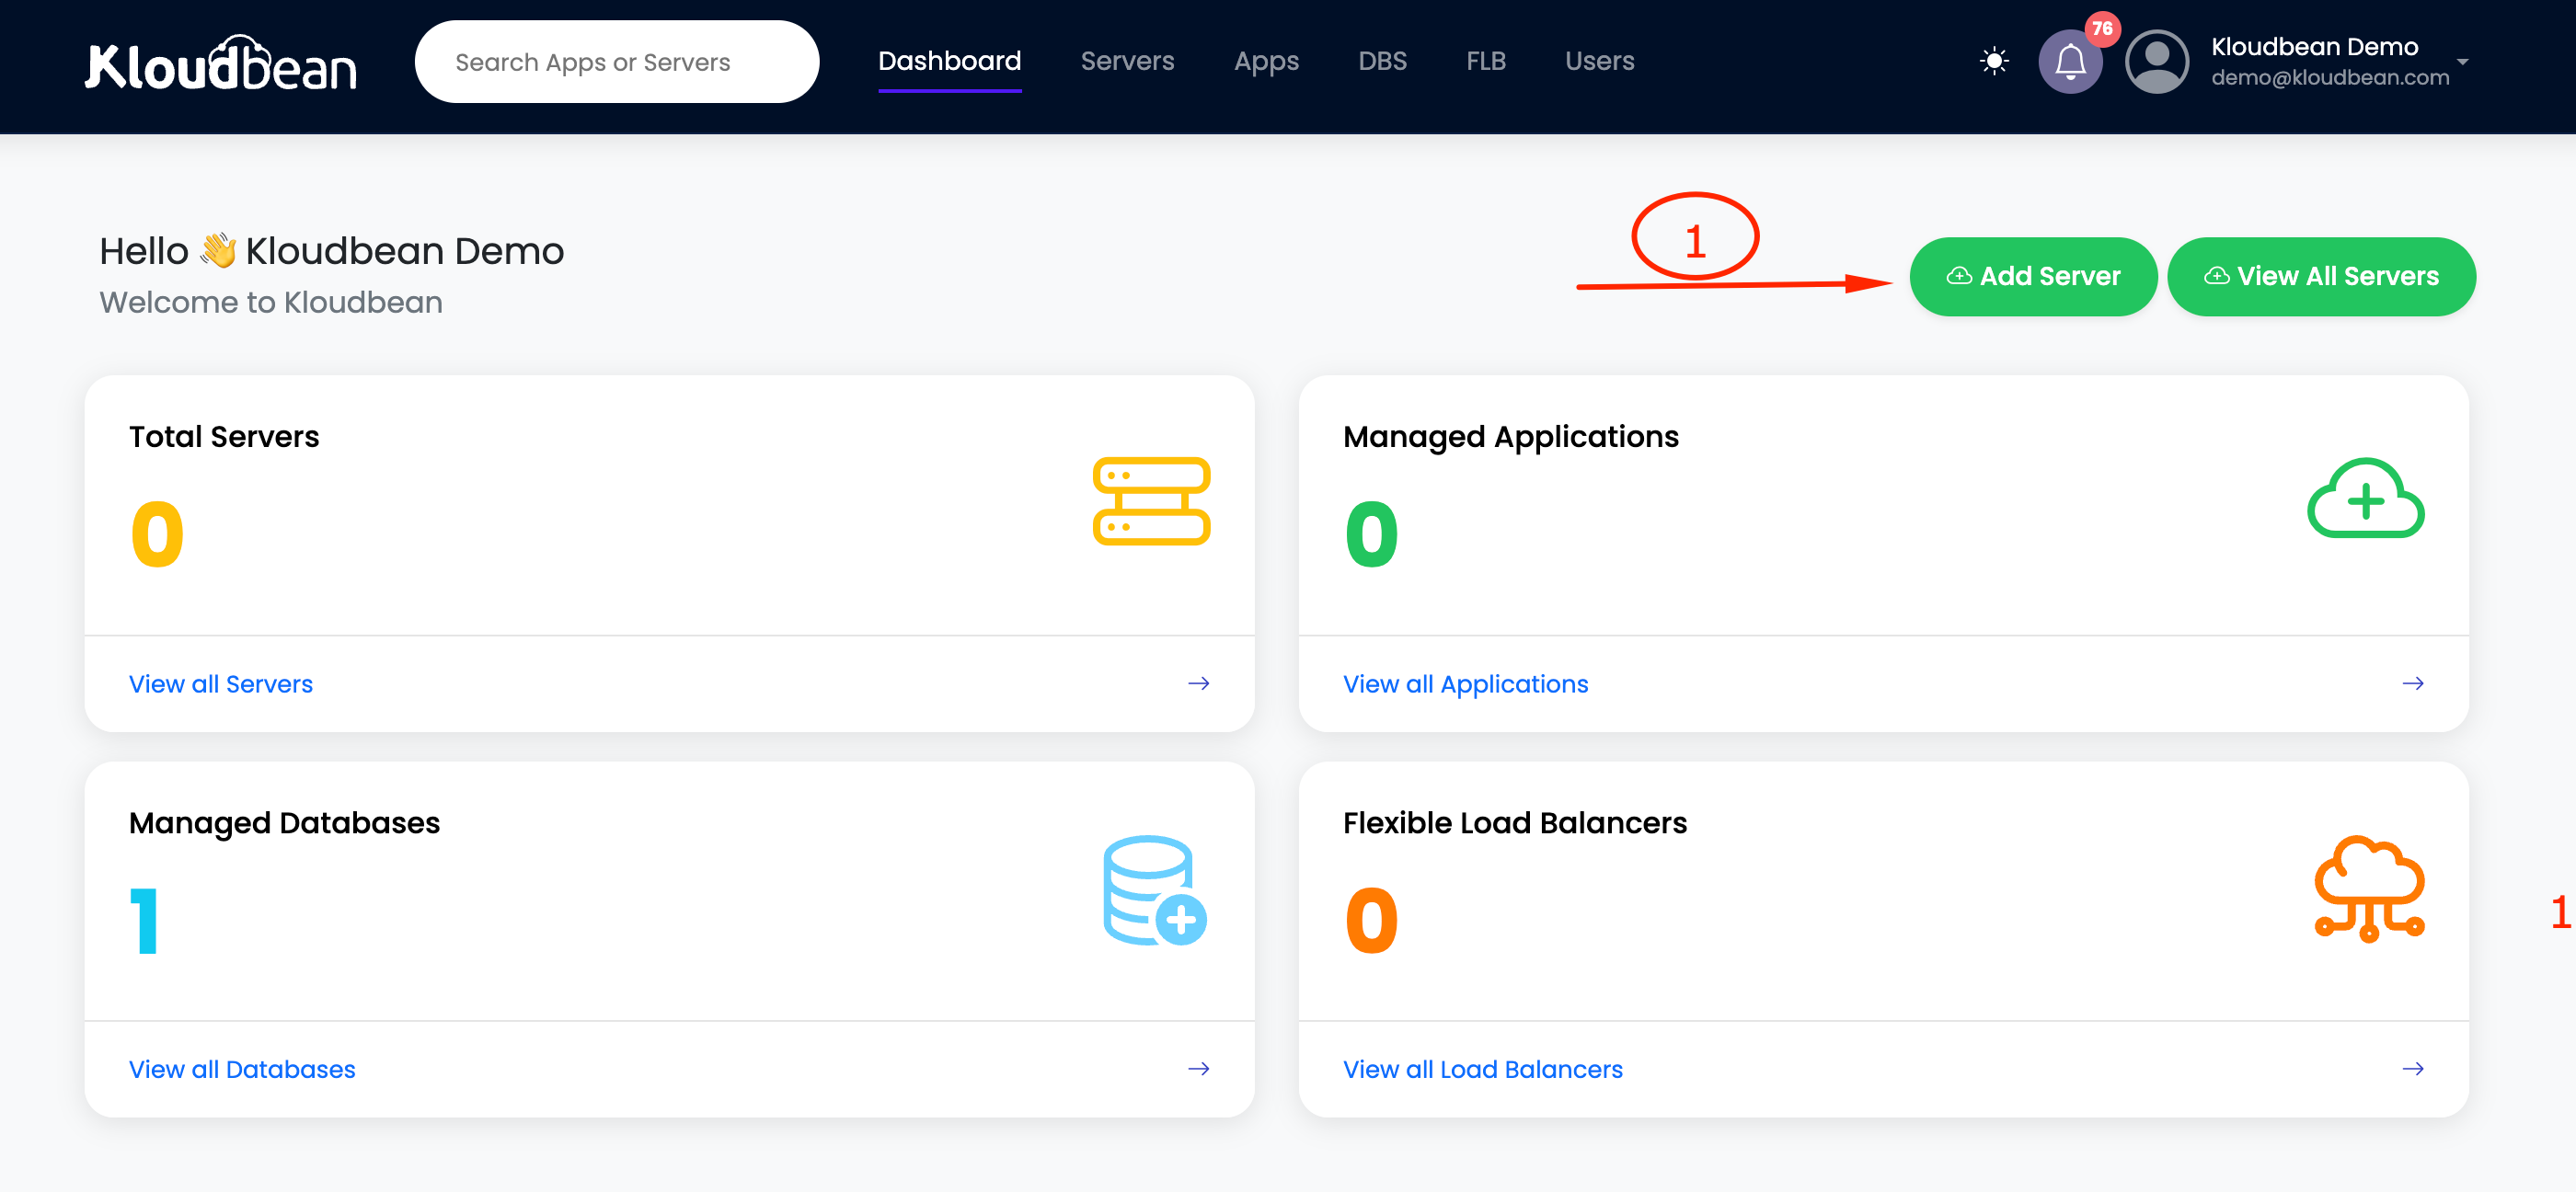
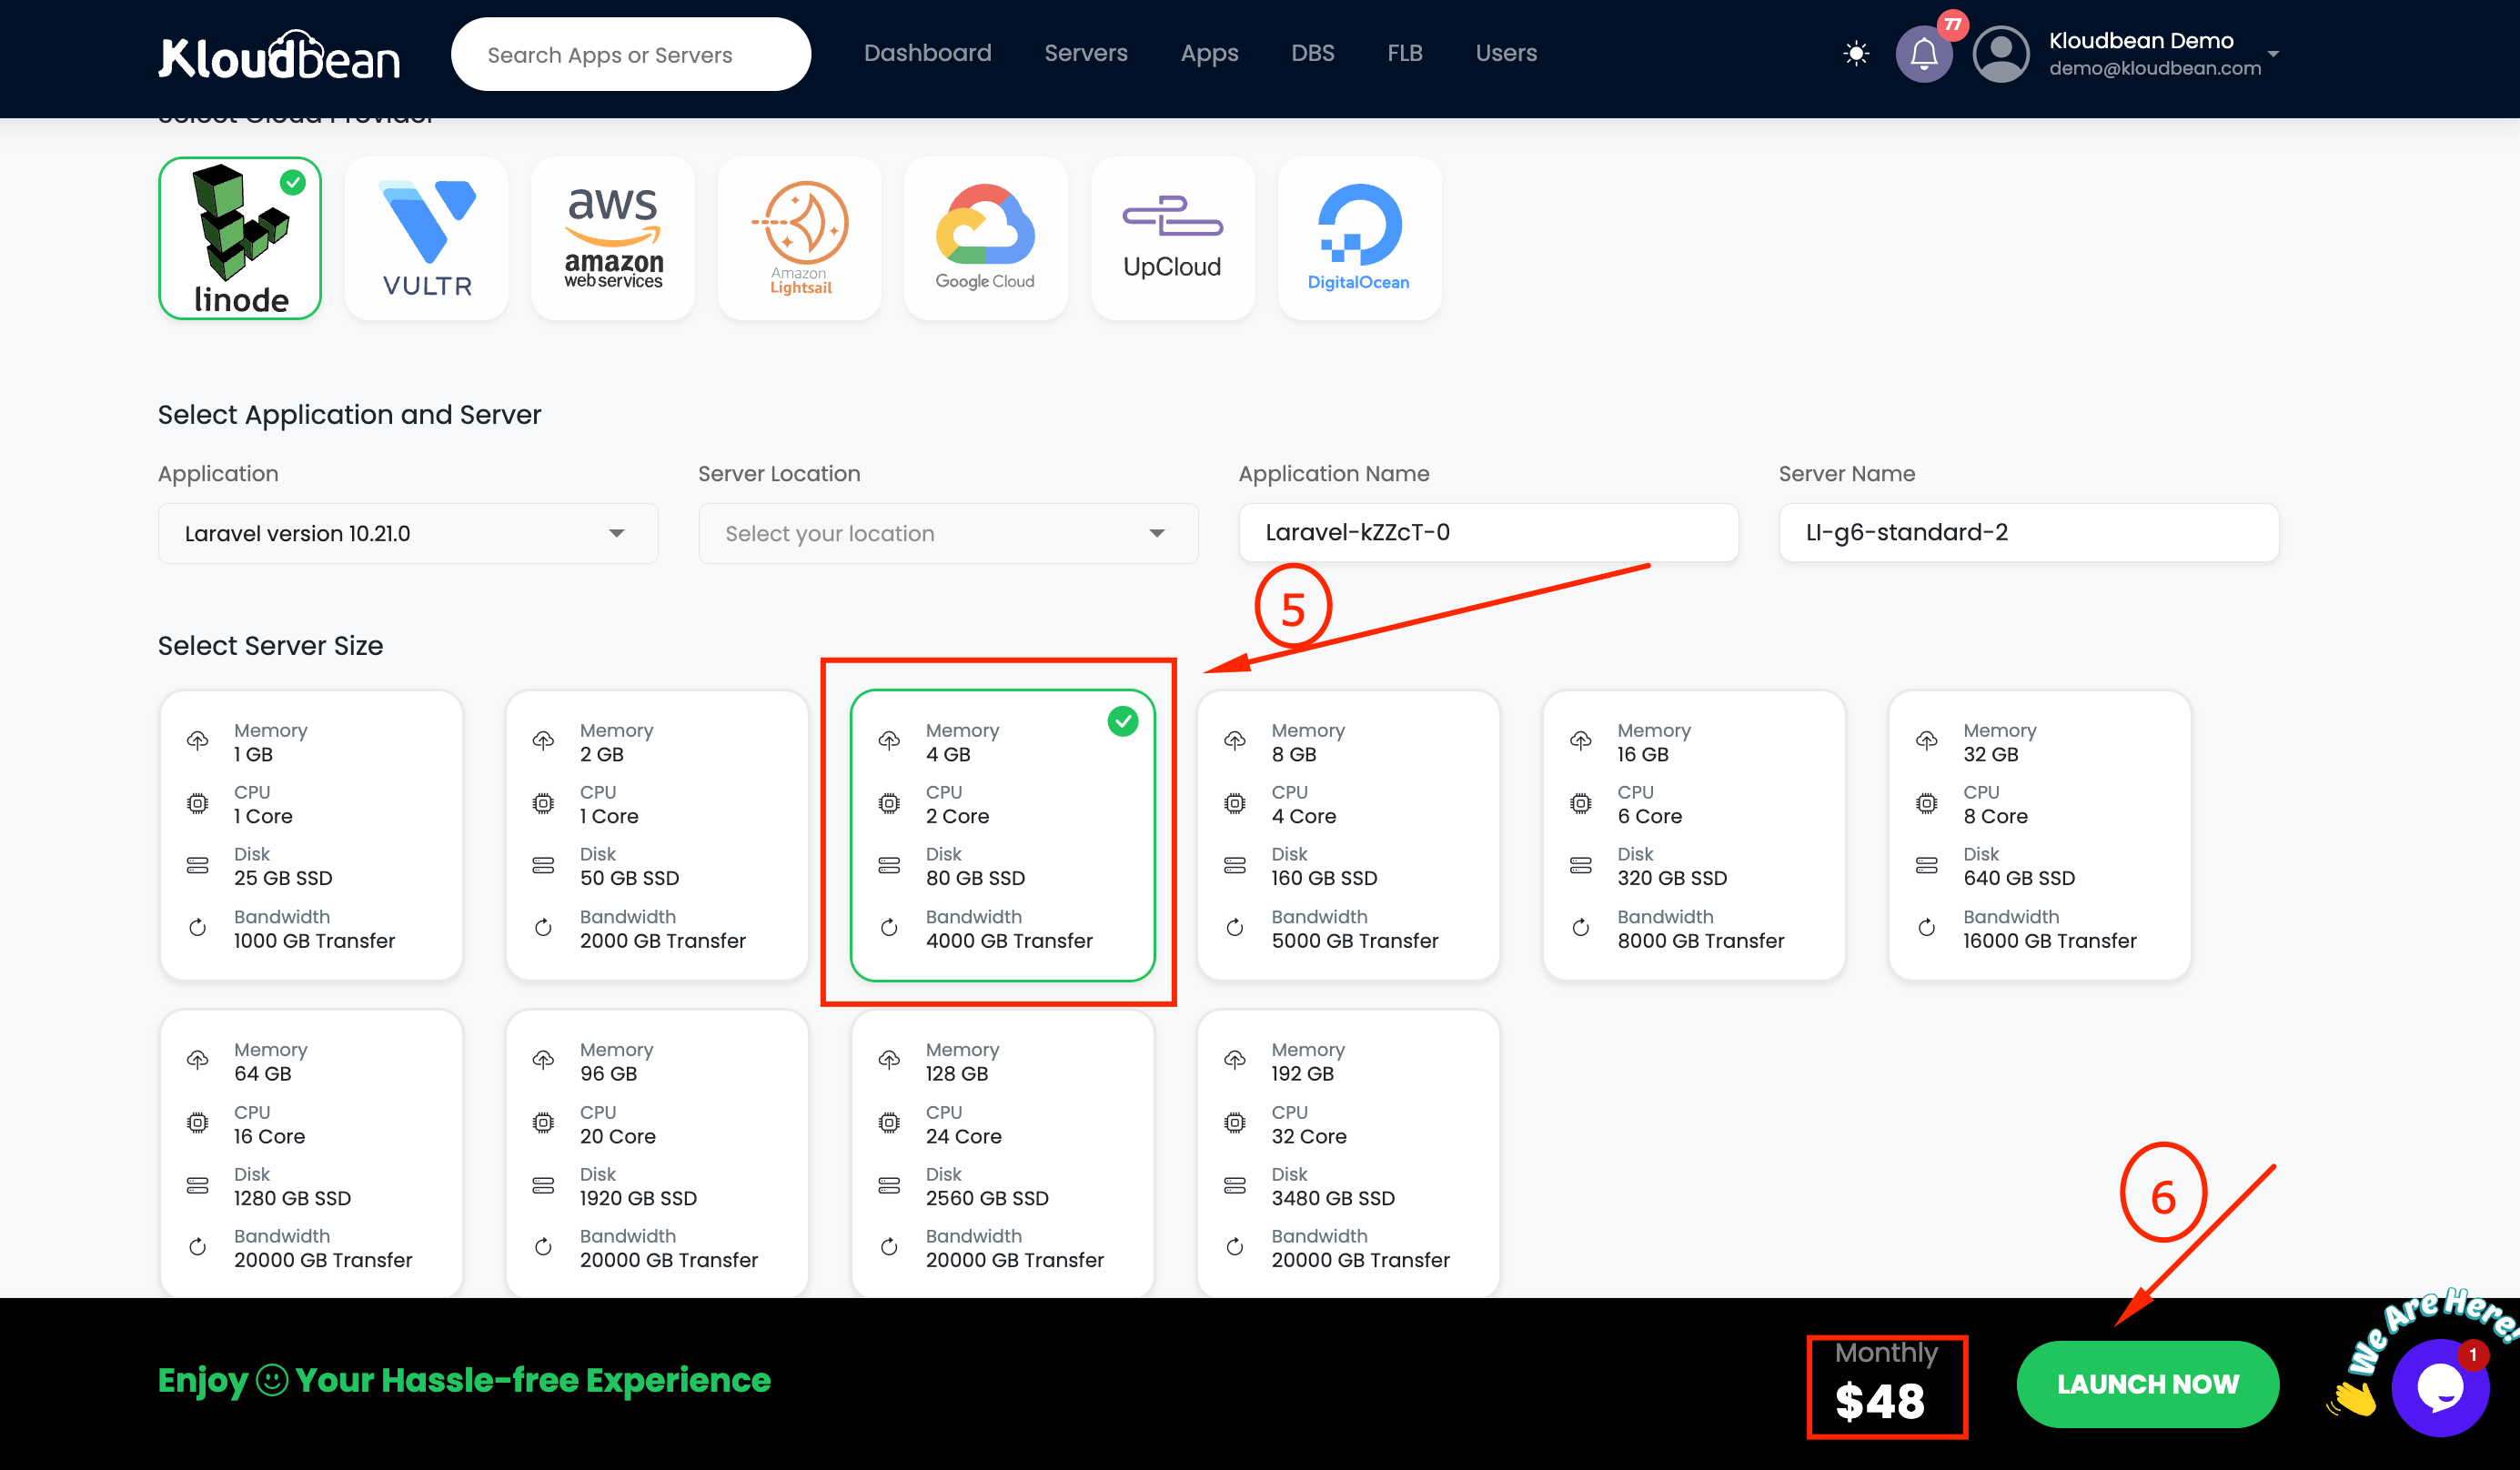
Step 1: Choose Server provider
Step 2: Choose your application
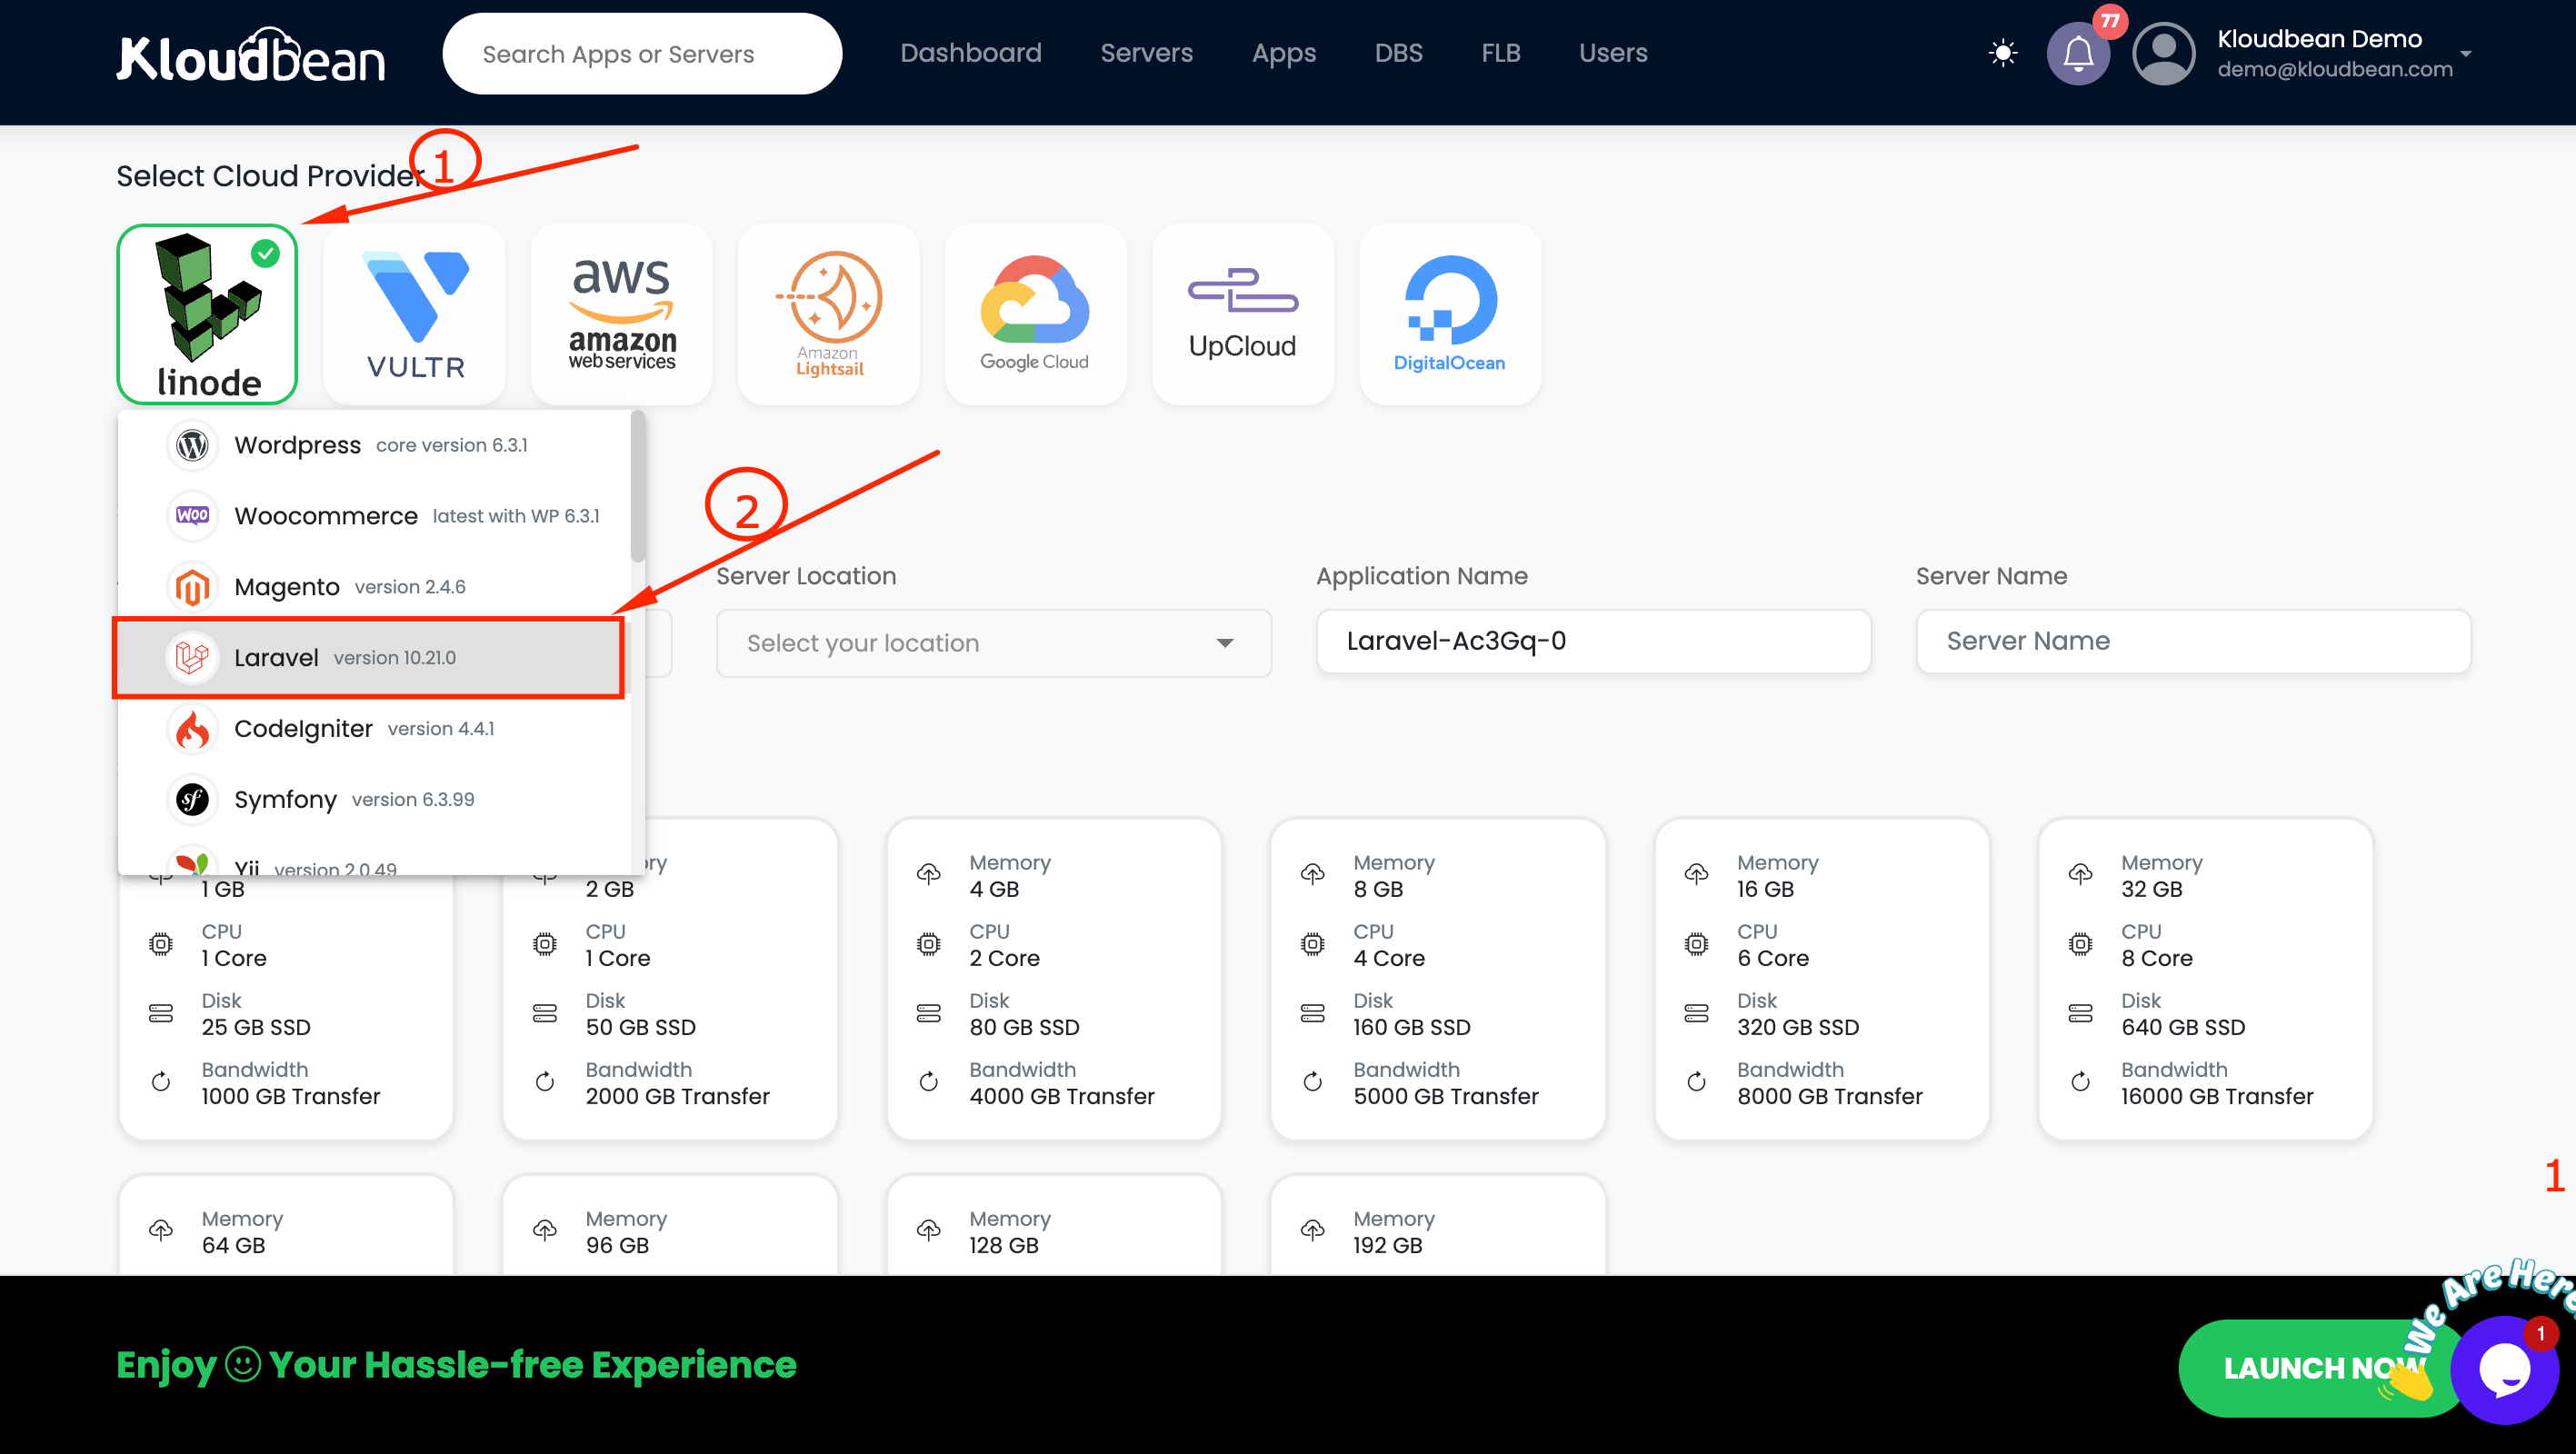
Step 3: Choose Server location
Step 4: Rename your application
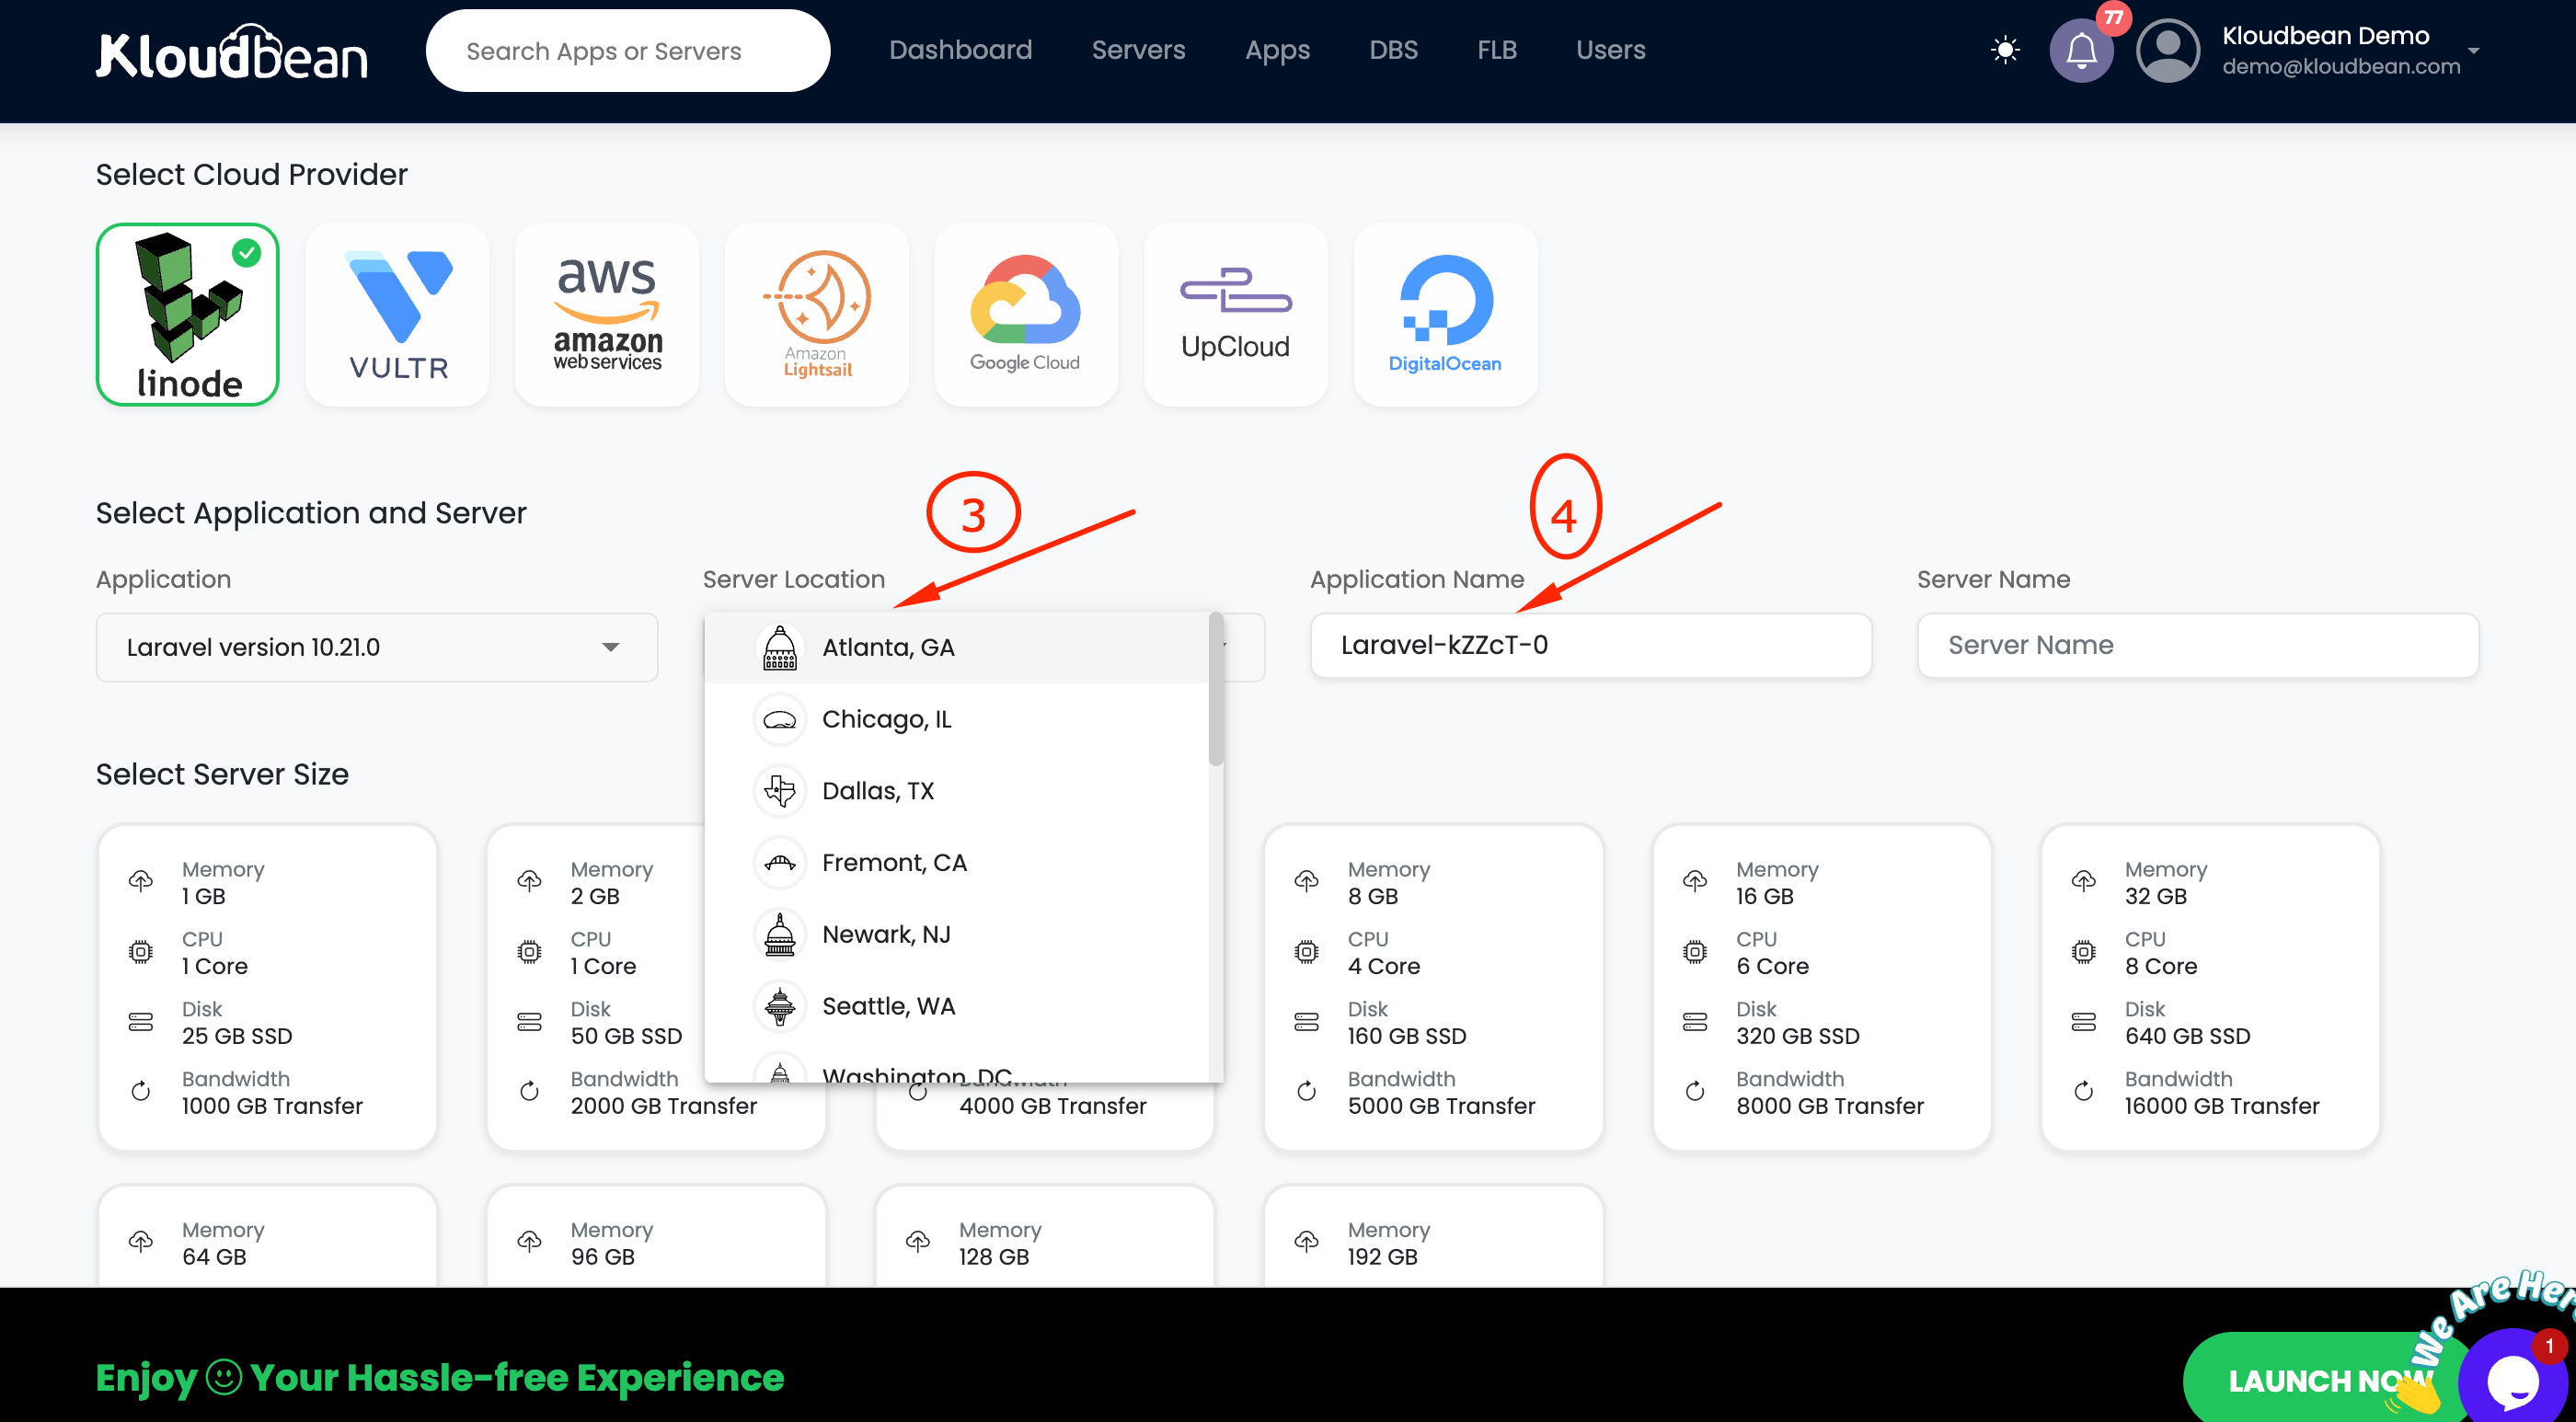
Step 5: Choose server configuration
Step 6: Now click on Launch now
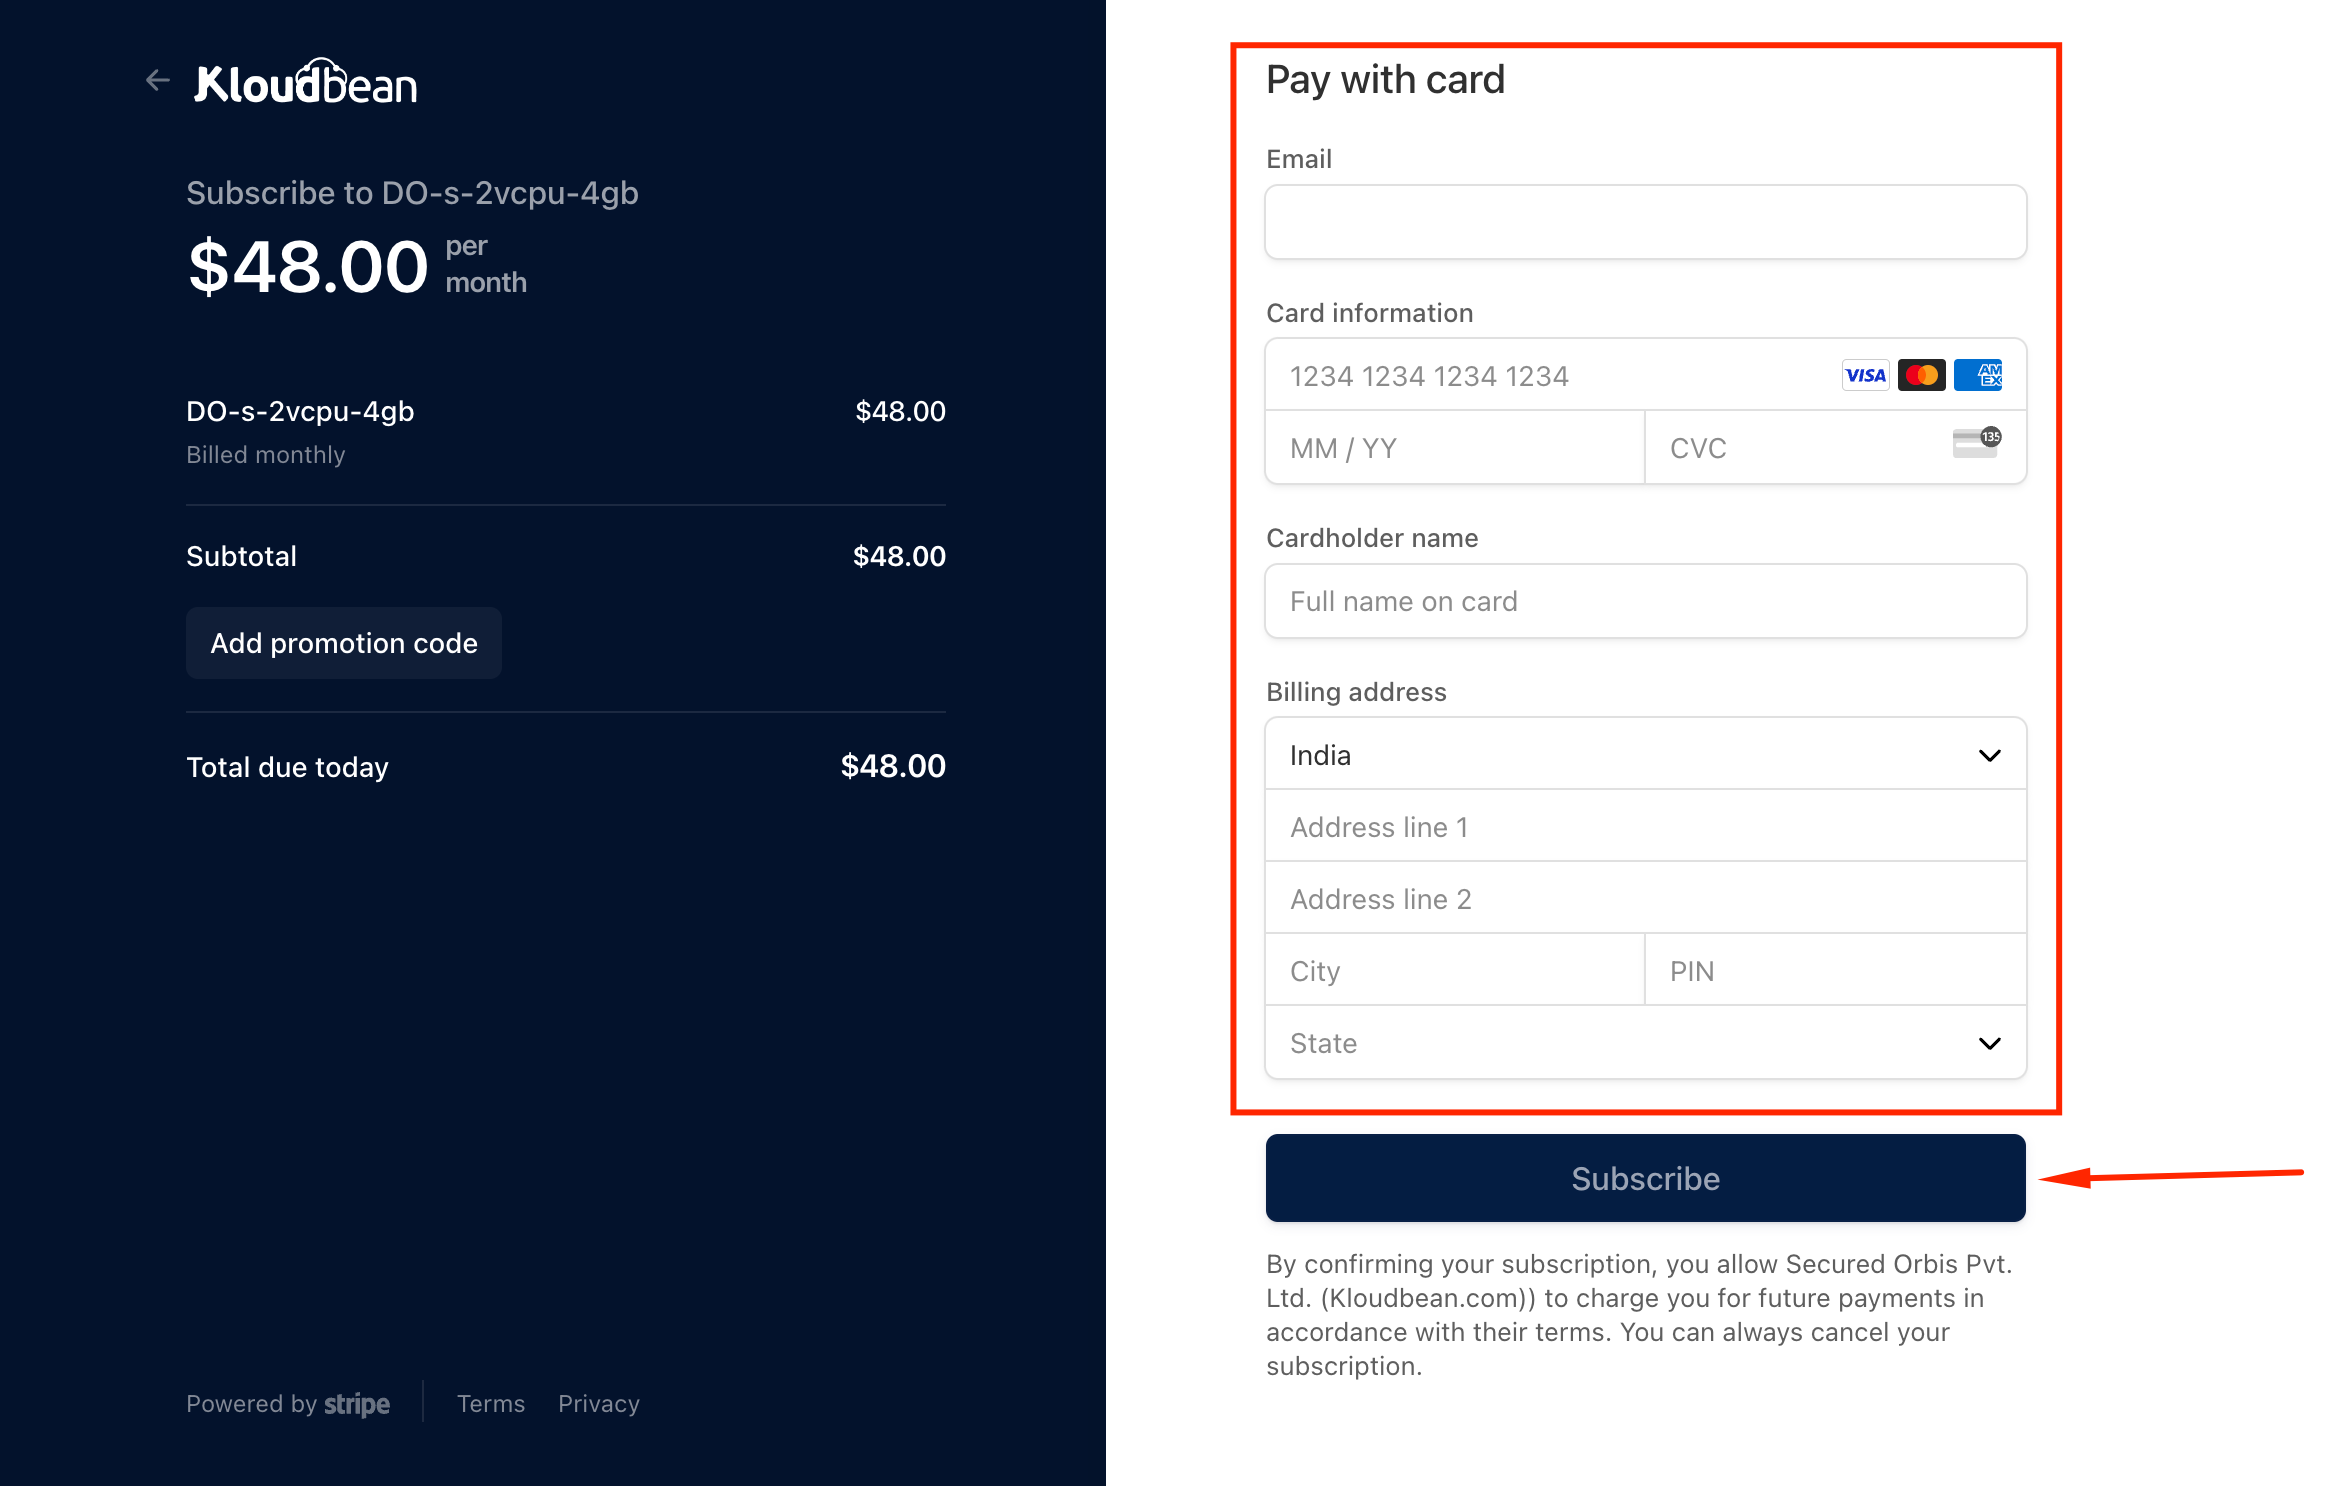
Step 7: Fill your credit/debit card detail and click subscribe button.
Once you subscribe, server creation process will start automatically.
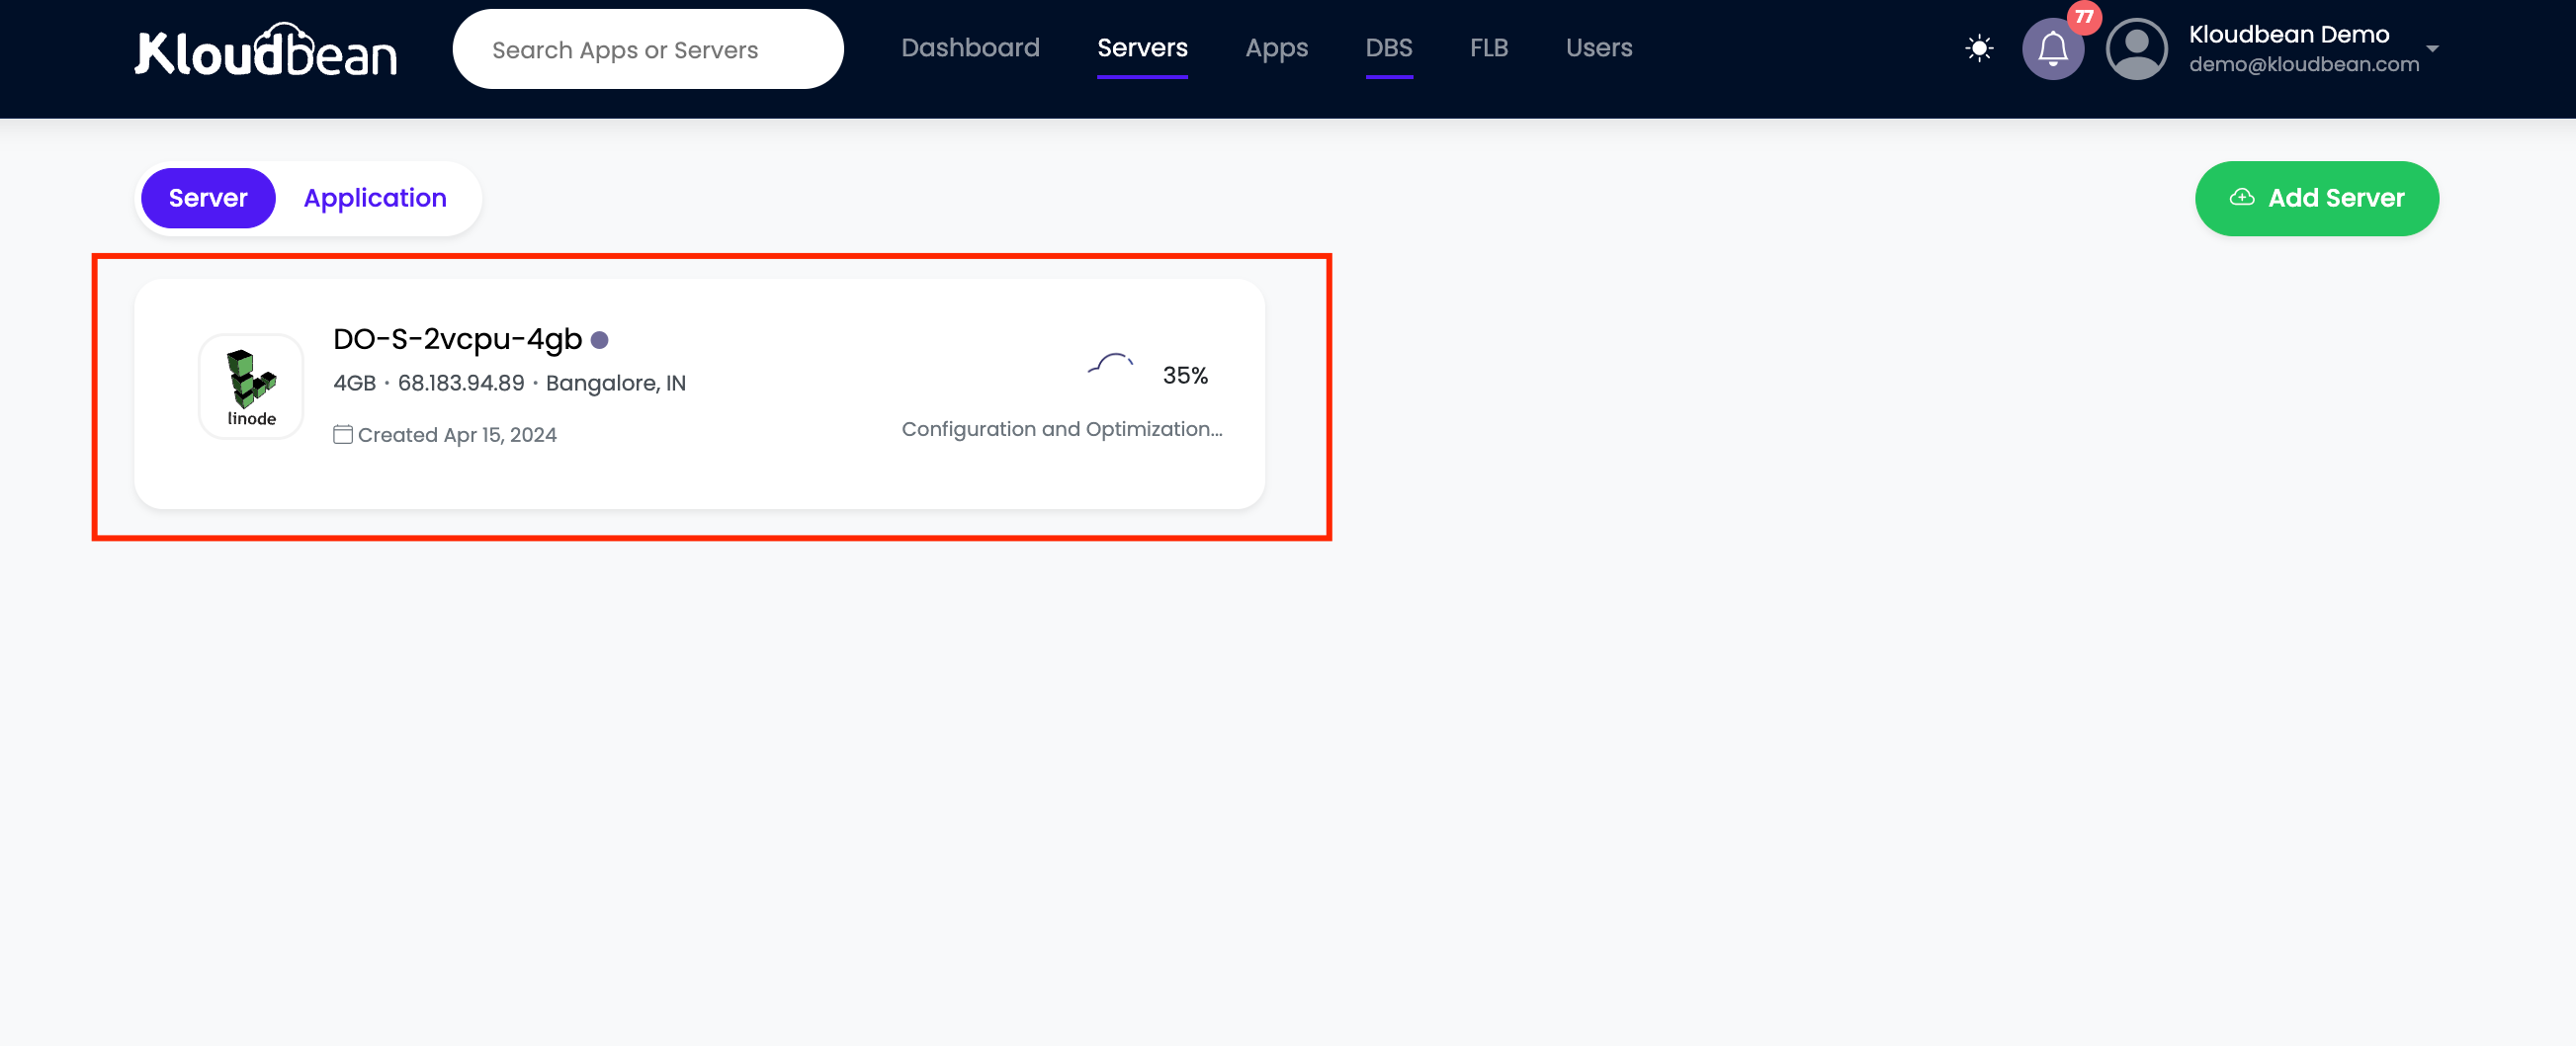
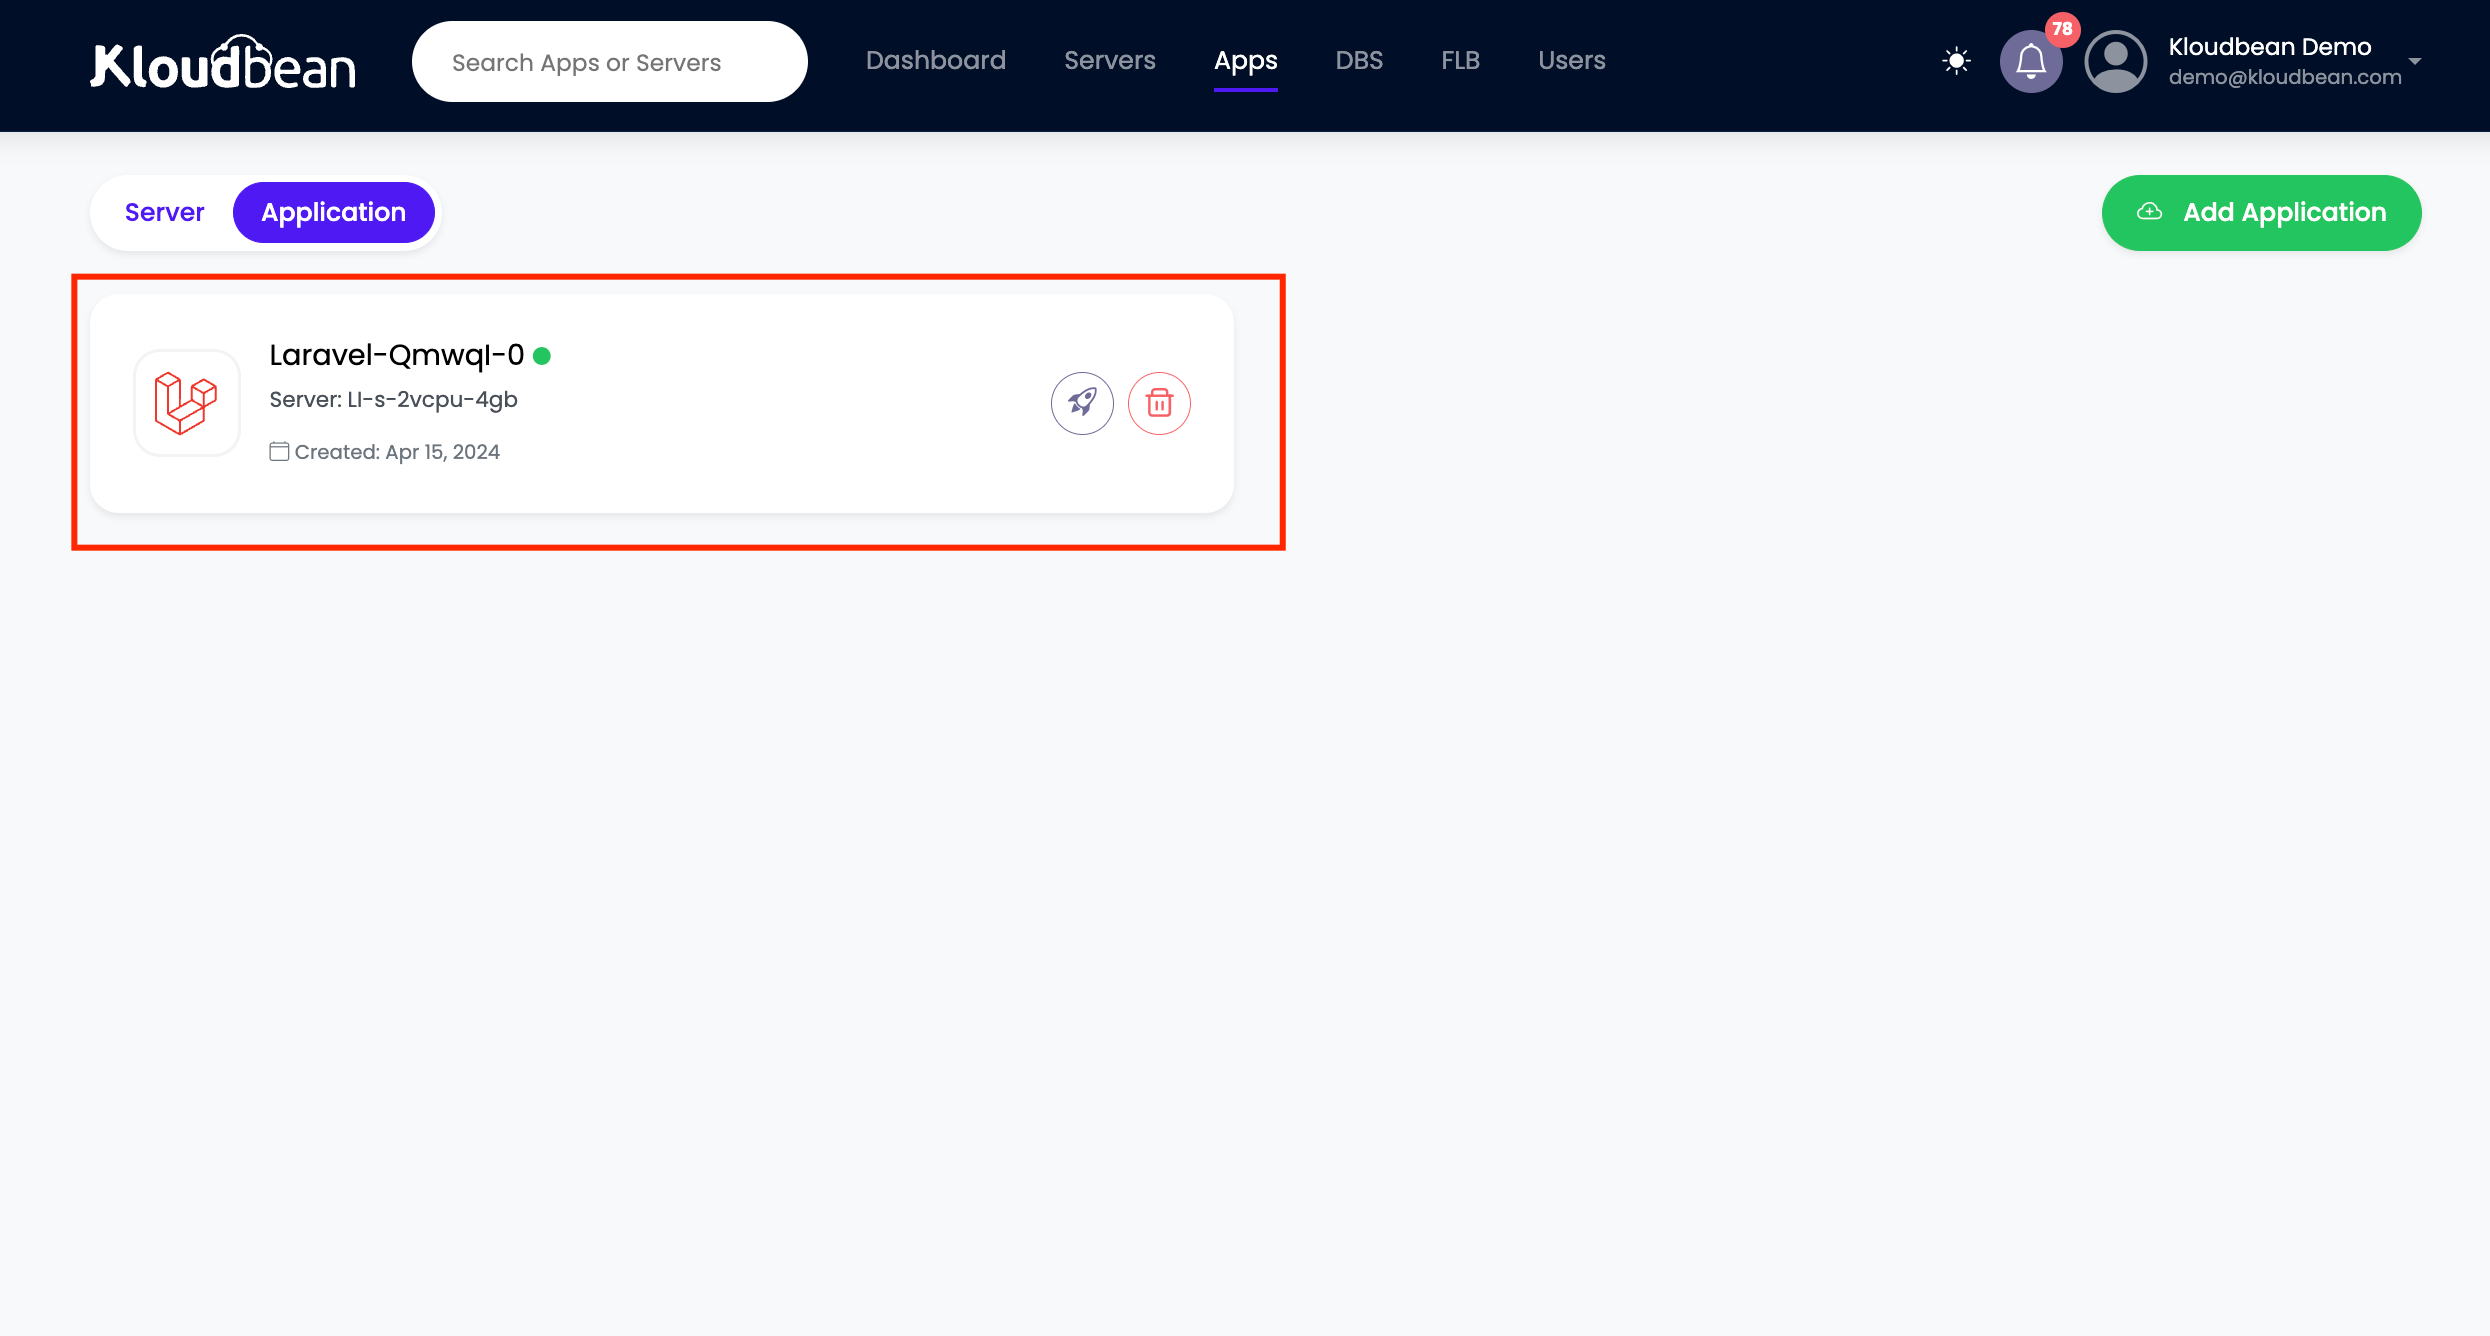
Now your server is creacted. You can check the connected application by clicking on the globe icon.
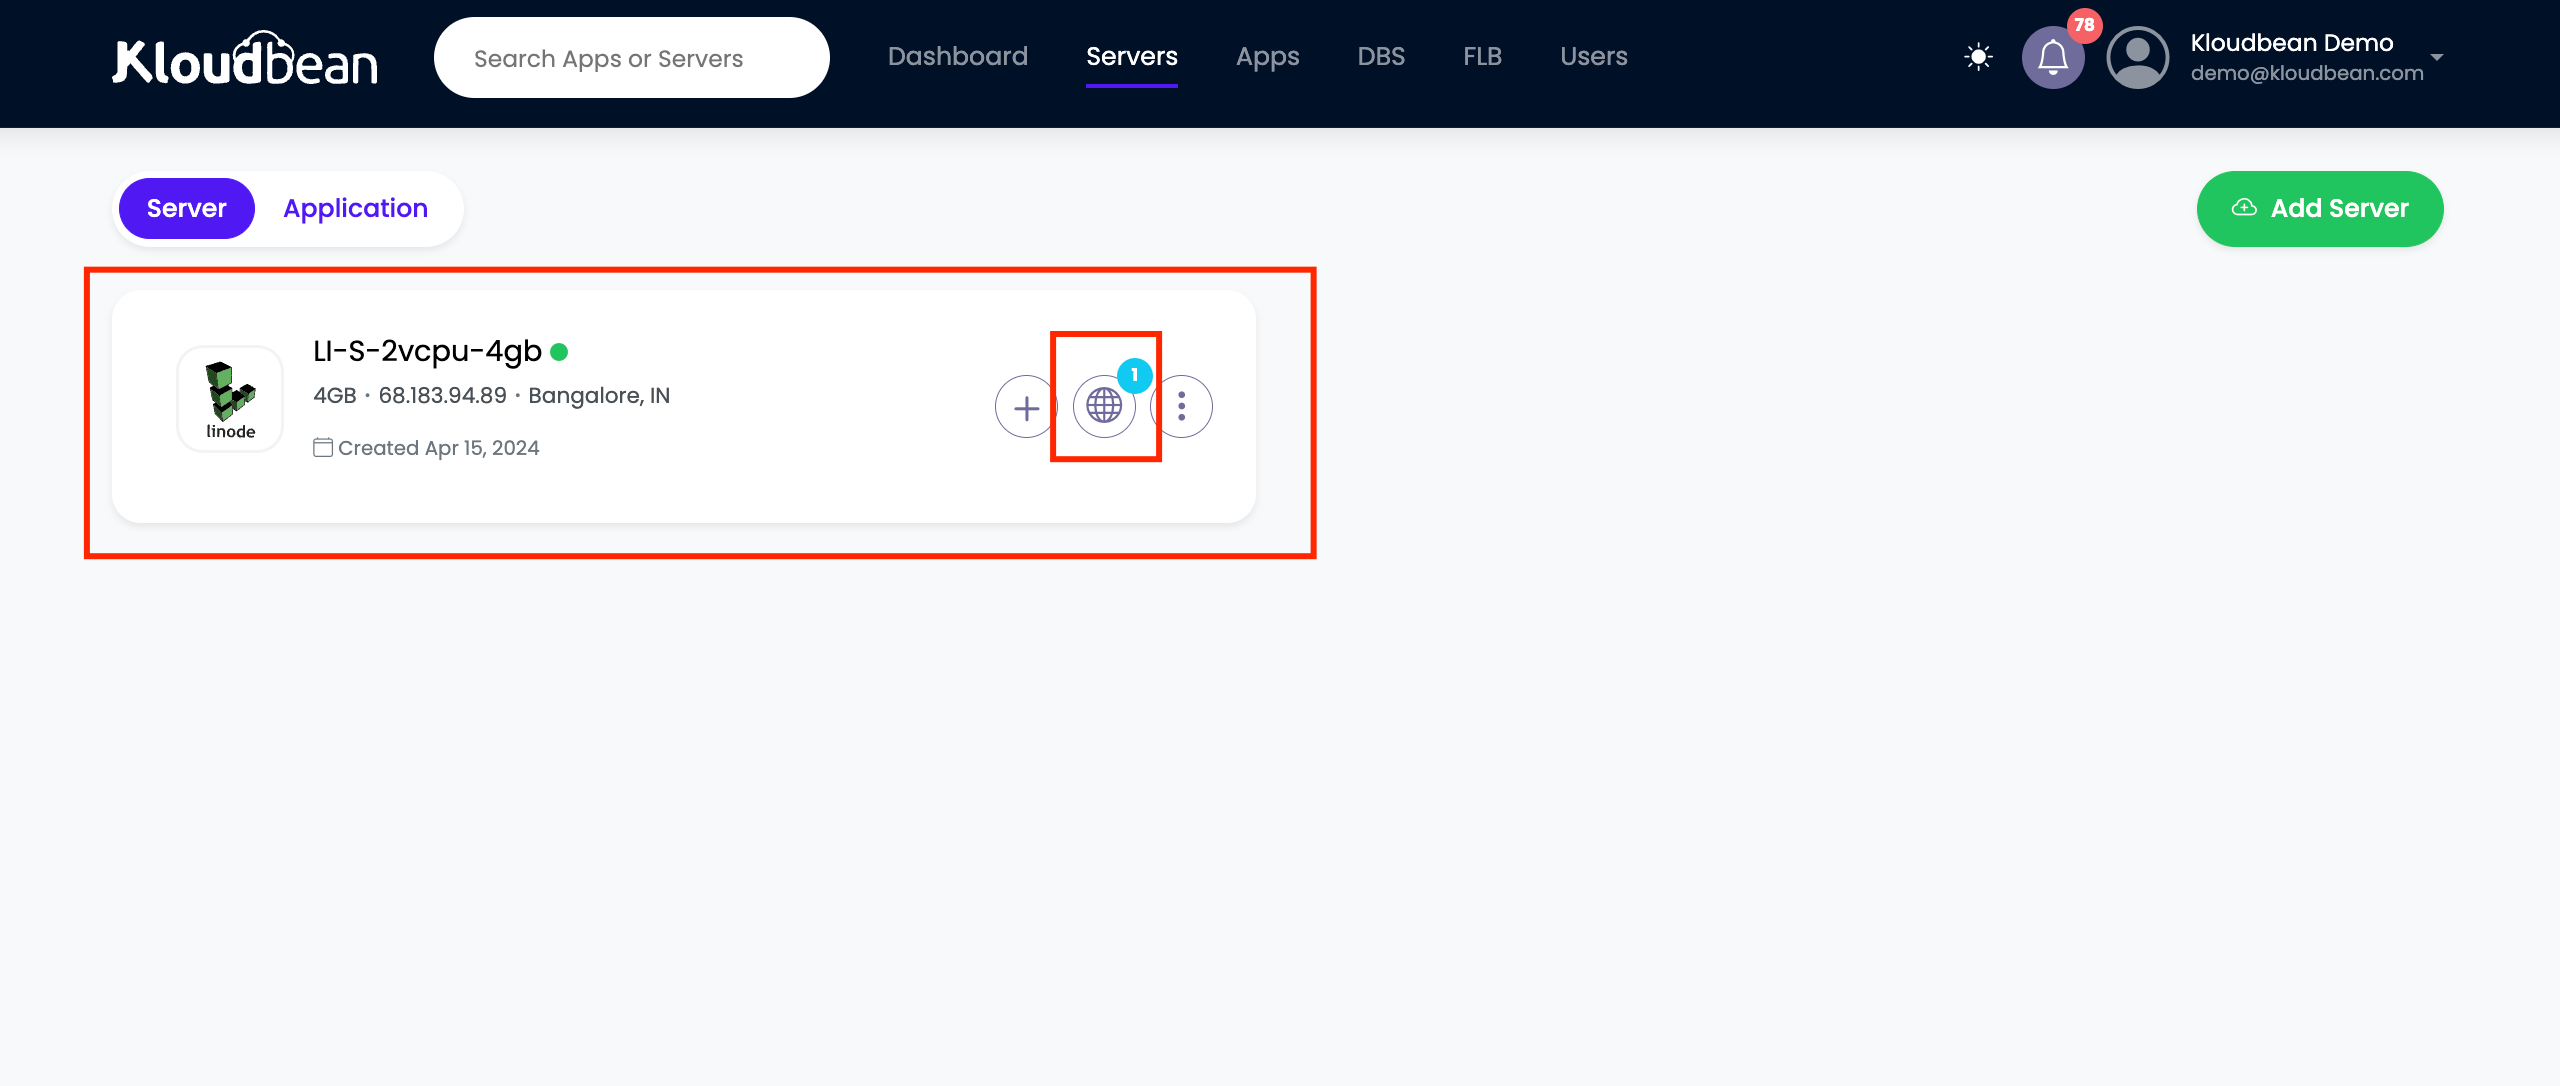
You will see the installed application here.