Deploying Code with Git Commands: A Step-by-Step Guide
If you're looking to deploy code to your application using Git commands, this guide is for you.
While you can use tool Termius, Termius powerful console allows for Git code deployment (pull), using other Git functionalities like push, pull, and clone requires accessing your server via SSH.
Mandatory
To execute Git commands, you'll need Admin Credentials. Application Credentials lack permission to generate and access SSH keys, which are essential for Git operations. If you're part of a team, you can utilize Git deployment via the kloudbean Platform or request Admin credential access from the account owner.
Deploying Code with Git Commands
Step 1: Get SSH Access
Connect to your server via SSH. (To do this please, follow this guide.)
Step 2: To set up an SSH key for your Git operations, you'll need Admin Credentials.
Once connected via SSH, generate SSH keys to enable direct connection to your GitHub or Gitlab, BitBucket repositories without username or password prompts.
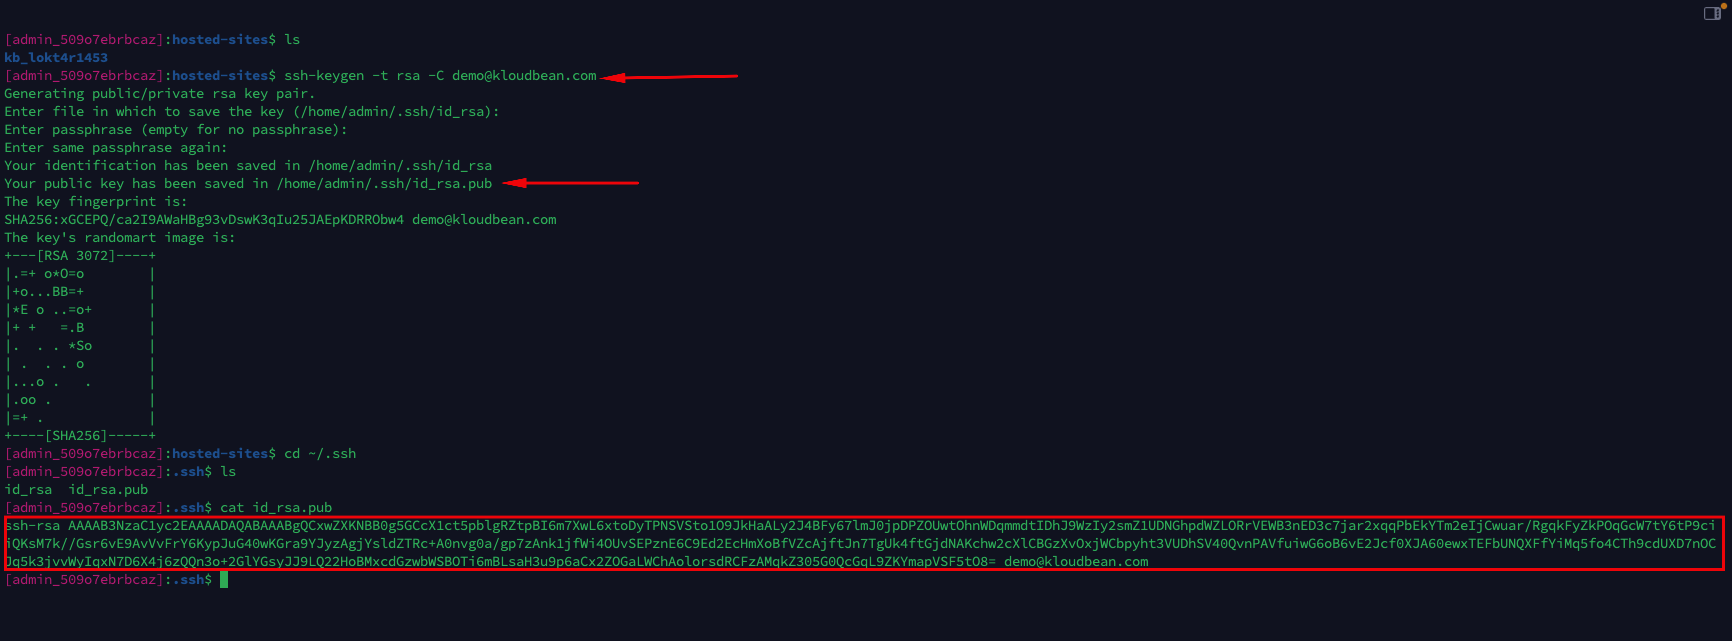
Navigate to your desired web application’s webroot (app-html) and execute the following command to generate a public and private RSA key pair:
ssh-keygen -t rsa -C "[email protected]replacing "[email protected]" with your actual email address.
Press Enter to save the key in the default location (/home/admin/.ssh/id_rsa). Hit Enter twice if you prefer a no/empty passphrase.
Your SSH keys will be saved at the default location. To view the generated public SSH key, run the following command:
cat /home/admin/.ssh/id_rsa.pub
Once you've generated an SSH key pair, you need to upload the public key to your Git repository to establish a secure connection between your server and the repository.
Step 3: Setup SSH Key to Git Repository Like: Github, Gitlab, Bitbucket
We'll be using a GitHub account for this demonstration.
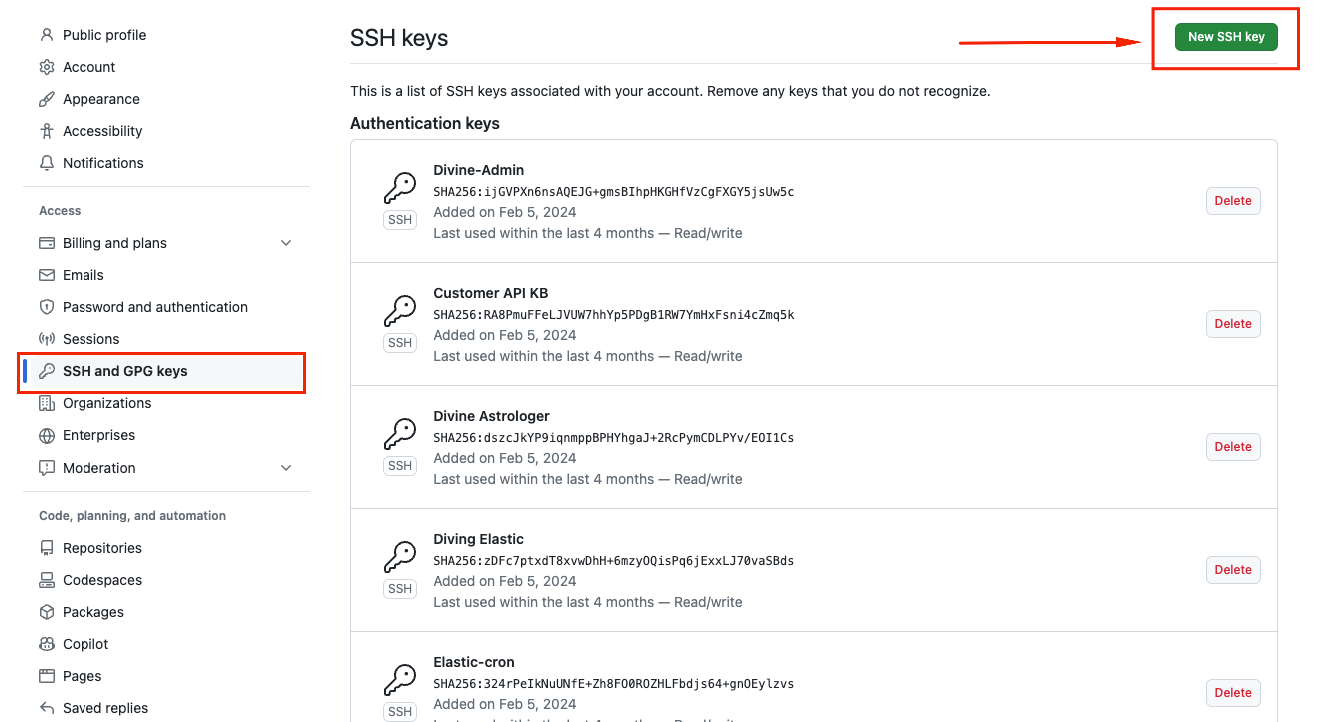
1. Log into your GitHub account and In the upper-right corner of any page, click your profile photo, then click Settings.
2. Navigate to the Settings tab.
3. Within the Settings menu, locate and click on "SSH and GPG Keys."
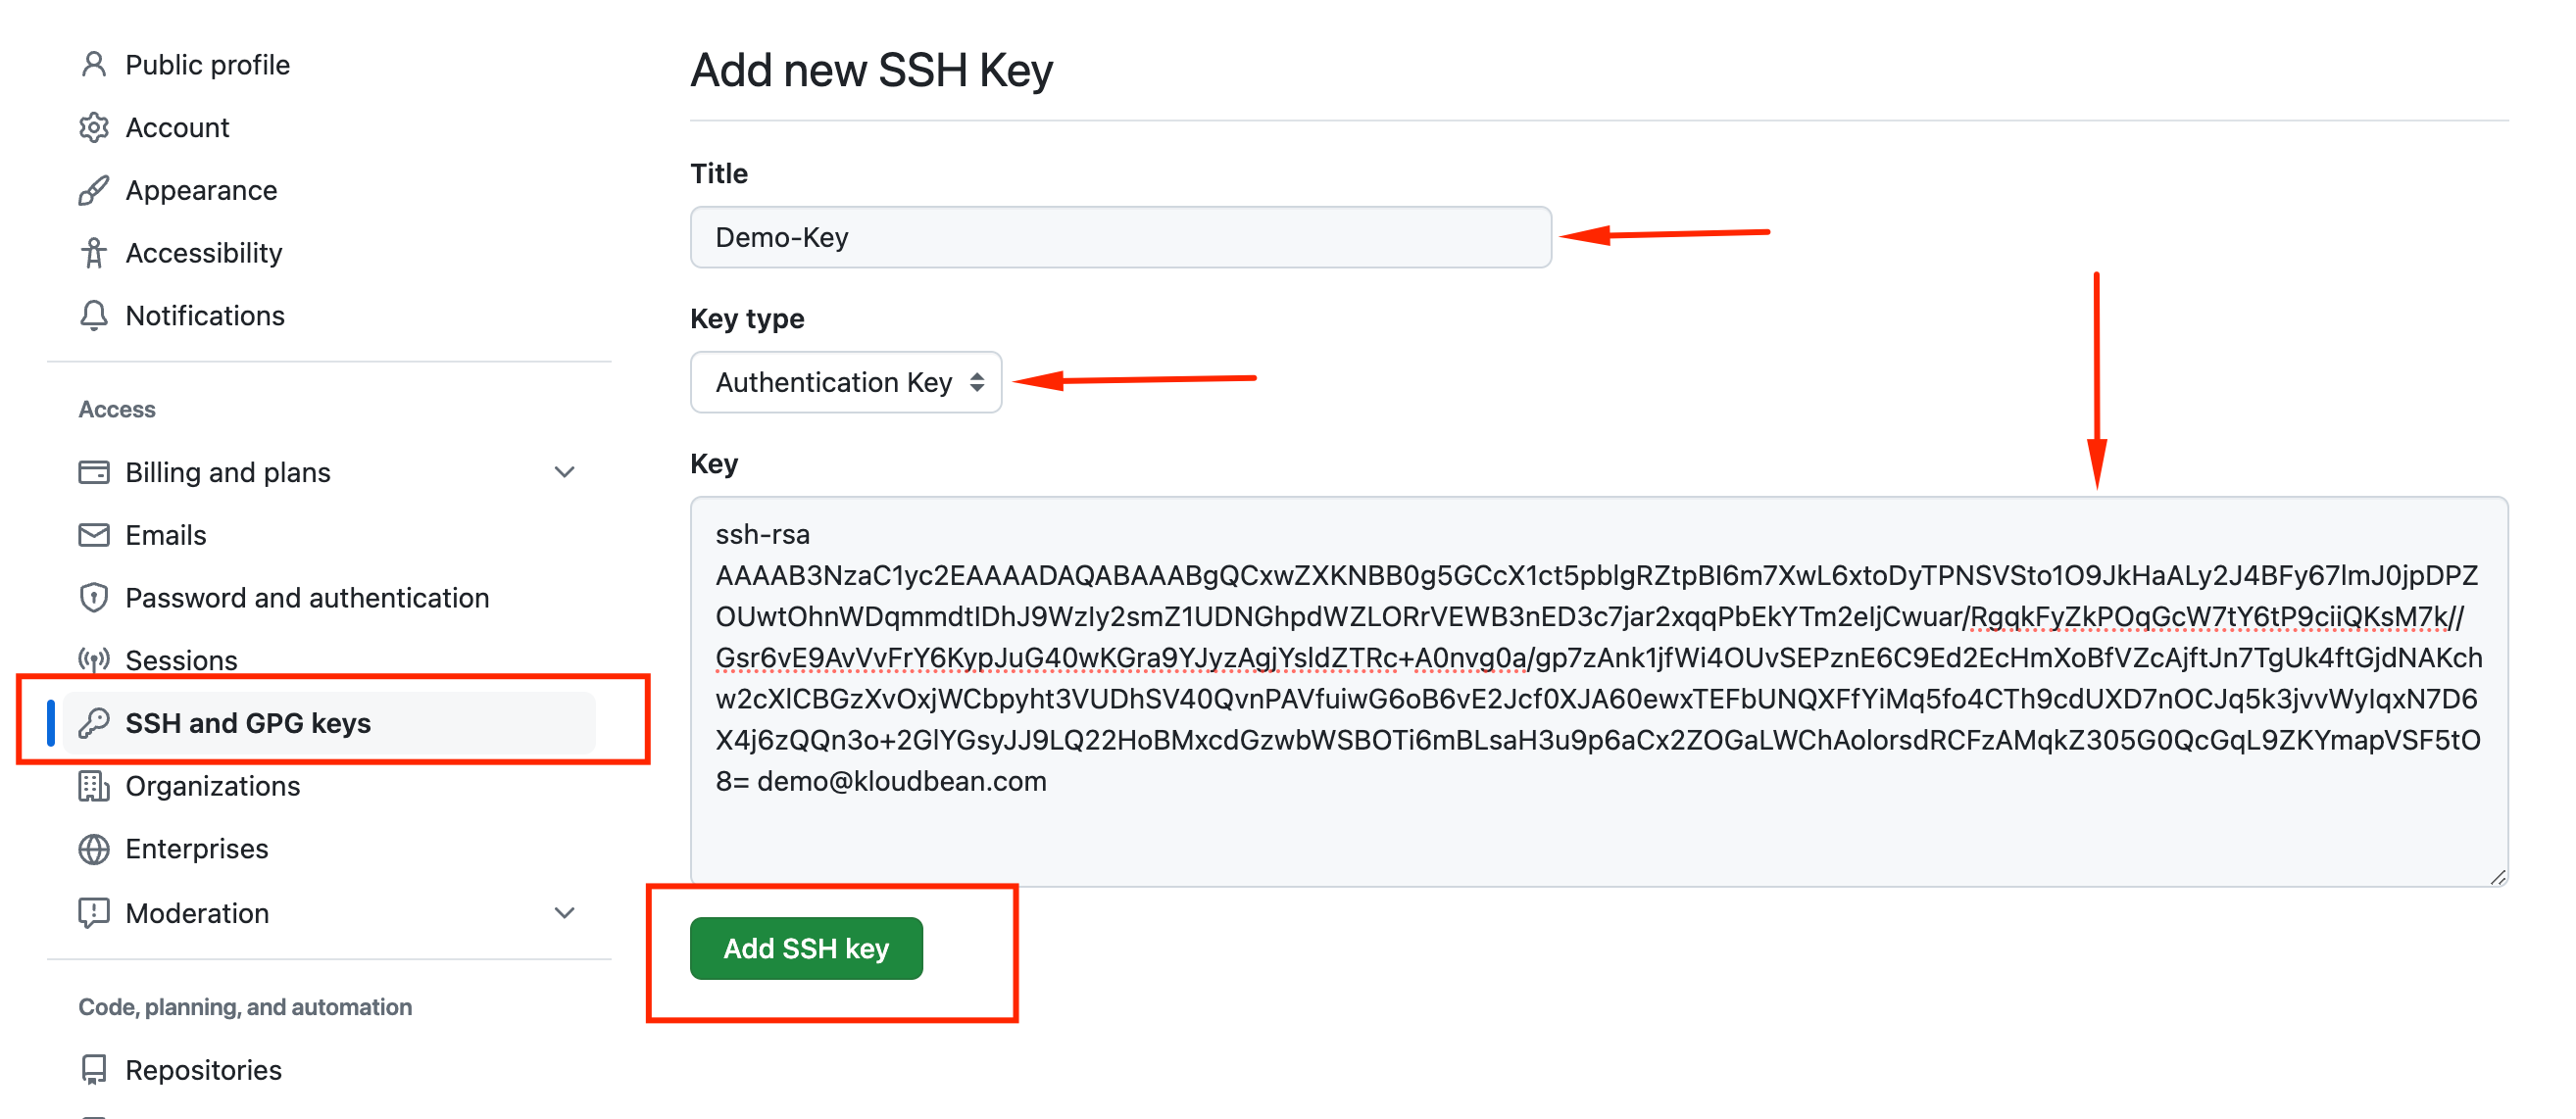
4. Click the "Add SSH Key" button to initiate the addition of the SSH key we copied earlier.
5. Paste the content of the SSH public key into the "Key" field on GitHub.
6. Optionally, you can give a name to this key in the "Title" field (e.g., Demo).
7. Finally, click on the "Add SSH Key" button to save the SSH key.
By completing these steps, you'll have successfully added the SSH key to your GitHub repository, allowing for secure communication and enabling Git operations such as pushing code changes.


Step 4: Deploy Code Using Git Commands
After adding the SSH key to your GitHub repository, you're ready to use Git commands on your server. You can access the server's shell with Admin Credentials, typically in the application's app-html directory.
Below are some useful Git commands:
1. Git Clone: To copy the code (web files) from the GitHub repository, use this command:
$ git clone git_url (replace git_url with your repository URL, like [email protected]:kloudbeantest.git)
Note: Please choose SSH method for cloning instead of HTTPS.
2. Git Init: Initialize a local Git repository with:
$ git init3. Git Add: Add files to your new local repository:
$ git add .(Adds files to the local repository and stages them for commit)
4. Git Commit: Commit files you want to stage in the local Git repository:
$ git commit -m “my first git commit.”(Commits tracked changes to be pushed to a remote Git repository)
5. Git Remote Add: Add the Git URL where your local repository will be pushed:
$ git remote add origin remote_repository_SSH_URL(adds the new remote)
6. Verify Git Remote URL:
$ git remote -v7. Git Push: Push changes from your local repository to GitHub:
$ git push origin master(pushes changes from the local repository to the remote repository you added as the origin)
8. Git Checkout: Create and switch to a branch:
$ git checkout -b branchnameOr, if the branch already exists:
$ git checkout branchname9. Git Merge: Merge a branch into the master branch:
$ git merge master